Oracle ACE Pro
Oracle Solution Architect
Oracle E-Business Suite
Oracle Cloud Infrastructure
Oracle Fusion Middleware
Oracle Database Administration
Oracle Weblogic Administration

Oracle ACE Pro
Oracle Solution Architect
Oracle E-Business Suite
Oracle Cloud Infrastructure
Oracle Fusion Middleware
Oracle Database Administration
Oracle Weblogic Administration
Oracle Internet Directory

Step-by-Step Guide: Installing and Configuring Oracle Internet Directory 12.2.1.4
Prerequisites and Environment Setup
Before diving into the installation process, ensure that your environment meets the necessary prerequisites.
Environment Resources
Below is a summary of the resources used in this setup:
Hardware Resources |
|
|---|---|
| Component | Details |
| Virtualization | VirtualBox |
| RAM | 10 GB |
| Hard Drive | 100 GB |
| CPU | 4 vCPU |
Software Resources |
|
|---|---|
| Component | Version/Details |
| Operating System | Oracle Enterprise Linux 8.10 |
| Oracle Database | Oracle Database 19c |
| Fusion Middleware (FMW) | 12.2.1.4 |
| Oracle Internet Directory | 12.2.1.4 |
Action Plan for The Installation:
The installation process will be divided into the following parts, as illustrated below. Each part will be thoroughly explored and discussed in detail as presented below.
Step 1: Install Oracle Database 19c
Oracle Internet Directory requires a backend database to store its metadata. Oracle Database 19c is a recommended choice.
Key Steps:
- Download and install the Oracle Database software.
- Create a database instance to host the OID schema.
- Ensure the database is running before proceeding to subsequent steps.
For detailed instructions, refer to Oracle Database 19c Installation for OID.
Step 2: Install Fusion Middleware 12.2.1.4
Oracle Fusion Middleware is required for the OID installation.
Key Steps:
- Download the Fusion Middleware Infrastructure 12.2.1.4 installer.
- Use the Oracle Universal Installer (OUI) to install the software.
- Validate the installation with the rcu utility.
For details, visit FMW 12.2.1.4 Installation for Oracle Internet Directory(OID).
Step 3: Install Oracle Internet Directory
Once Fusion Middleware is installed, the next step is to install OID.
Key Steps:
- Use the Oracle Universal Installer to install the OID binaries.
- Ensure the proper directory structure is created.
Refer to Oracle Internet Directory 12.2.1.4 Installation for detailed steps.
Step 4: Configure WebLogic Domain for OID
The Oracle WebLogic Server domain is a crucial component that manages OID services.
Key Steps:
- Create a new WebLogic domain for OID.
- Configure the domain using the WebLogic Configuration Wizard.
- Start the WebLogic Admin Server.
Detailed instructions are available in Configure Weblogic Domain for OID 12.2.1.4.
Step 5: Configure Oracle Internet Directory
The final step is to configure and initialize OID.
Key Steps:
- Test and verify the configuration using OID tools.
- Integrate with external applications as required.
Follow Configure Oracle Internet Directory(OID) 12.2.1.4 for the full guide.
Final Verification and Testing
After completing the above steps, perform the following checks to ensure the installation and configuration are successful:
- Verify that all services (OID and WebLogic) are up and running.
- Use ldapbind and ldapsearch commands to test the OID service.
- Check the WebLogic Admin Console for server health.
Conclusion
Installing and configuring Oracle Internet Directory 12.2.1.4 involves multiple interconnected steps. Following this comprehensive guide can streamline the process and ensure a successful deployment. For additional details on each task, refer to the linked individual posts.
If you encounter any issues or have further questions, feel free to contact on Below: Linkedin 🔗 SyedSaadAli
Configure Oracle Internet Directory(OID) 12.2.1.4
Note: Before proceeding with this installation section, ensure you have completed the prerequisite tasks outlined below. Refer to the provided links for detailed guidance.
Step 1: Install and Configure Oracle Database for Oracle Internet Directory Please refer to the following blog for detailed guidance.
Link 🔗 Oracle Database 19c Installation for OID
Step 2: Install Oracle Fusion Middleware 12c Detailed instructions can be found in the following blog.
Link 🔗FMW 12.2.1.4 Installation for Oracle Internet Directory(OID)
Step 3: Install Oracle Internet Directory 12.2.1.4 Detailed instructions can be found in the following blog.
Link 🔗Configure Weblogic Domain for OID 12.2.1.4
Step 4:Configure Oracle Internet Directory(OID) 12.2.1.4 Detailed instructions are in the following blog.
Link 🔗Configure OID 12.2.1.4
1. Start the Administration Server and Node Manager |
|
|
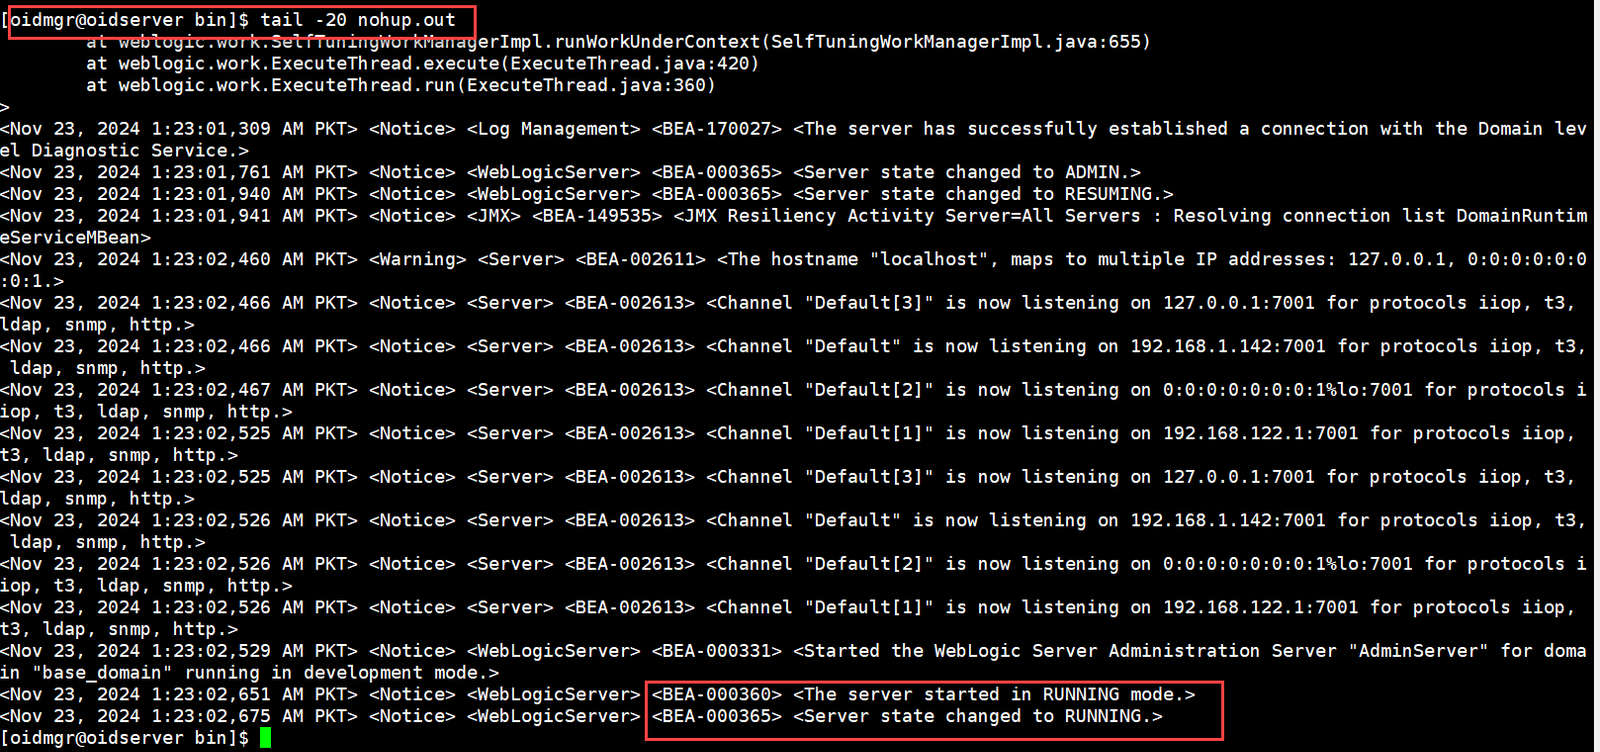
[oidmgr@oidserver ~]$ . ./oid_env.env [oidmgr@oidserver ~]$ cd $DOMAIN_HOME/bin [oidmgr@oidserver bin]$ nohup ./startWebLogic.sh & [1] 6503 Check the nohup.out to check and make sure the Admin Server Process in Running Mode [oidmgr@oidserver bin]$ tail -20 nohup.out |
 |
|
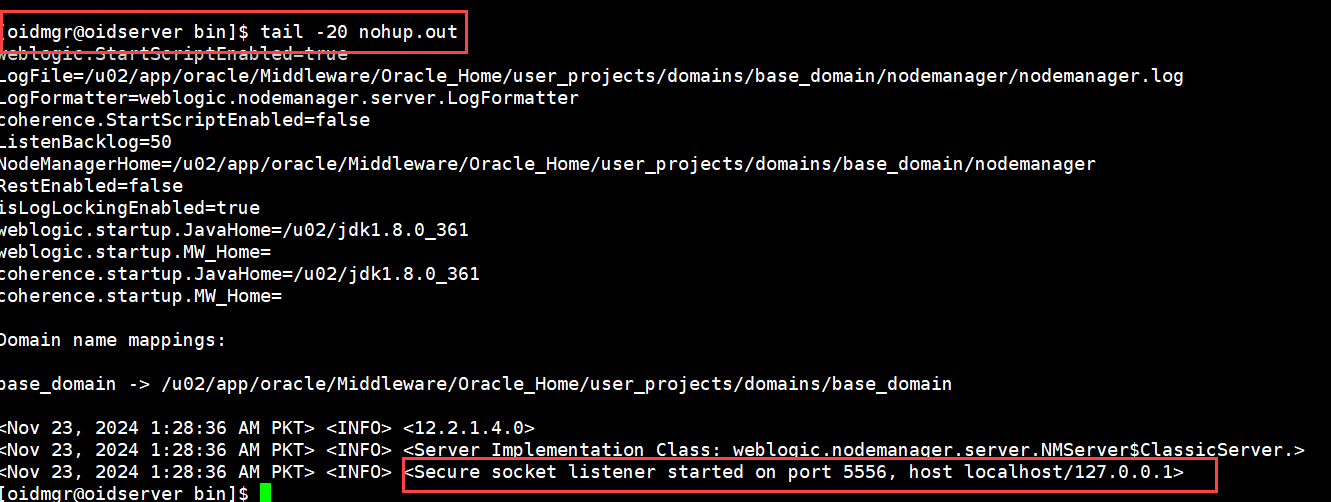
[oidmgr@oidserver ~]$ cd $DOMAIN_HOME/bin [oidmgr@oidserver bin]$ nohup ./startNodeManager.sh & [2] 7630 Check the nohup.out to check and make sure the Node Manager Process in Running Mode [oidmgr@oidserver bin]$ tail -20 nohup.out |
 |
2. Initial Oracle Internet Directory(OID) Setup |
|
|
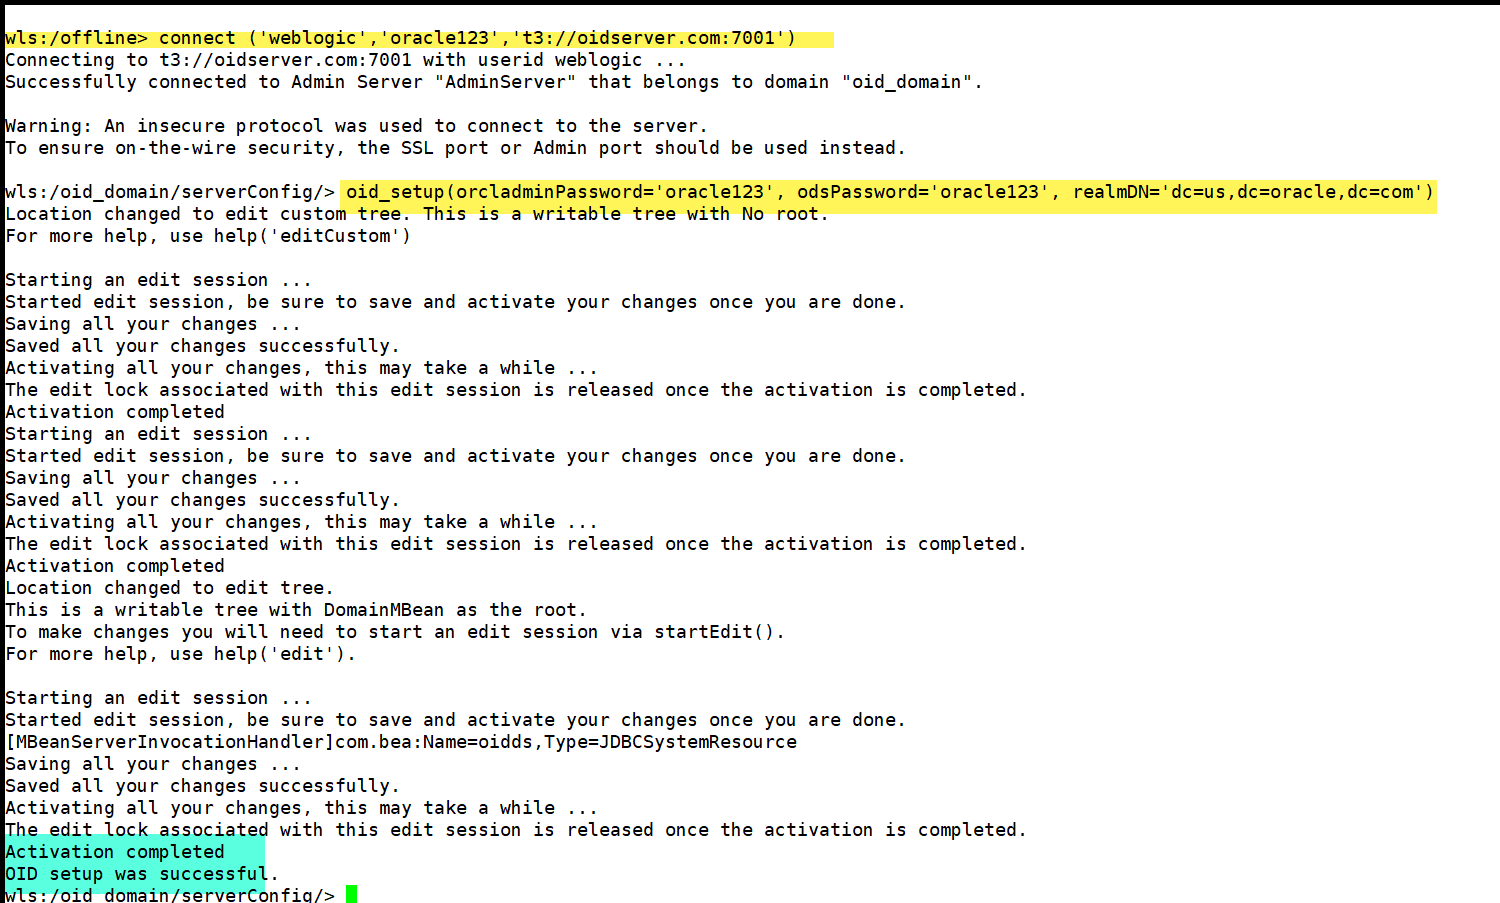
Connect with Weblogic Scripting Tool for initial setup up of OID Instance [oidmgr@oidserver bin]$ cd $ORACLE_HOME/oracle_common/common/bin [oidmgr@oidserver bin]$ ./wlst.sh WARNING: This is a deprecated script. Please invoke the wlst.sh script under oracle_common/common/bin. Initializing WebLogic Scripting Tool (WLST) … Welcome to WebLogic Server Administration Scripting Shell Type help() for help on available commands wls:/offline> connect (‘weblogic’,’oracle123′,’t3://oidserver.com:7001′) wls:/base_domain/serverConfig/> oid_setup(orcladminPassword=’oracle123′, odsPassword=’oracle123′, realmDN=’dc=us,dc=oracle,dc=com’) This will start the oid instance automatically |
 |
3. Starting Managed Server (wls_ods1) |
|
|
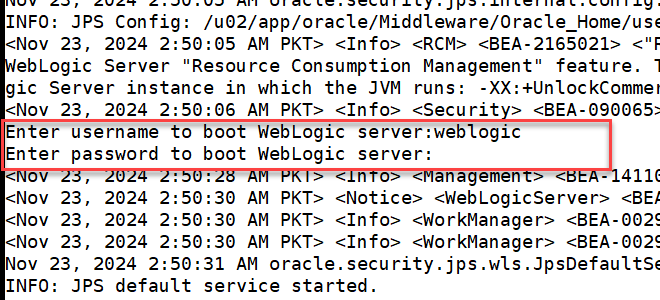
[oidmgr@oidserver bin]$ cd $DOMAIN_HOME/bin [oidmgr@oidserver bin]$ ./startManagedWebLogic.sh wls_ods1 When prompted for username/password to Boot Weblogic |
 |
| Wait for the process of Managed Server being started and status shows RUNNING | 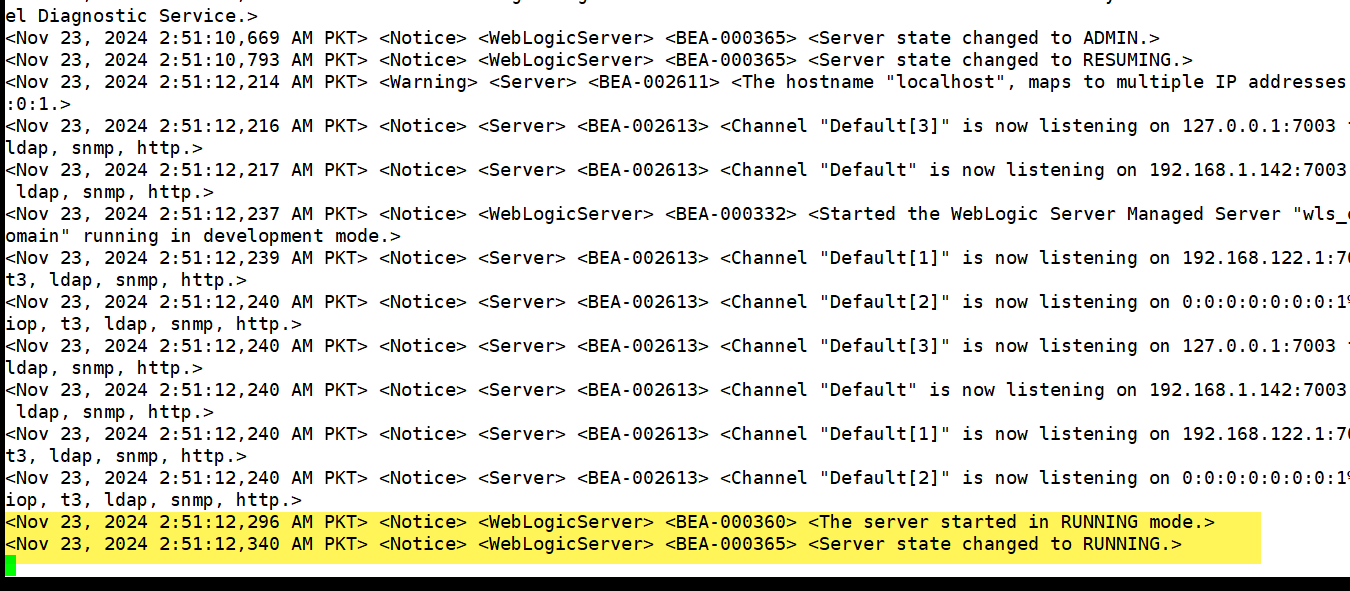 |
4. Access Weblogic Console |
|
|
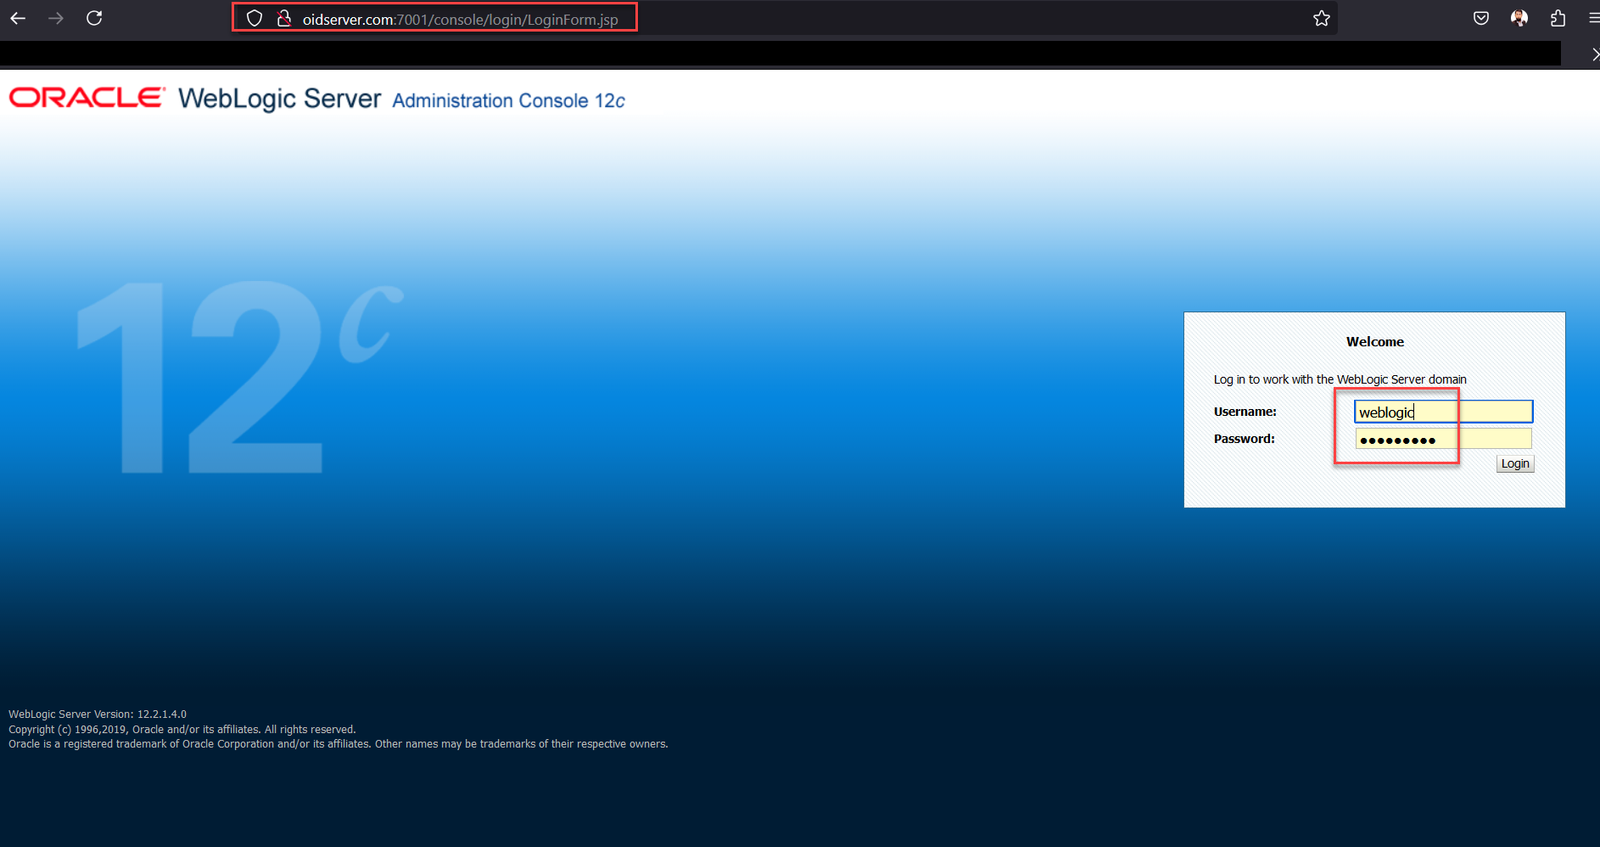
Login the Weblogic Console to check the Status http://oidserver.com:7001/console/login/LoginForm.jsp
|
 |
| Check the Server Status As you can see our wls_ods1 Manage Server is running. | 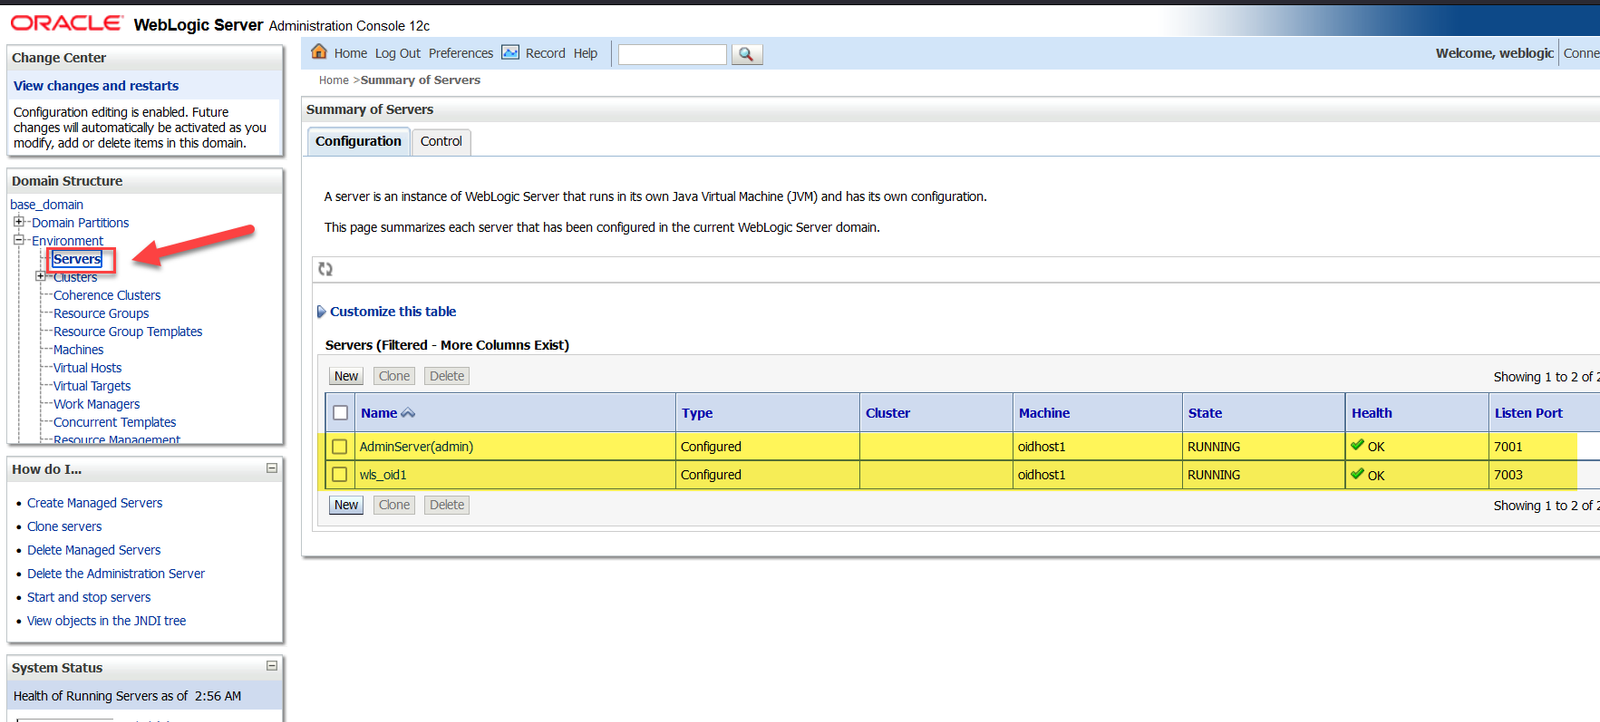 |
5. Access Oracle Directory Service Manager(ODSM) Console |
|
| Open the ODSM Console For Creating Login Connection http://oidserver.com:7001/odsm/faces/odsm.jspx | 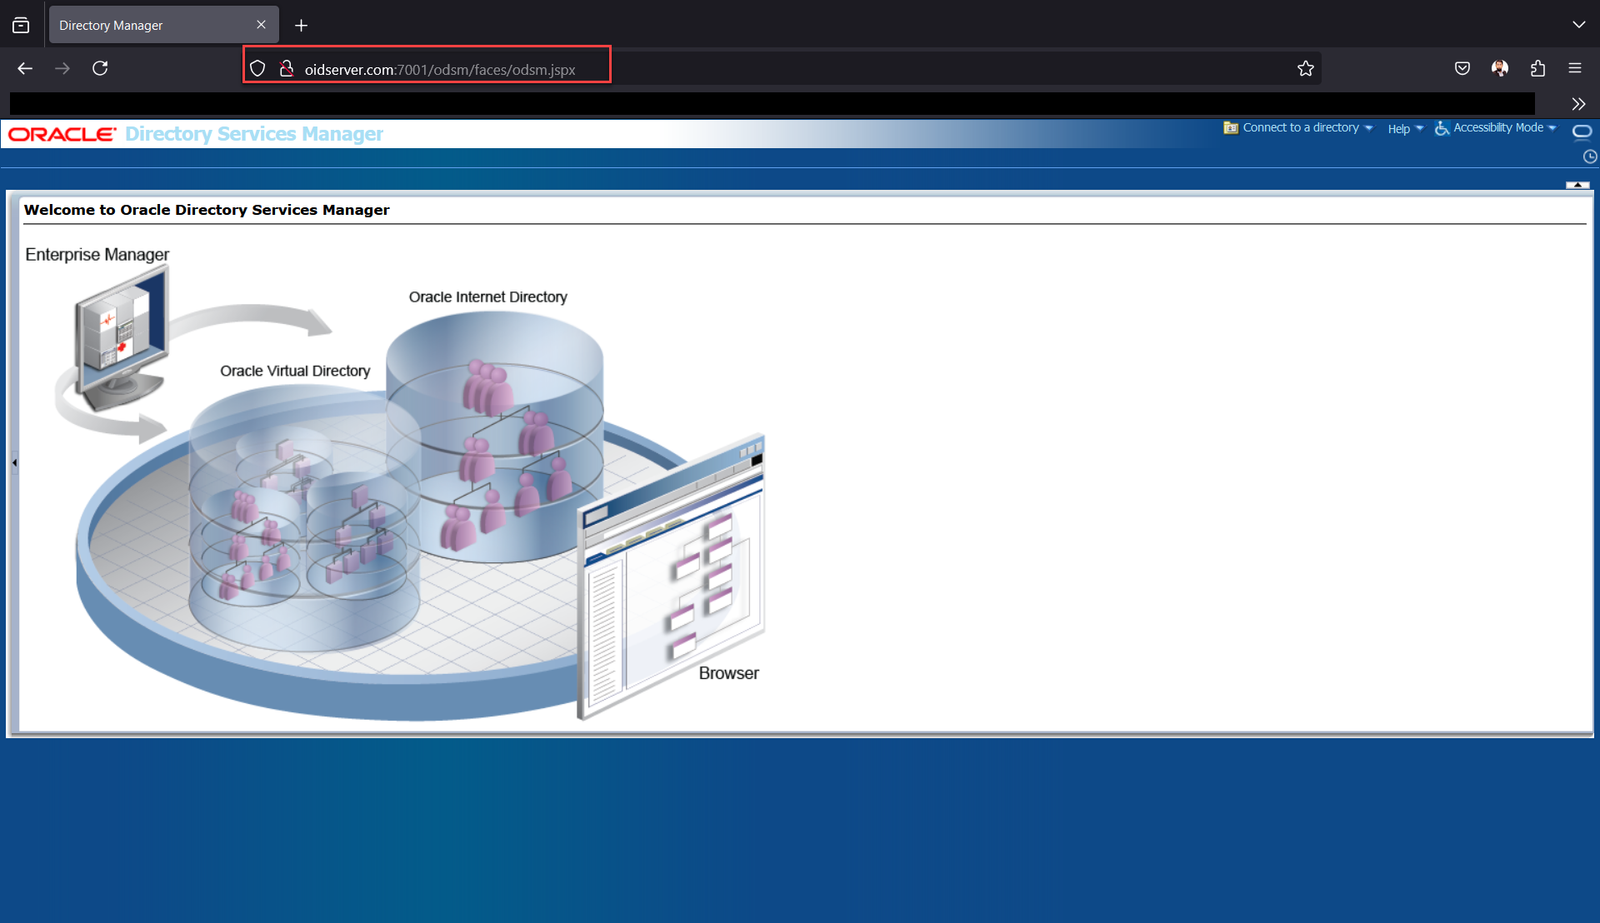 |
| Click Connect to a directory Now Click Create a New Connection | 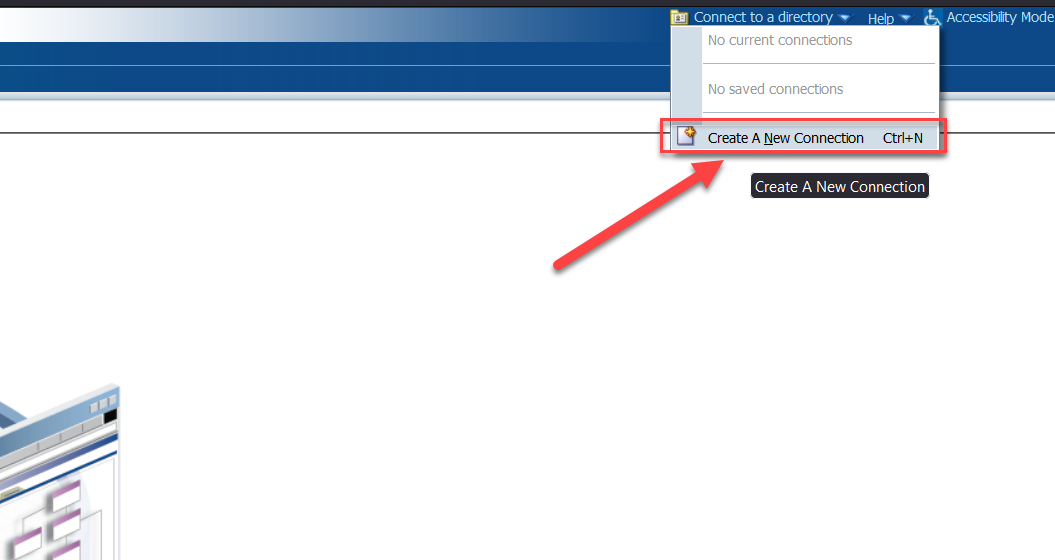 |
|
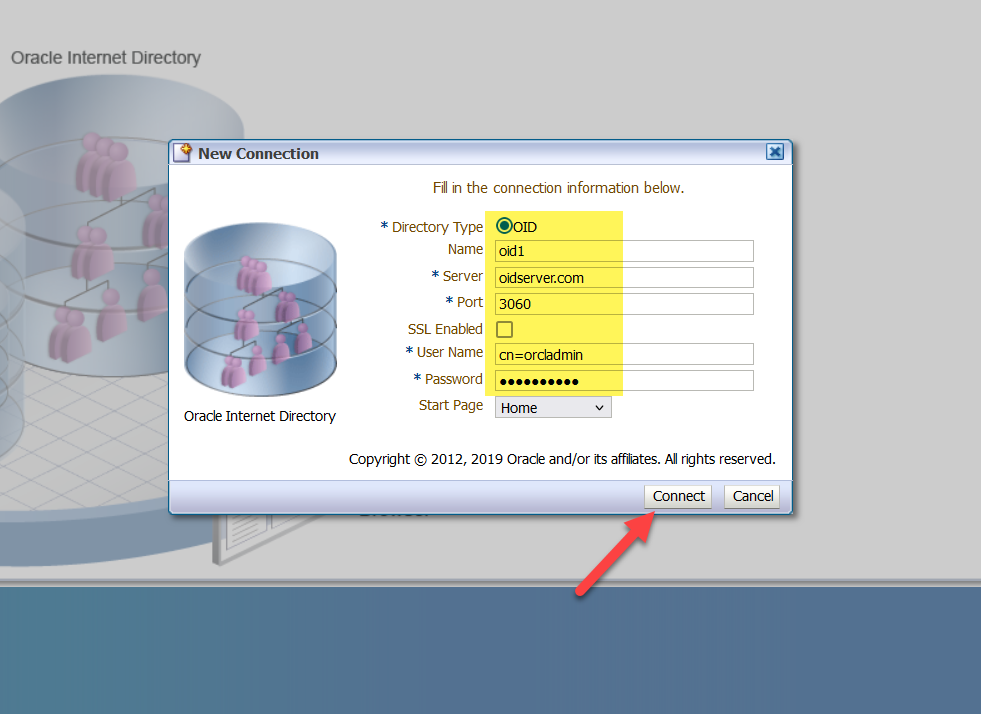
Fill the Connection information as Below •Directory Type: OID •Name: oid1 (We can give any name ) •Server: oidserver.com •Port : 3060 •Username: cn=orcladmin •Password: Oracle_123 |
 |
| Logged in Page of ODSM | 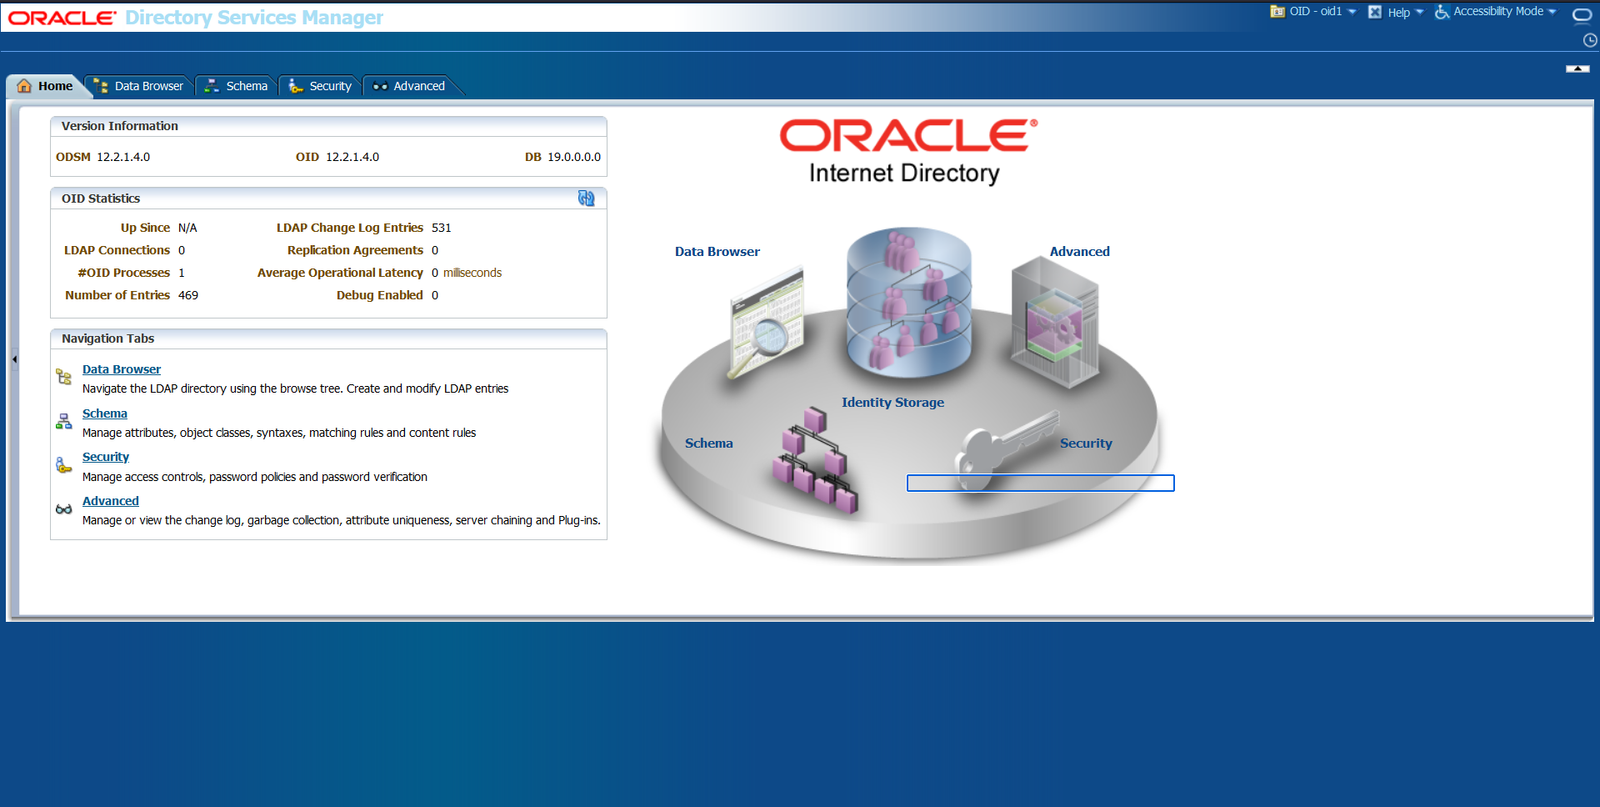 |
6. Access Enterprise Manager(EM) Console |
|
|
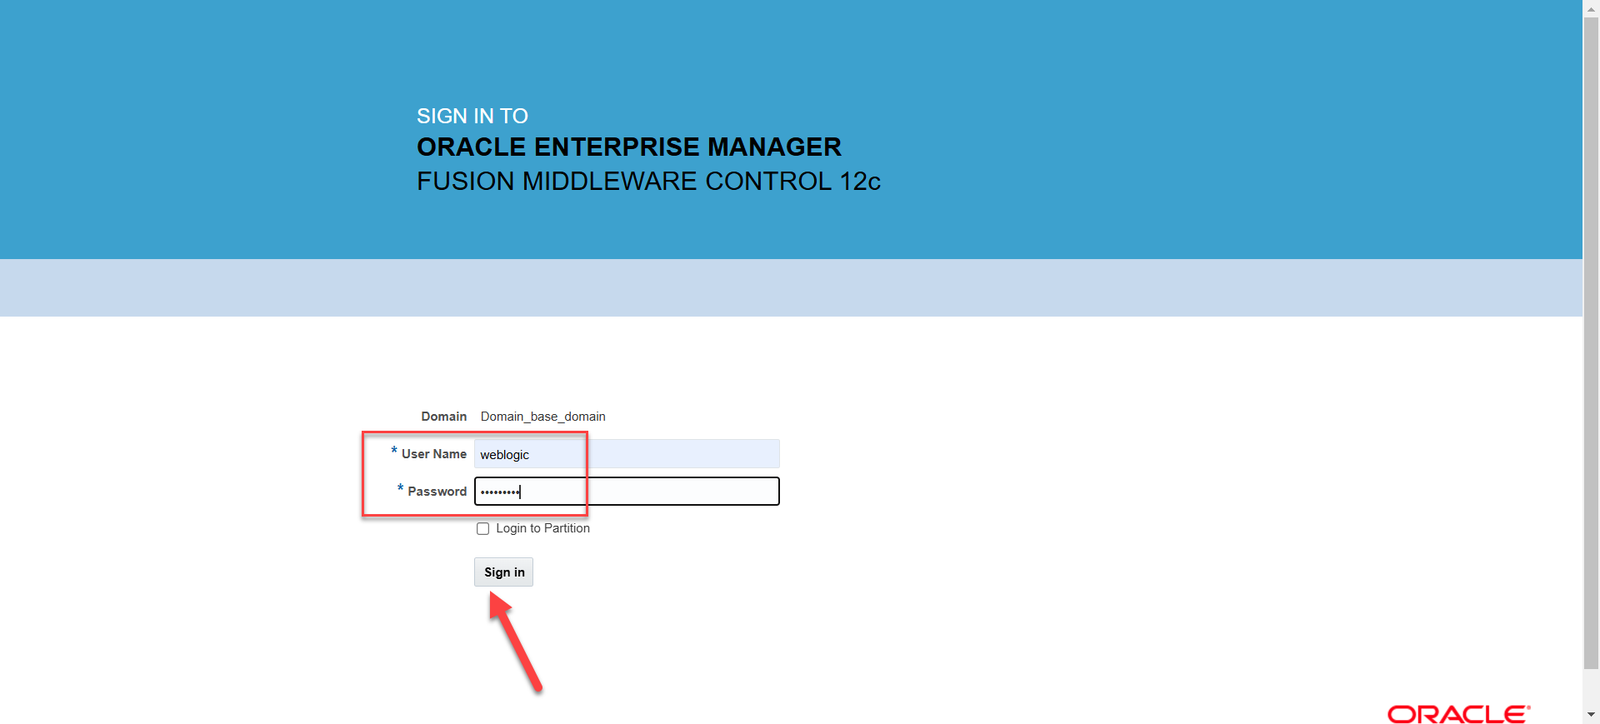
Access WebLogic Server EM Console
|
 |
Note:We Faced issue while logging into EM Console, it was continuously trying to reload the page and in the end, it ends up with Error.jsp Download the Following 2 Patches and Copy the downloaded patches on /home/oidmgr/* directory and Unzip Patch Patch 33903365 Patch 30613425 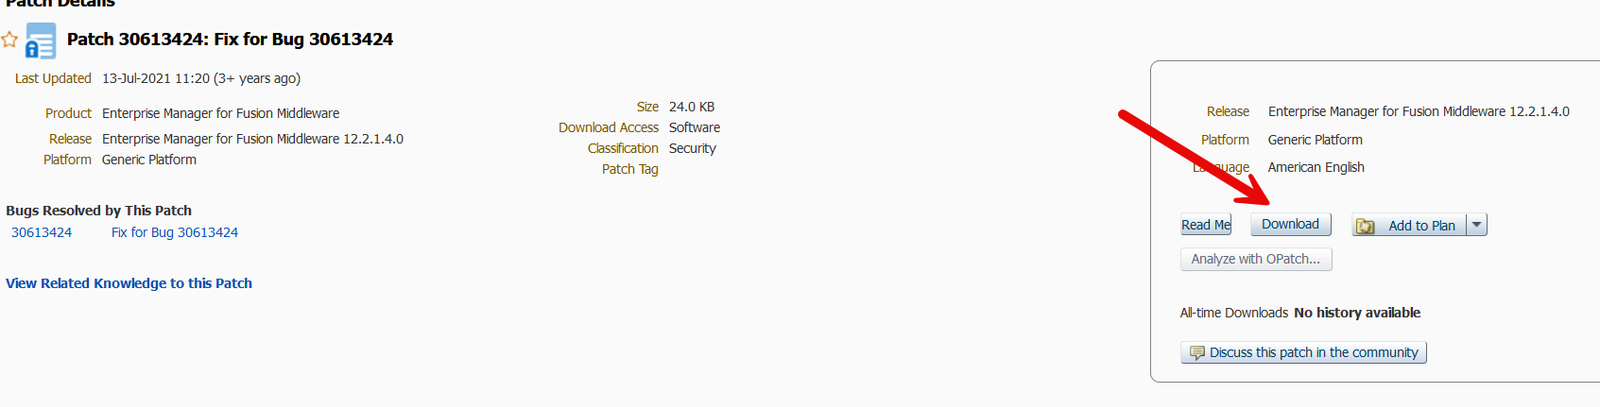 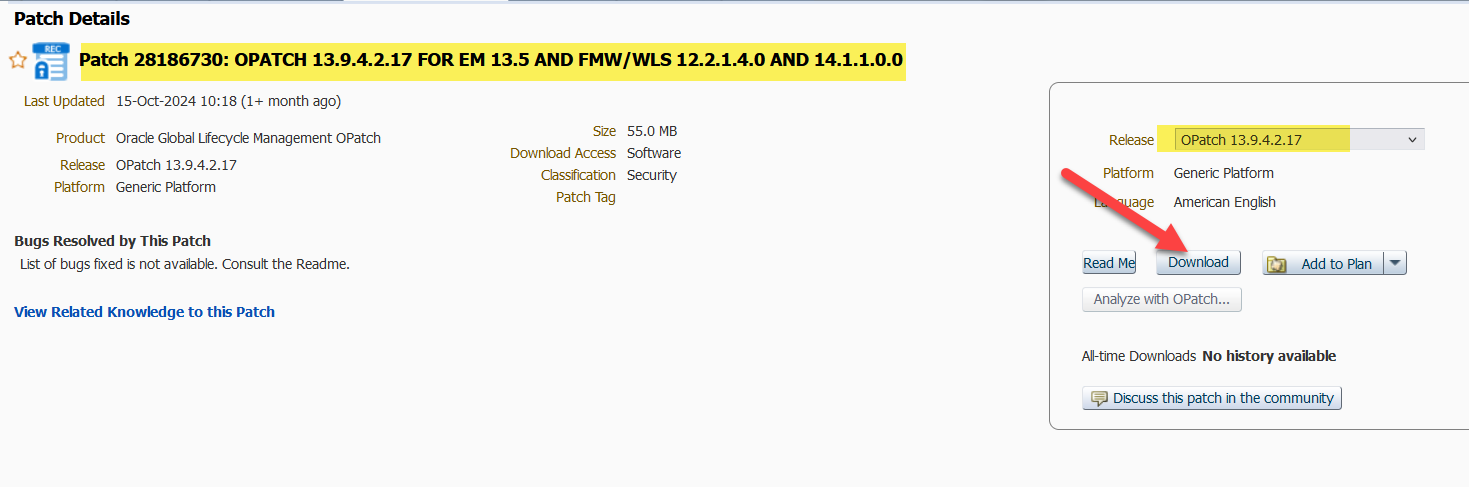
Environment should be down for apply this patchUnzip the Download Patches [oidmgr@oidserver ~]$ cd /home/oidmgr/30613424/ [oidmgr@oidserver 30613424]$ unzip p30613424_122140_Generic.zip [oidmgr@oidserver ~]$ cd /home/oidmgr/33903365/ [oidmgr@oidserver 33903365]$ unzip p33903365_122140_Generic.zip Set the Environment for Patching [oidmgr@oidserver ~]$ export ORACLE_HOME=/u02/app/oracle/Middleware/Oracle_Home [oidmgr@oidserver ~]$ export PATH=$ORACLE_HOME/OPatch:$PATH [oidmgr@oidserver ~]$ opatch version OPatch Version: 13.9.4.2.1 OPatch succeeded. Validate the OUI inventory with the following commands: [oidmgr@oidserver ~]$ opatch lsinventory -jre $ORACLE_HOME/oracle_common/jdk/jre Applying Patch 30613424 [oidmgr@oidserver ~]$ cd 30613424/30613424 [oidmgr@oidserver 30613424]$ opatch apply Applying Patch 33903365 [oidmgr@oidserver 30613424]$ cd /home/oidmgr/33903365/33903365 [oidmgr@oidserver 33903365]$ opatch apply |
|
|
Now Again Try to Login EM Console Access WebLogic Server EM Console as http://oidserver.com:7001/em |
|
| After login Click the Highlighted Icon to Expand Target Navigation | 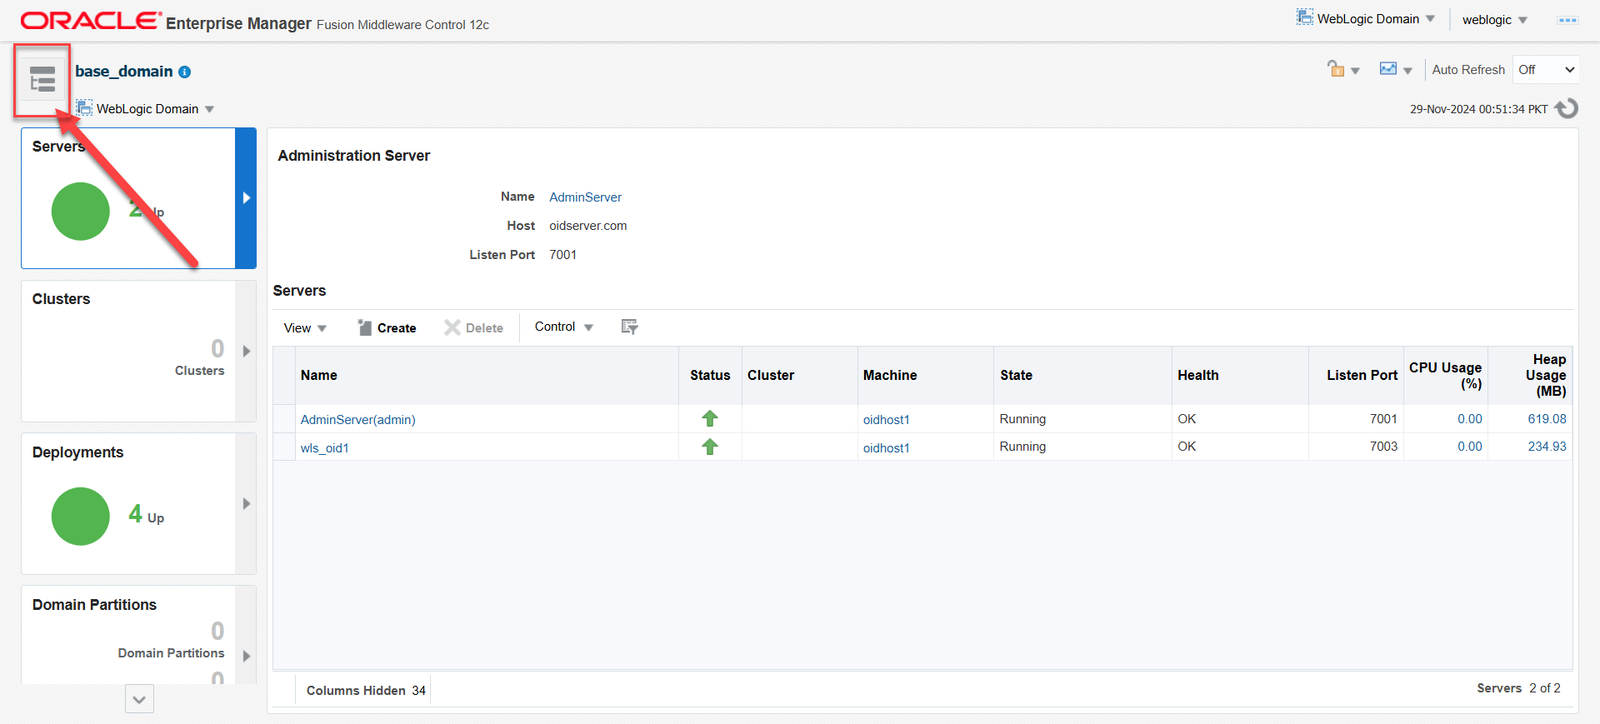 |
| You can see Adminserver and Manage_Server(wls_ods1) | 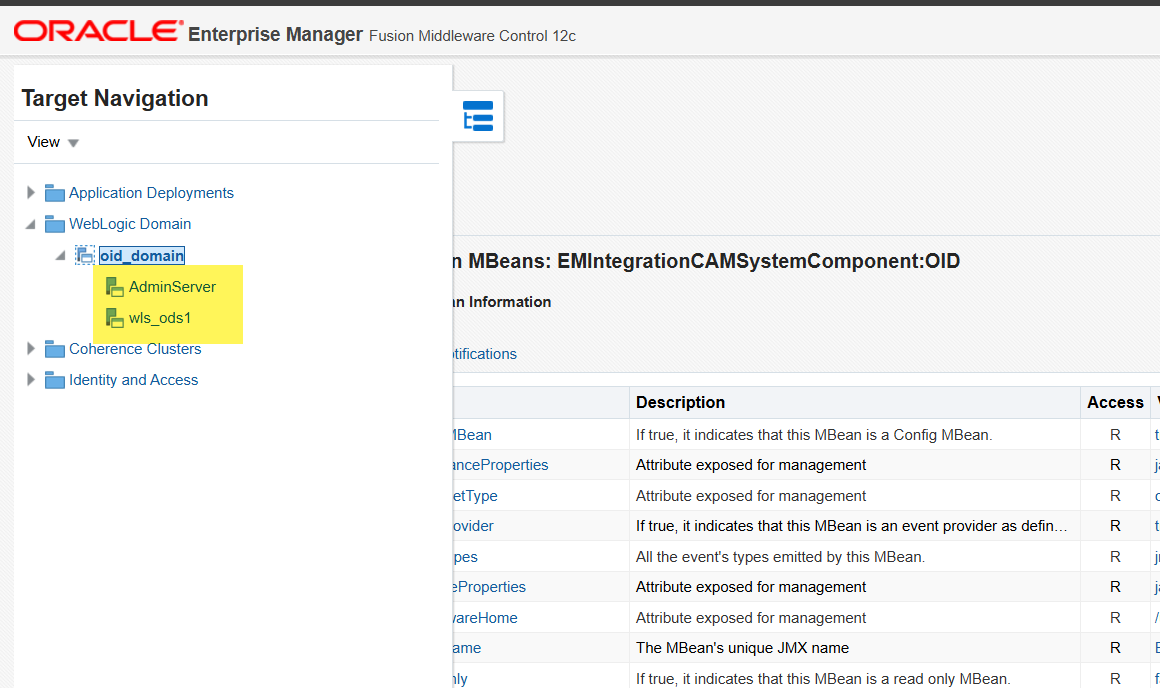 |
CONFIGURING Directory Integration Platform(DIP) 12.2.1.4 FOR OID |
|
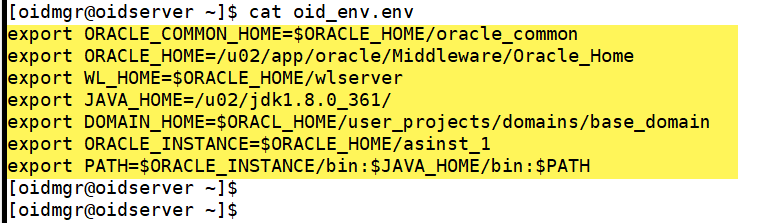
Adding Cipher Suites Configured for Oracle Internet Directory into ODIP[oidmgr@oidserver ~]$ . ./oid_env.env [oidmgr@oidserver ~]$ cd $JAVA_HOME/jre/lib/security [oidmgr@oidserver security]$ vi java.security Change the following given below in java.security From: jdk.tls.disabledAlgorithms=SSLv3, RC4, DES, MD5withRSA, DH keySize < 1024, EC keySize < 224, 3DES_EDE_CBC, anon, NULL TO: jdk.tls.disabledAlgorithms=SSLv3, RC4, DES, MD5withRSA, DH keySize < 1024, EC keySize < 224, 3DES_EDE_CBC, NULL |
 |
| From the Target Navigation pane in EM, expand the domain. From the domain home page, select the Managed Server (wls_ods1). | 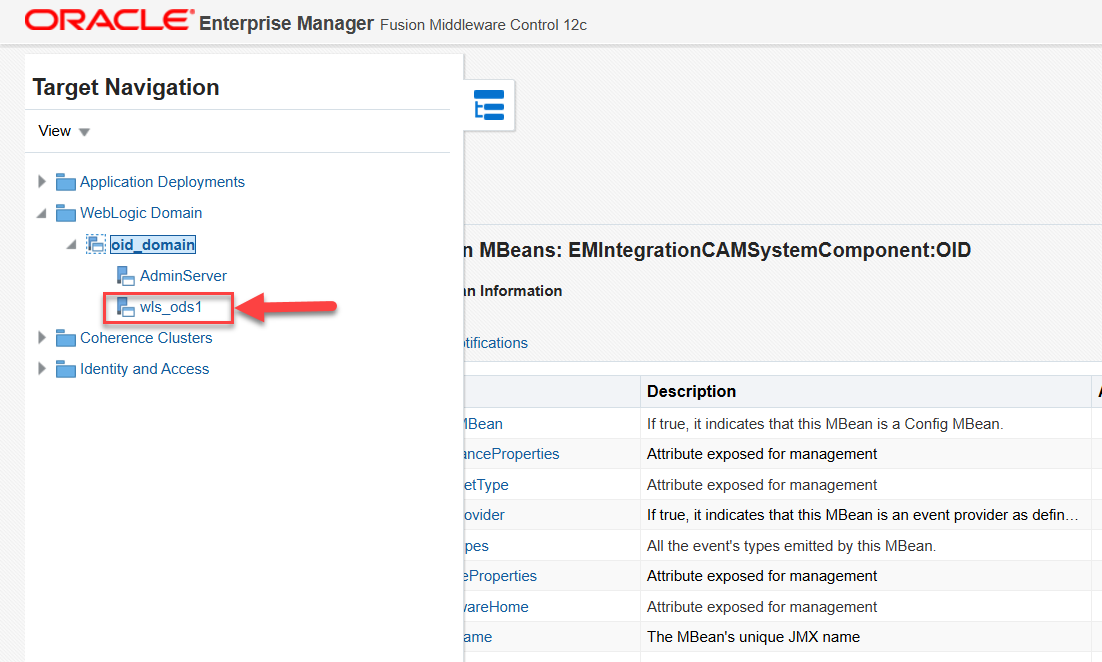 |
| From the WebLogic Server menu, choose System MBean Browser. | 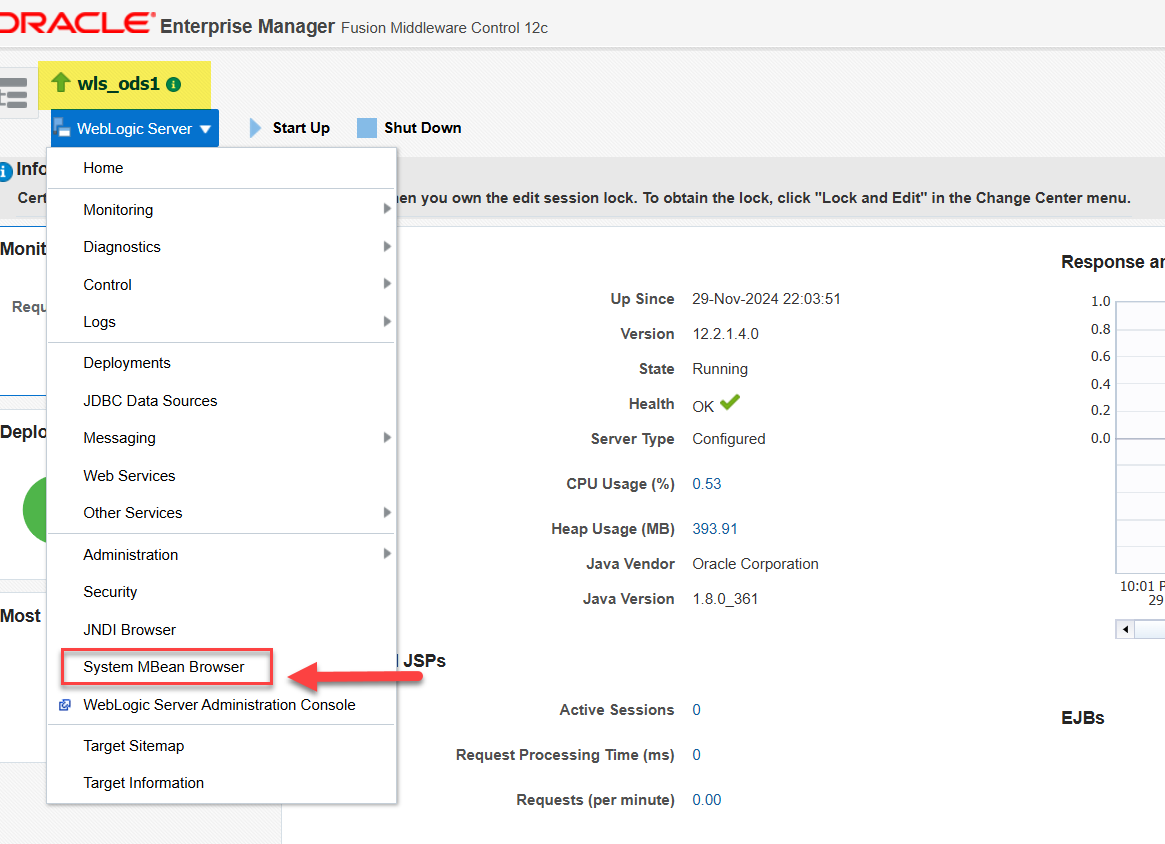 |
|
Expand Configuration MBeans in the MBean navigation tree and then select bea > Server. Expand the Server node and then expand the Managed Server node (wls_ods1). |
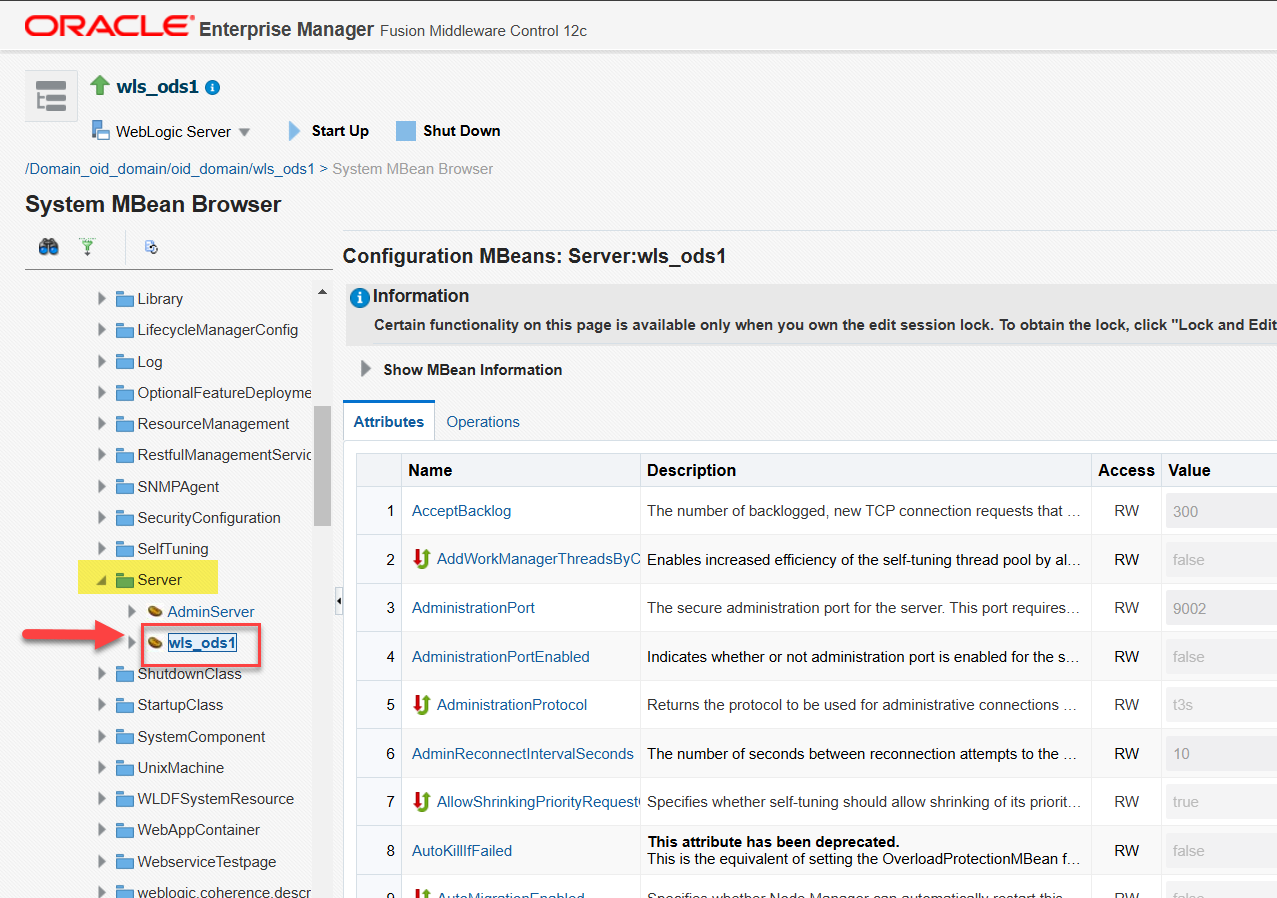 |
|
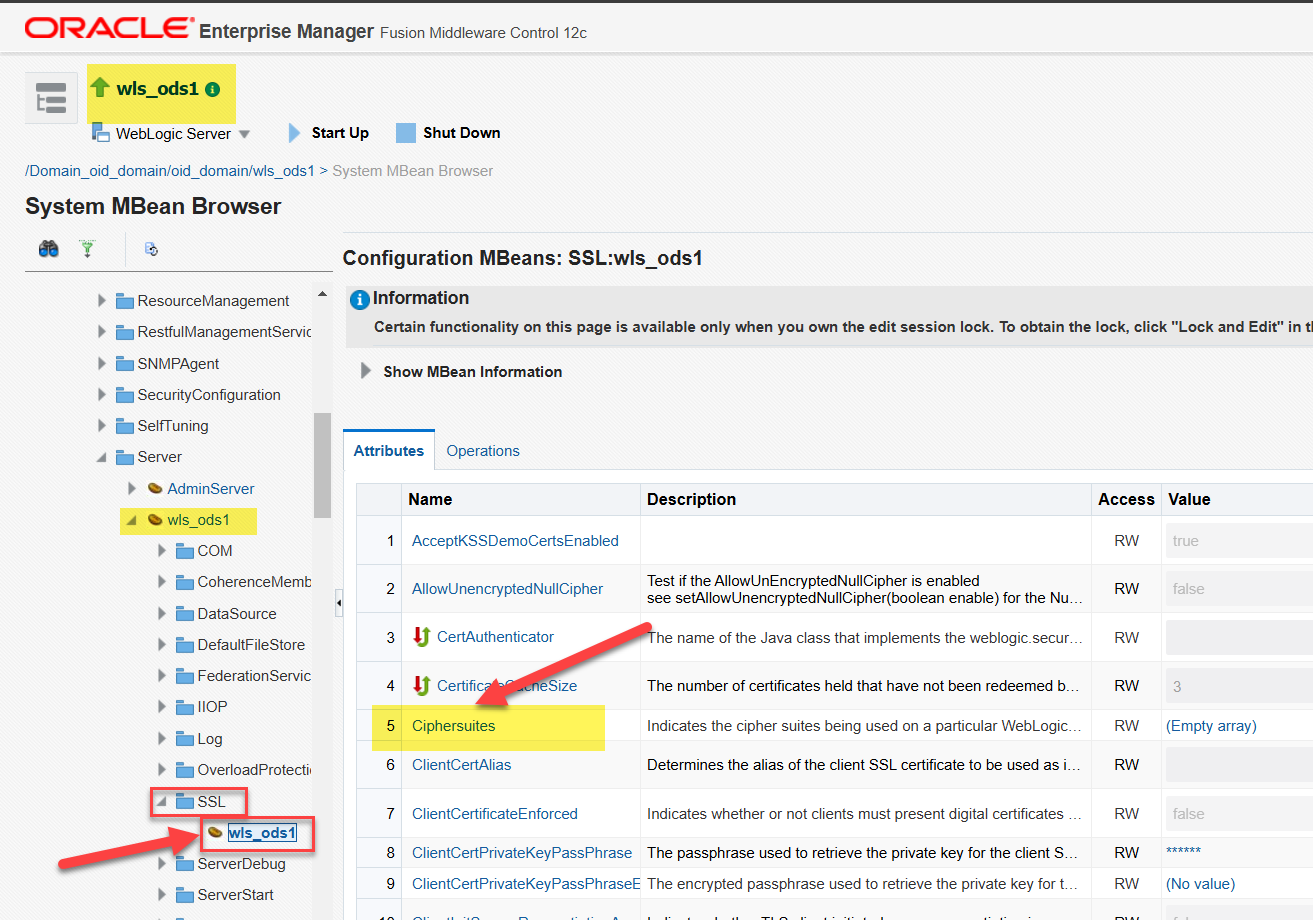
From the Managed Server node, expand SSL and then select the Managed Server MBEAN. The Configuration MBEAN page is displayed. Select Attributes tab and then select CipherSuites |
 |
| Click on Lock & Edit screen before doing the changes | 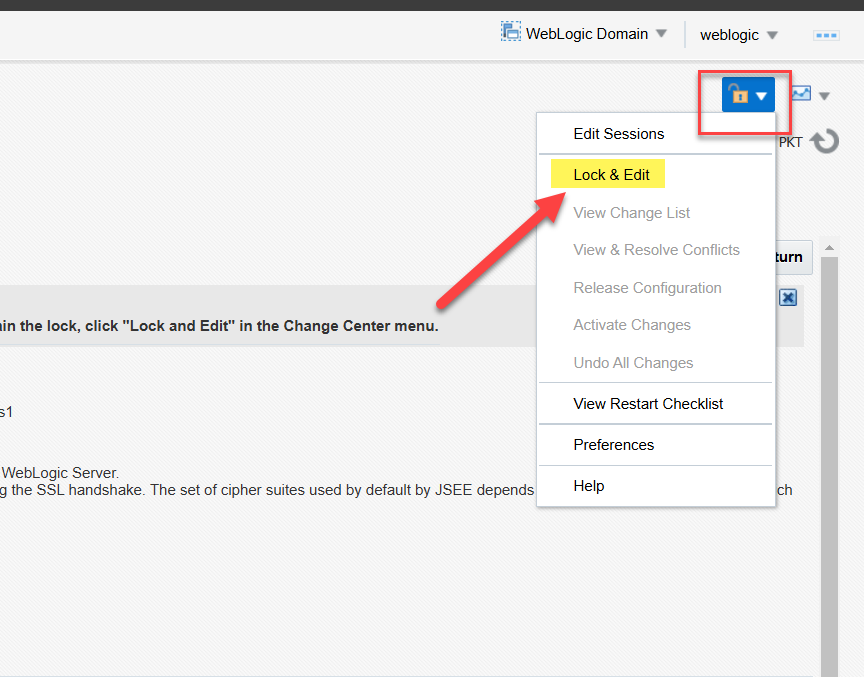 |
| Attribute: Ciphersuites page is displayed. Click Add and then add the ciphers | 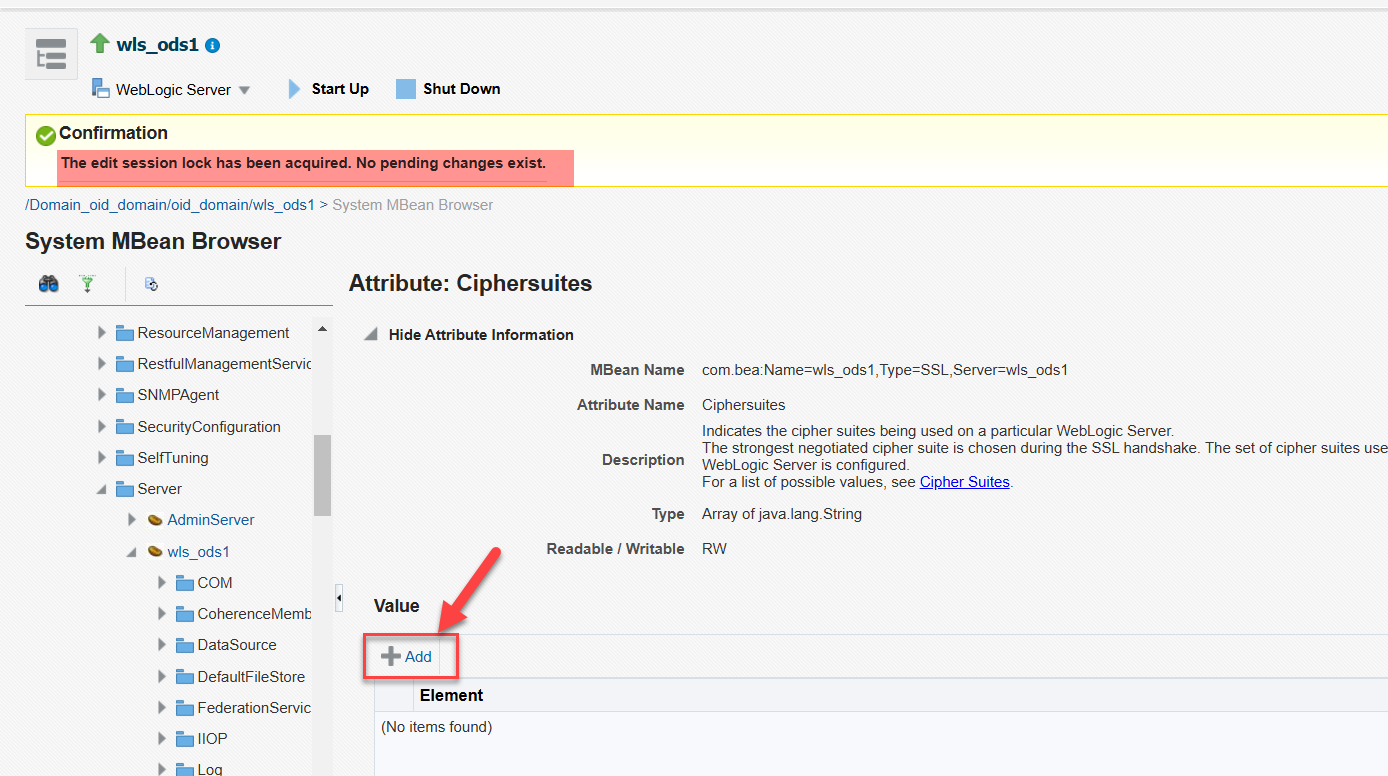 |
|
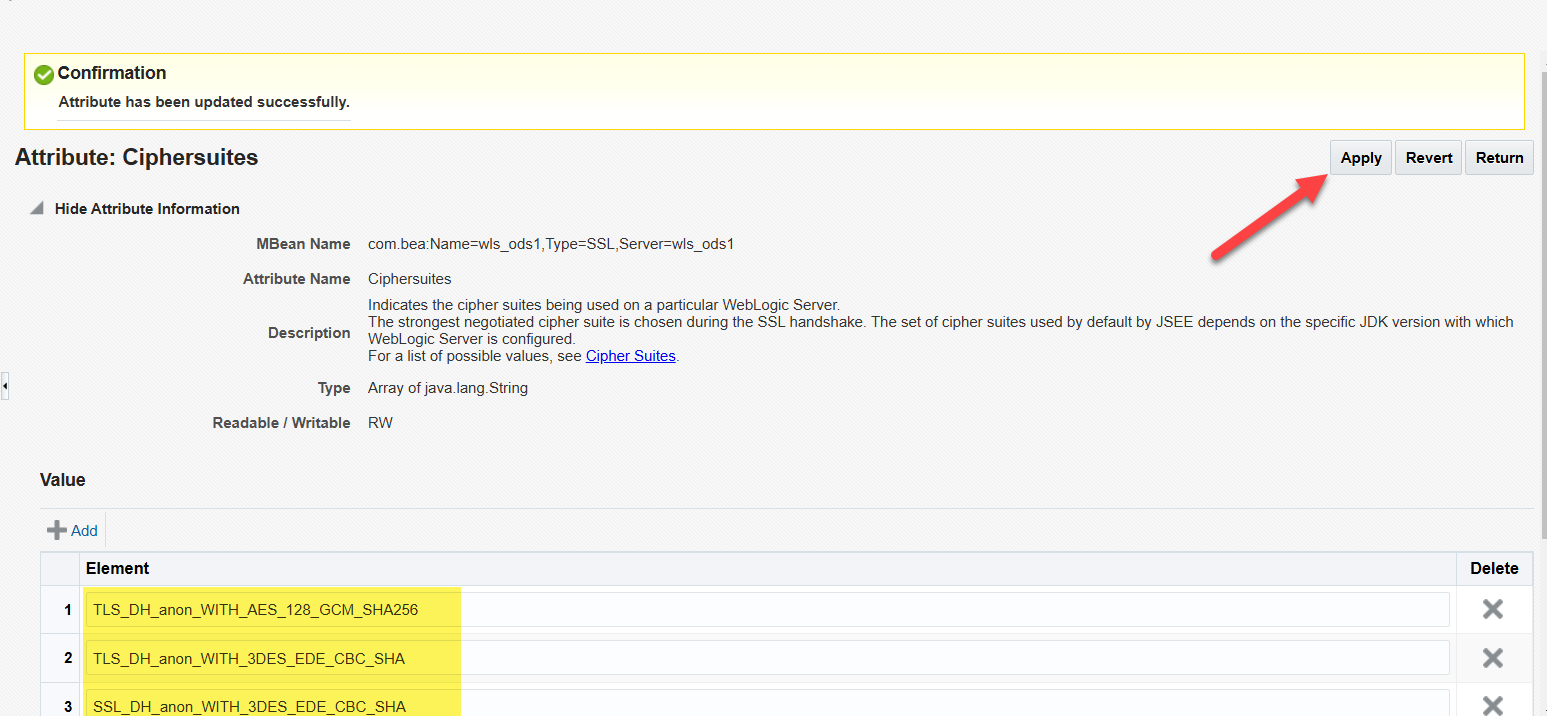
TLS_DH_anon_WITH_AES_128_GCM_SHA256 TLS_DH_anon_WITH_3DES_EDE_CBC_SHA SSL_DH_anon_WITH_3DES_EDE_CBC_SHA Click Apply. Click Activate Changes in the Change Center Security Features in Oracle Directory Integration Platform Documentation: Security Features in DIP
|
 |
Configuring Oracle Directory Integration Platform for Oracle Internet Directory SSL No Authentication Mode |
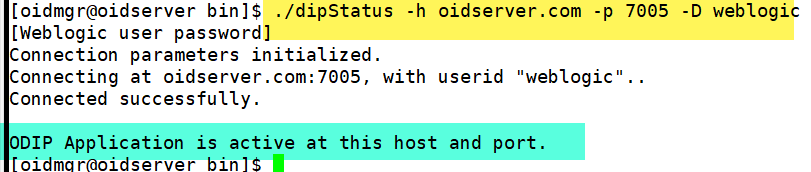
Note: Make sure before executing manageDIPServerConfig Utility you update your WL_HOME Location [oidmgr@oidserver ~]$ cd $ORACLE_HOME/bin [oidmgr@oidserver bin]$ $ORACLE_HOME/bin/manageDIPServerConfig set -attribute sslmode -val 1 -h oidserver.com -p 7005 -D “weblogic” [Weblogic user password] Connection parameters initialized. Connecting at oidserver.com:7005, with userid “weblogic”.. Connected successfully. The attribute sslmode is successfully changed to value 1. [oidmgr@oidserver bin]$ |
Configuring Oracle Directory Integration Platform for Oracle Internet Directory |
|
Set the WL_HOME and ORACLE_HOME environment variables for Oracle Directory Integration Platform
Run the dipConfigurator setup (<ORACLE_HOME>/bin) command on the command line. Note: You must create a dbconfigfile named as db.properties file with mentioned parameters under $ORACLE_HOME/bin You must set the WL_HOME and ORACLE_HOME environment variables before executing the dipStatus and dipConfigurator commands [oidmgr@oidserver ~]$ cd $ORACLE_HOME [oidmgr@oidserver Oracle_Home]$ cd bin [oidmgr@oidserver bin]$ vi db.properties DRIVER_NAME:oracle.jdbc.OracleDriver DRIVER_TYPE:thin DB_HOST:oidserver.com DB_PORT:1521 DB_SID:OIDDB DB_SERVICENAME:OIDDB |

Running dipConfigurator |
|
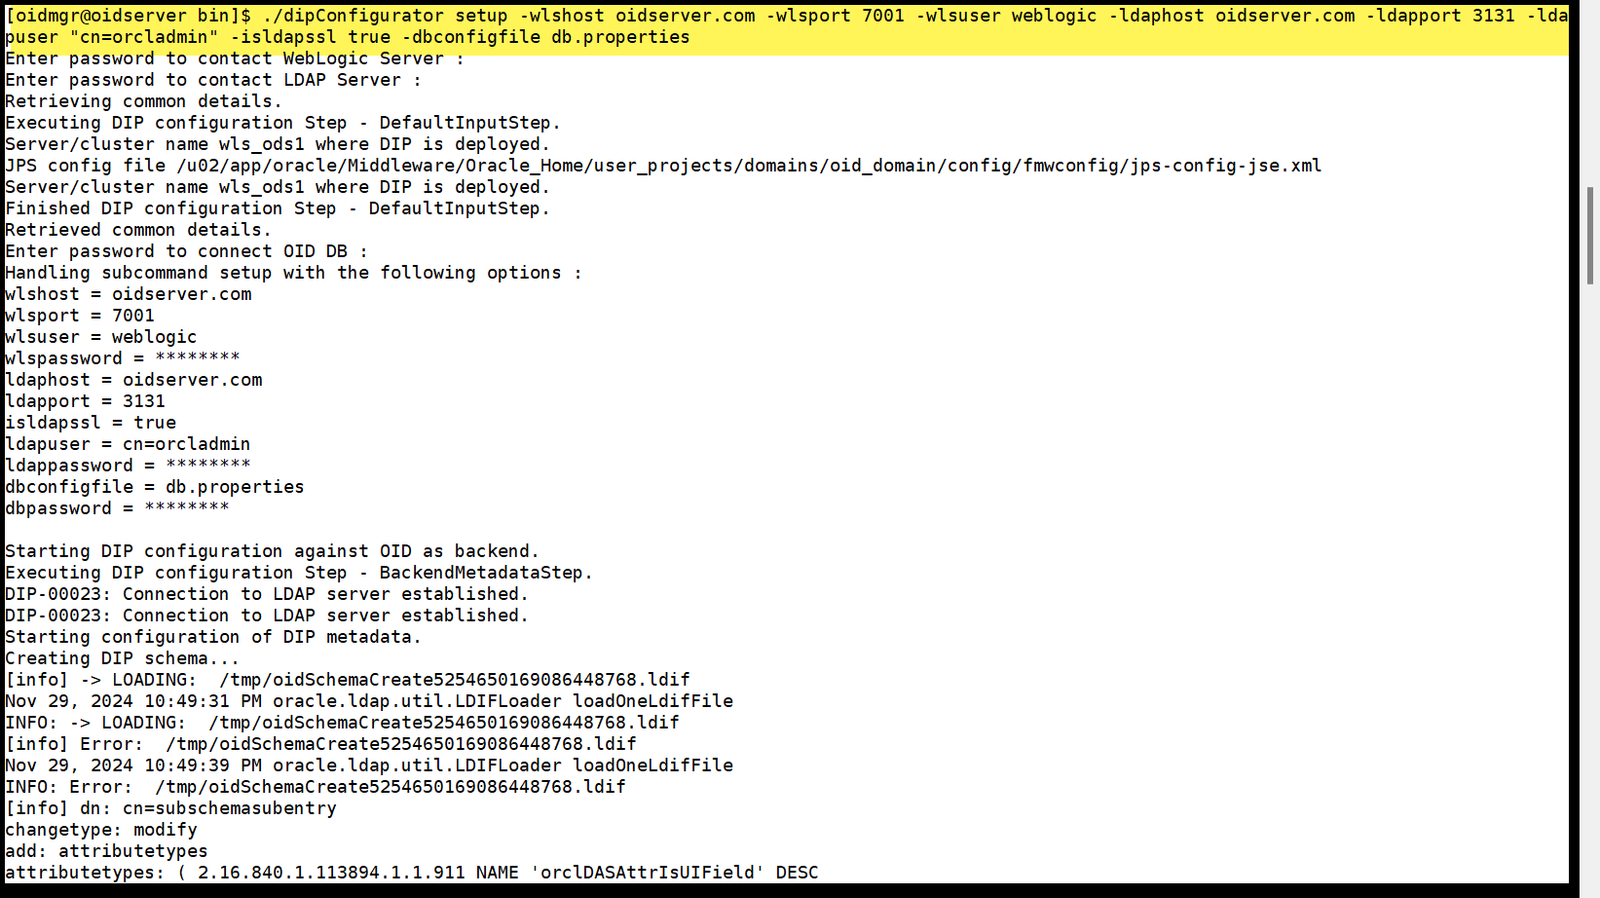
[oidmgr@oidserver bin]$./dipConfigurator setup -wlshost oidserver.com -wlsport 7001 -wlsuser weblogic -ldaphost oidserver.com -ldapport 3131 -ldapuser “cn=orcladmin” -isldapssl true -dbconfigfile db.properties Enter password to contact WebLogic Server: Enter password to contact LDAP Server : Enter password to connect OID DB : DIP Configuration completed
/u02/app/oracle/Middleware/Oracle_Home/ldap/log/dipConfig.log |

If you encounter any issues or have further questions, feel free to contact on Below: Linkedin 🔗 SyedSaadAli

Oracle Internet Directory 12.2.1.4 Installation
Note: Before proceeding with this installation section, ensure you have completed the prerequisite tasks outlined below. Refer to the provided links for detailed guidance.
Step 1: Install and Configure Oracle Database for Oracle Internet Directory Please refer to the following blog for detailed guidance.
Link 🔗 Oracle Database 19c Installation for OID
Step 2: Install Oracle Fusion Middleware 12c Detailed instructions can be found in the following blog.
Link 🔗FMW 12.2.1.4 Installation for Oracle Internet Directory(OID)
- Once the Infrastructure installation has been completed, the OID software can be installed into the same Infrastructure’s Oracle Home. In 12c the installer has been incorporated into a single binary.
- Executing this binary will install OID, Directory Integration Platform (DIP) and Oracle Directory Services Manager(ODSM) into this Infrastructure’s Oracle
Untar Oracle Internet Directory (OID) software
| [oidmgr@oidserver oid]$ unzip -qo V983403-01.zip [oidmgr@oidserver oid]$ ls -l total 5025468 -r-xr-xr-x. 1 oidmgr oinstall 2579525498 Sep 13 2019 fmw_12.2.1.4.0_oid_linux64.bin -rw-r–r–. 1 oidmgr oinstall 10185 Sep 16 2019 fmw_12214_readme.html -rwxrwxrwx. 1 oidmgr oinstall 2566529344 Nov 17 22:36 V983403-01.zip |

Running OID Setup
[oidmgr@oidserver 31190532]$ /u02/oid/fmw_12.2.1.4.0_oid_linux64.bin -prereqConfigLoc /u02/31190532/prereq_metadata/oracle.as.install.oid.prerequisite/prereq Launcher log file is /tmp/OraInstall2024-11-18_02-59-12AM/launcher2024-11-18_02-59-12AM.log. Checking if CPU speed is above 300 MHz. Actual 2208.004 MHz Passed Checking monitor: must be configured to display at least 256 colors. Actual 16777216 Passed Checking swap space: must be greater than 512 MB. Actual 16379 MB Passed Checking if this platform requires a 64-bit JVM. Actual 64 Passed (64-bit not required) Checking temp space: must be greater than 300 MB. Actual 52902 MB Passed Preparing to launch the Oracle Universal Installer from /tmp/OraInstall2024-11-18_02-59-12AM Log: /tmp/OraInstall2024-11-18_02-59-12AM/install2024-11-18_02-59-12AM.log 
| Select Skip Auto Updates Click Next |  |
| For the COLLOCATED Installation Type, select the same ORACLE HOME the Infrastructure installation created |  |
Standalone Mode:If you do not require Oracle Fusion Middleware (FMW) Infrastructure and just wish to install Oracle Internet Directory, then it is referred to as Standalone Mode. In this mode, OID and DIP must be managed via the command line and not the GUI interface Oracle Directory Services Manager (ODSM) or Enterprise Manager Fusion Middleware Control (EM FMWc) associated with the FMW Infrastructure. The FMW Infrastructure also includes a full WebLogic Server, ADF, OPSS, and other components, generally not required for an LDAP server. The advantage of OID Standalone may be to provide a database and LDAP server to many applications from a separately secured server with a minimal footprint. Collocated Mode:If you require Oracle Fusion Middleware Infrastructure and Oracle Internet Directory, then it is referred to as Collocated Mode. In this case install Oracle Fusion Middleware Infrastructure 12c (12.2.1.4.0) first, followed by the Oracle Internet Directory 12c (12.2.1.4). Both Infrastructure and Oracle Internet Directory must be installed in the same Oracle Home, hence the collocated terminology. Oracle Fusion Middleware Infrastructure distribution provides Weblogic Server, ADF Runtime, and advanced features such as OPSS and Enterprise Manager Fusion Middleware Control (EM FMWc) along with supporting Metadata Repository schemas and configuration of Oracle Directory Services Manager (ODSM). The FMW Infrastructure is a prerequisite for all other FMW products, except those that offer a standalone option (e.g. Oracle HTTP Server and Oracle Internet Directory).
|
|
| Select the JDK Home to use for this installation. Click Next |  |
| Click Next |  |
| Review the Installation Summary screen. To change entries Click BACK to the pertinent screen. Once satisfied with the settings, click the INSTALL button to begin the installation. |  |
| Installation in Progress |  |

ISSUE 2 (If Installing OID on OEL/RHEL 8)Another issue If you are installing the OID 12.2.1.4 on Oracle Enterprise Linux(OEL) 8.x, you might face as shown in below Snapshot while Installation. |


If you encounter any issues or have further questions, feel free to contact on Below: Linkedin 🔗 SyedSaadAli
Oracle Database 19c Installation on OEL 8.10
Operating System Setup
1. For Automatic Setup of Operating System Packages and Parameter, Run the following command with Root user
[root@oidserver ~]# dnf install -y oracle-database-preinstall-19c
| If you are using RHEL8 or CentOS8, you can pick up the RPM from the OL8 repository and install it. It will pull the dependencies from your normal repositories.
curl -o oracle-database-preinstall-19c-1.0-2.el8.x86_64.rpm https://yum.oracle.com/repo/OracleLinux/OL8/appstream/x86_64/getPackage/oracle-database-preinstall-19c-1.0-2.el8.x86_64.rpm dnf -y localinstall oracle-database-preinstall-19c-1.0-2.el8.x86_64.rpm |
2. Set the password for the “oracle” user.
[root@oidserver ~]# passwd oracle
3. Set secure Linux to permissive by editing the “/etc/selinux/config” file, making sure the SELINUX flag is set as follows.
SELINUX=permissive
4. Once the change is complete, restart the server or run the following command.
[root@oidserver ~]# setenforce Permissive
5. Once the change is complete, restart the server or run the following command.
If you have the Linux firewall enabled, you will need to disable or configure it. To disable it, do the following.
# systemctl stop firewalld

# systemctl disable firewalld
6. Create the directories in which the Oracle software will be installed.
[root@oidserver ~]# mkdir -p /u01/app/oracle/product/19.0.0/dbhome_1
[root@oidserver ~]# chown -R oracle:oinstall /u01/app
[root@oidserver ~]# chmod -R 775 /u01
7. Create an Environment Variable file for the Oracle Database on the Oracle User Home Directory
| [oracle@oidserver ~]$ vi setEnv.sh
# Oracle Settings export ORACLE_HOSTNAME=oidserver.com export PATH=/usr/sbin:/usr/local/bin:$PATH export LD_LIBRARY_PATH=$ORACLE_HOME/lib:/lib:/usr/lib |
8. Unzip Software Binaries
Copy the Downloaded Database 19c Zip (V982063-01.zip) file on the /u01/app/oracle/product/19.0.0/dbhome_1 Directory
[oracle@oidserver ~]$ cd /u01/app/oracle/product/19.0.0/dbhome_1
[oracle@oidserver dbhome_1]$ unzip -oq V982063-01.zip
Running Database Installer
| [oracle@oidserver dbhome_1]$ export DISPLAY=192.168.1.124:0.0 [oracle@oidserver dbhome_1]$ export CV_ASSUME_DISTID=OEL7.8[oracle@oidserver dbhome_1]$ ./runInstaller Launching Oracle Database Setup Wizard…The response file for this session can be found at: /u01/app/oracle/product/19.0.0/dbhome_1/install/response/db_2024-11-30_10-01-36PM.rsp You can find the log of this install session at: |
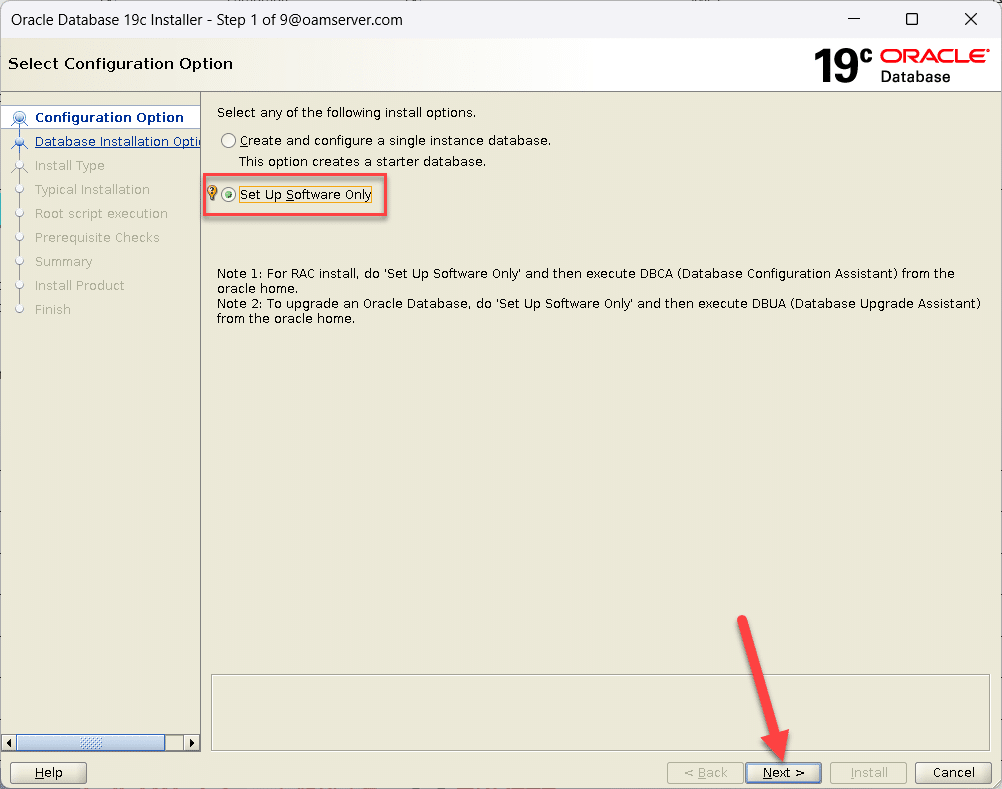
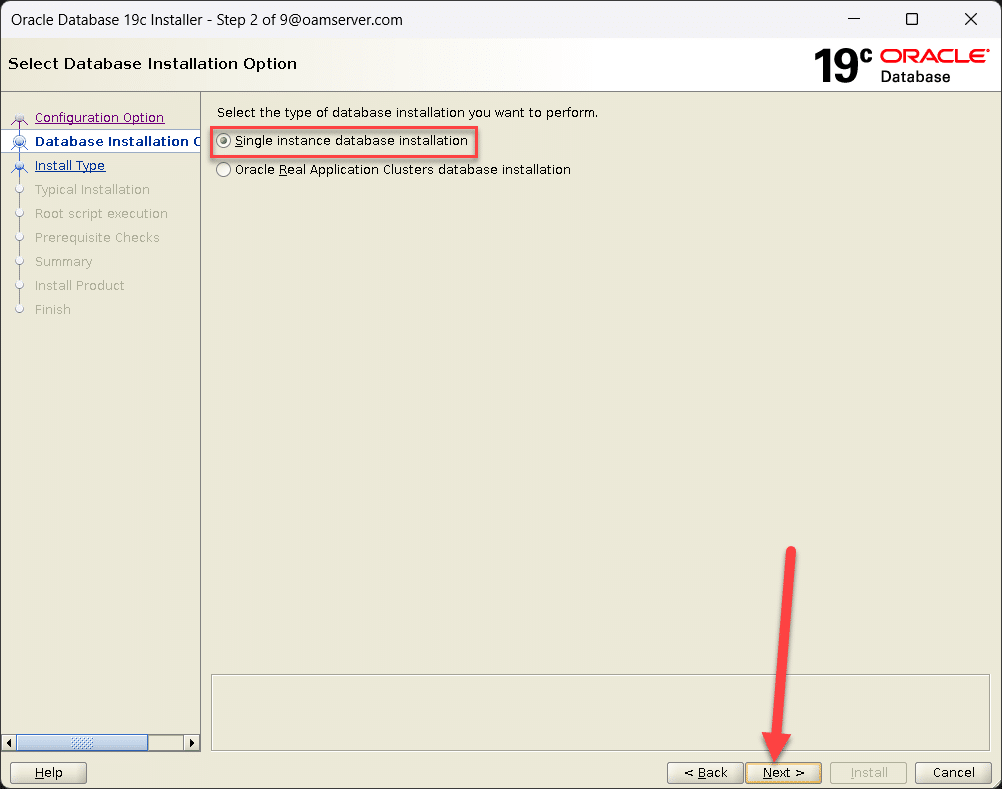
| Select Single Instance Database Installation
Click Next |
 |
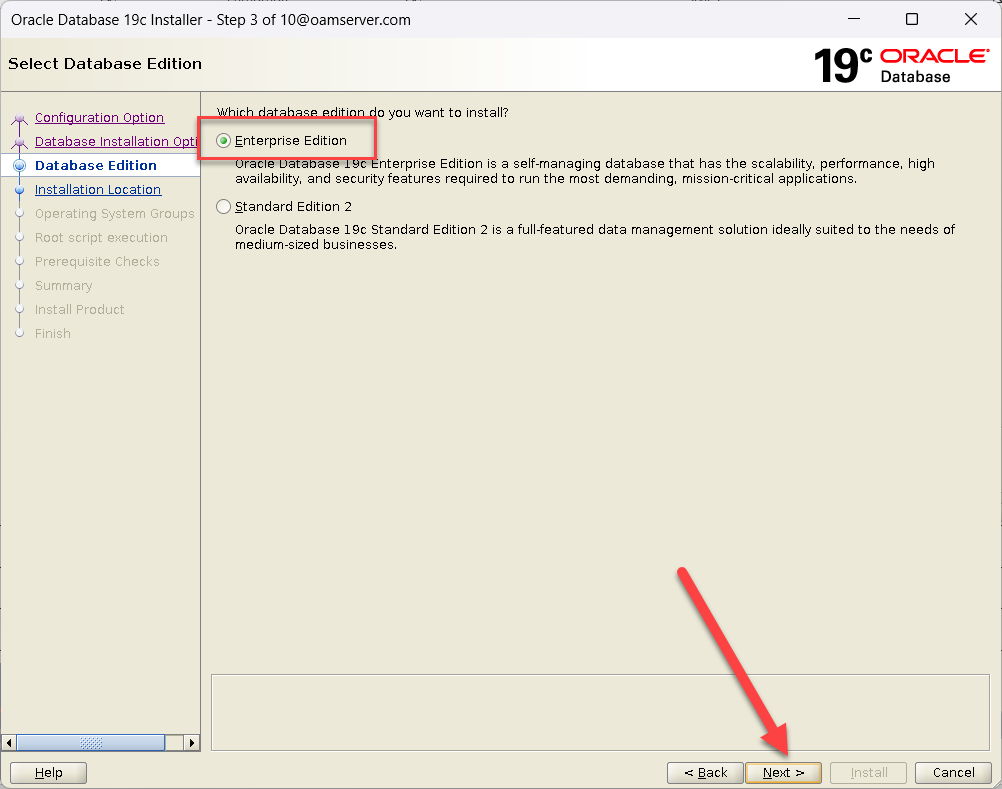
| Select Enterprise Edition
Click Next |
 |
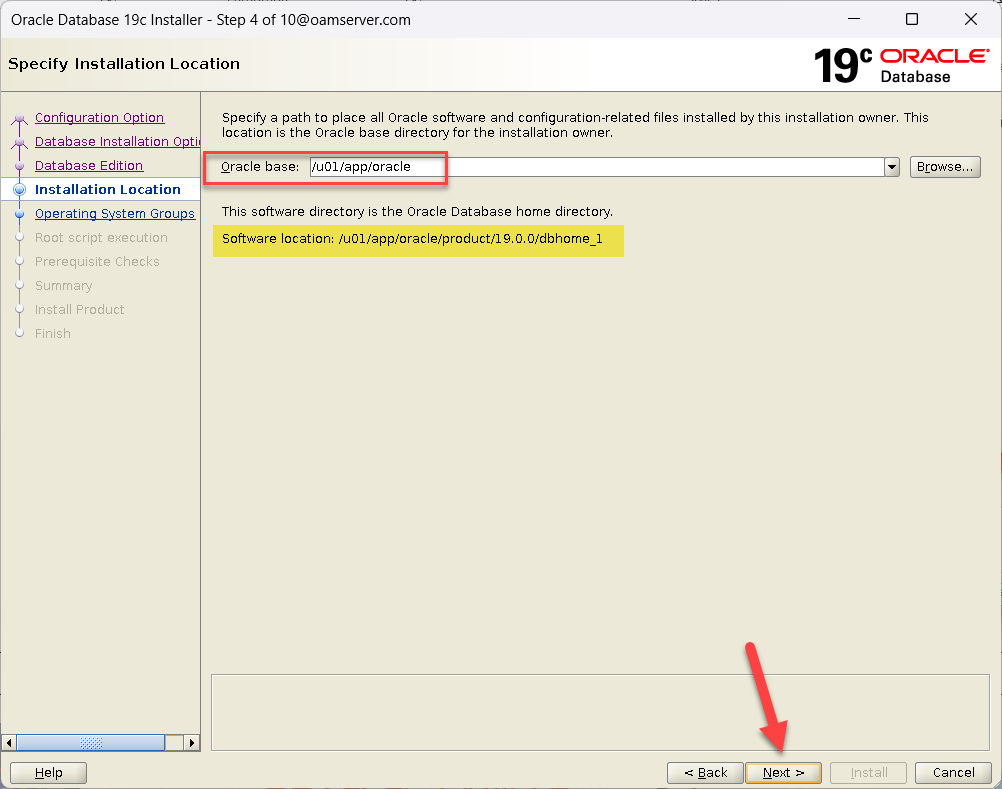
| Confirm Oracle Base Location
Click Next |
 |
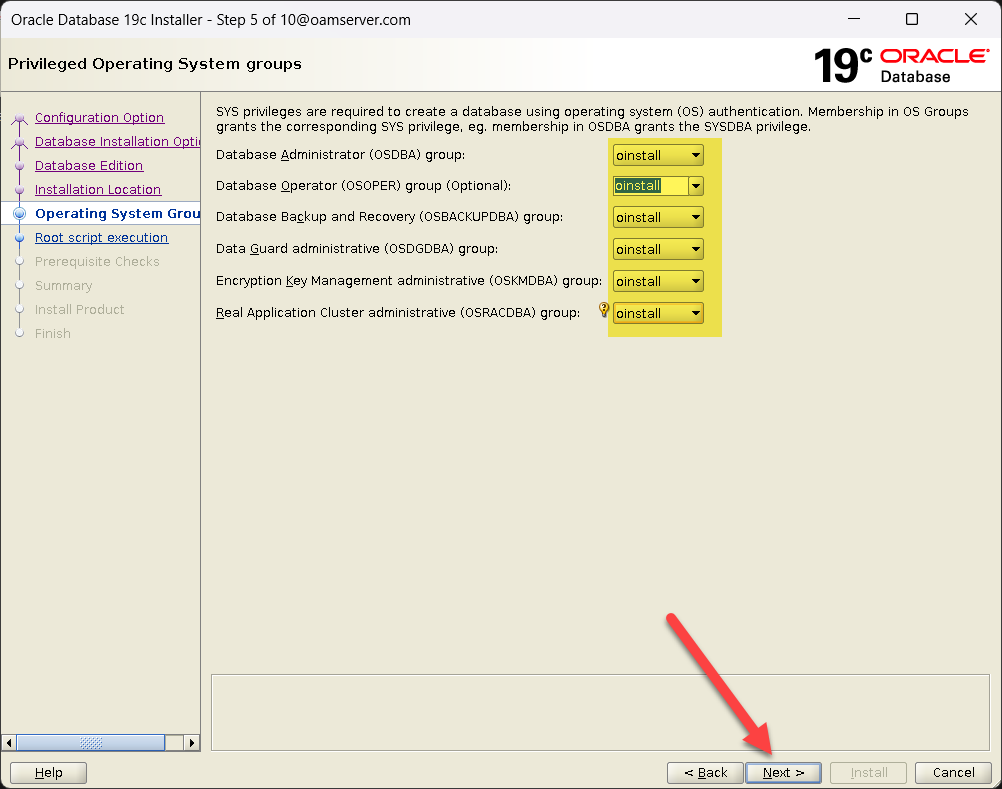
| Select Database Administration Groups
Click Next |
 |
| Click Next | 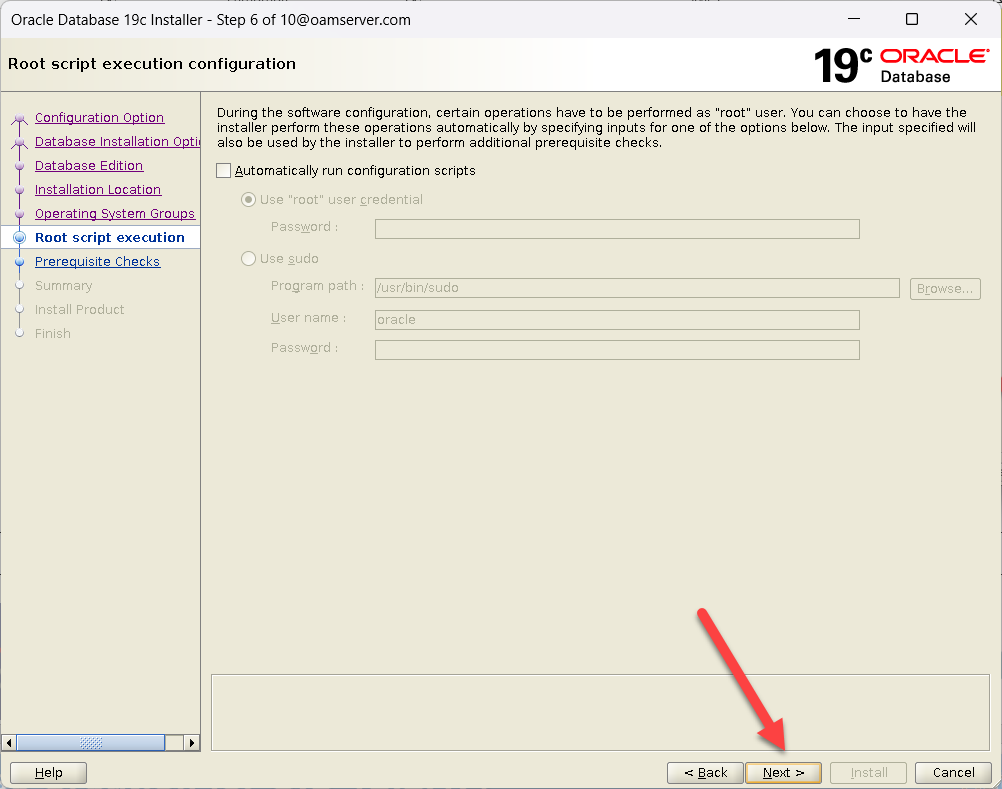 |
| Click Install | 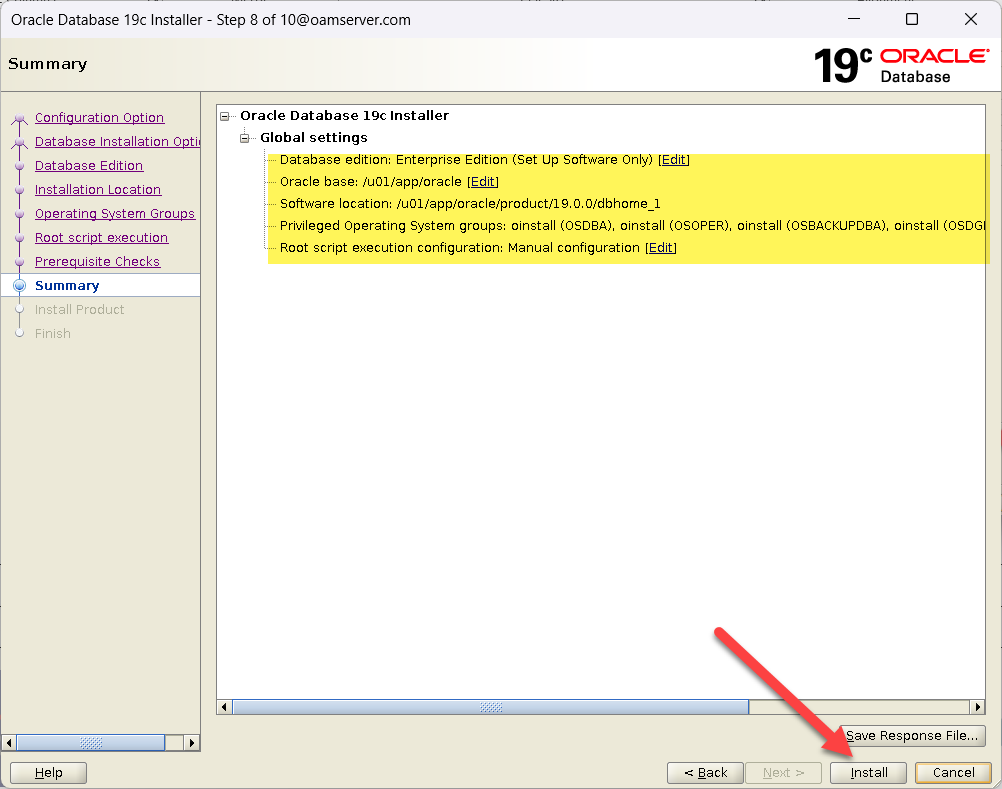 |
| Installation Started | 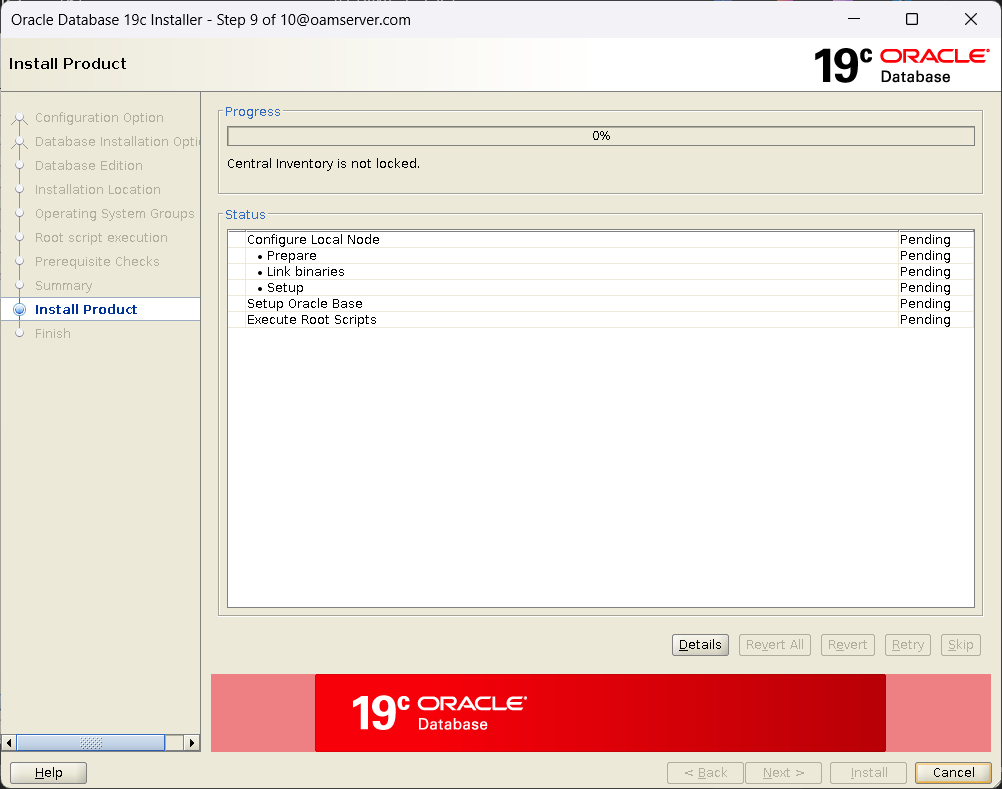 |
| Run the Script with Root User
[root@oidserver ~]# /u01/app/oracle/product/19.0.0/dbhome_1/root.sh Click OK |
 |
| Click Close | 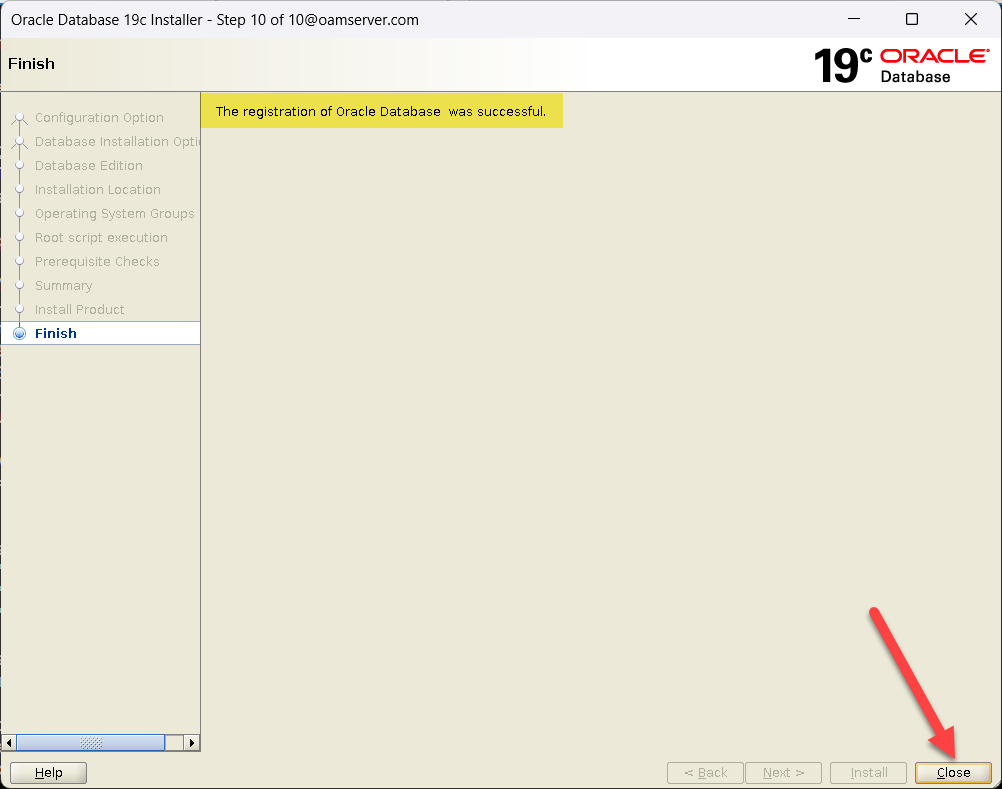 |
Database Creation through DBCA |
|
| [oracle@oidserver ~]$ . ./setEnv.sh
[oracle@oidserver ~]$ dbca |
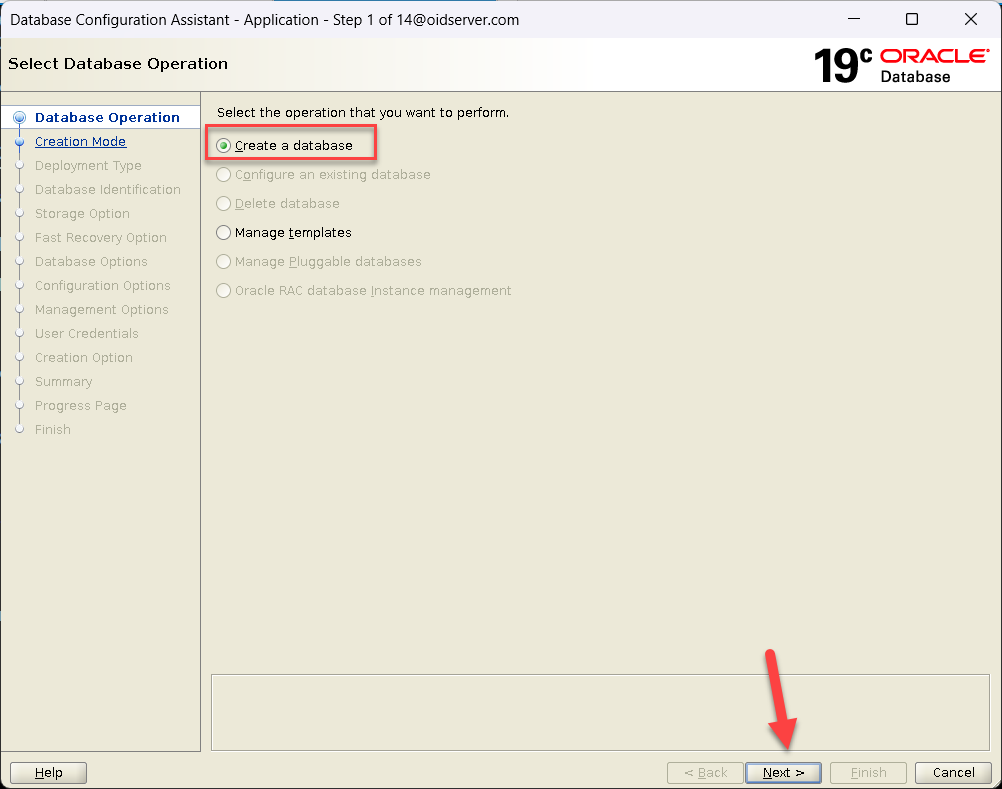 |
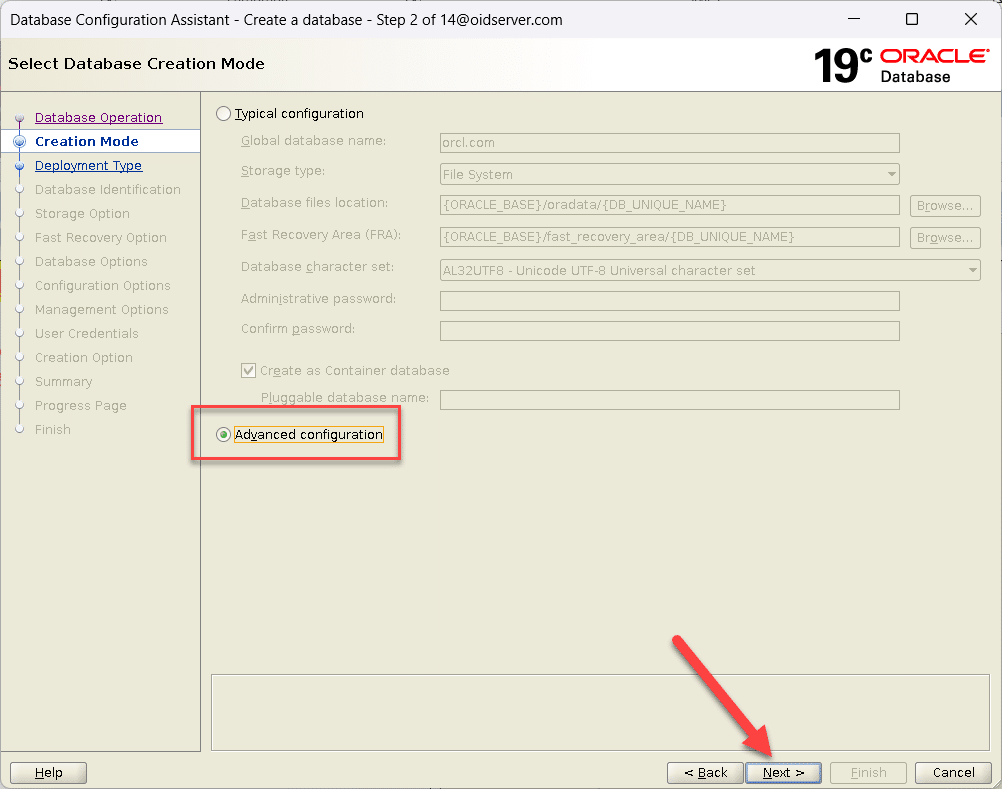
| Select Advanced Configuration
Click Next
|
 |
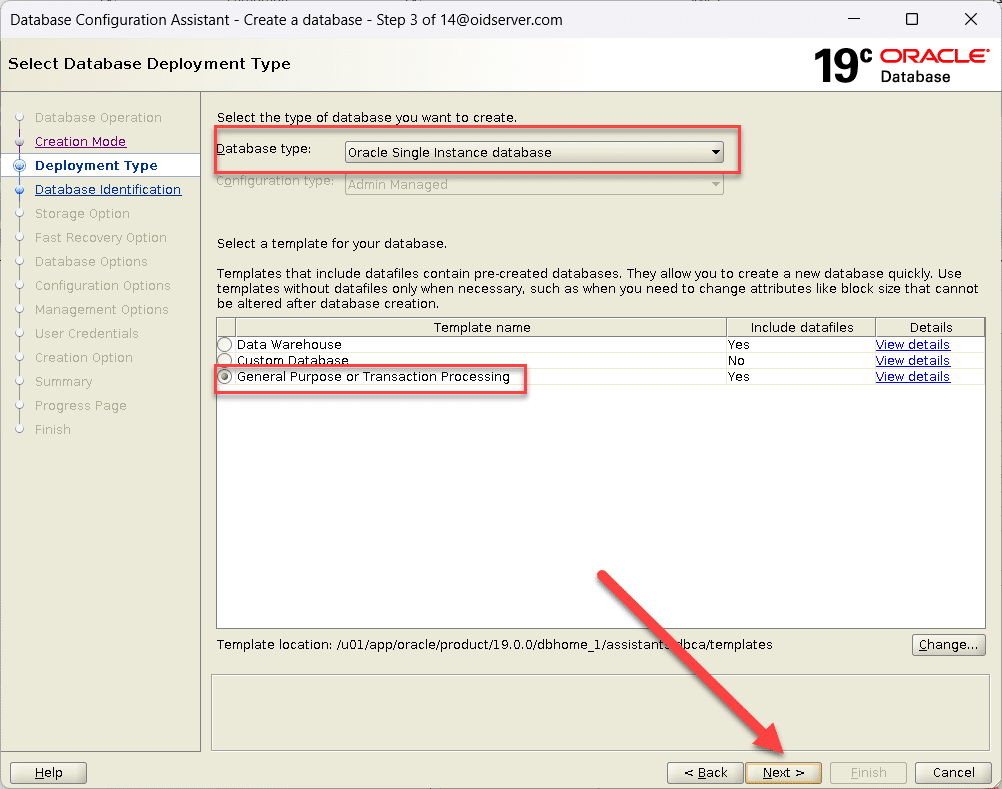
| Select Oracle Single Instance database
Select Template Name General Purpose or TransactionProcessing Click Next |
 |
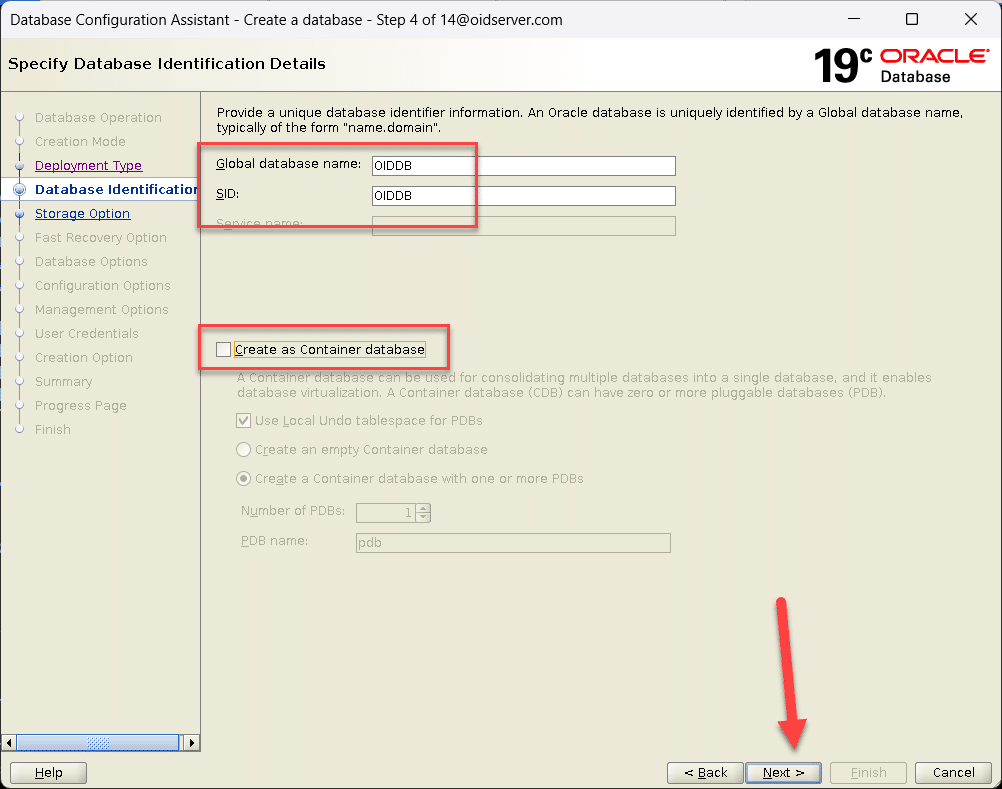
| Enter Global Database name and SID
Uncheck Option Create as Container database Click Next |
 |
| Click Next | 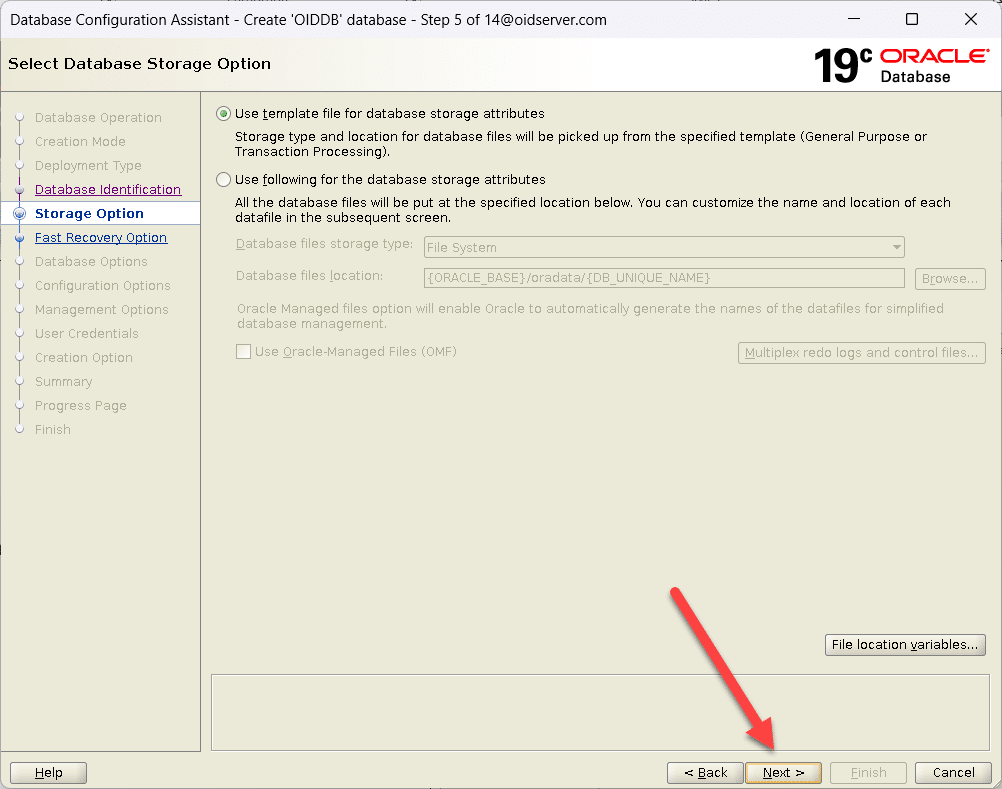 |
| Click Next |  |
| Click Next | 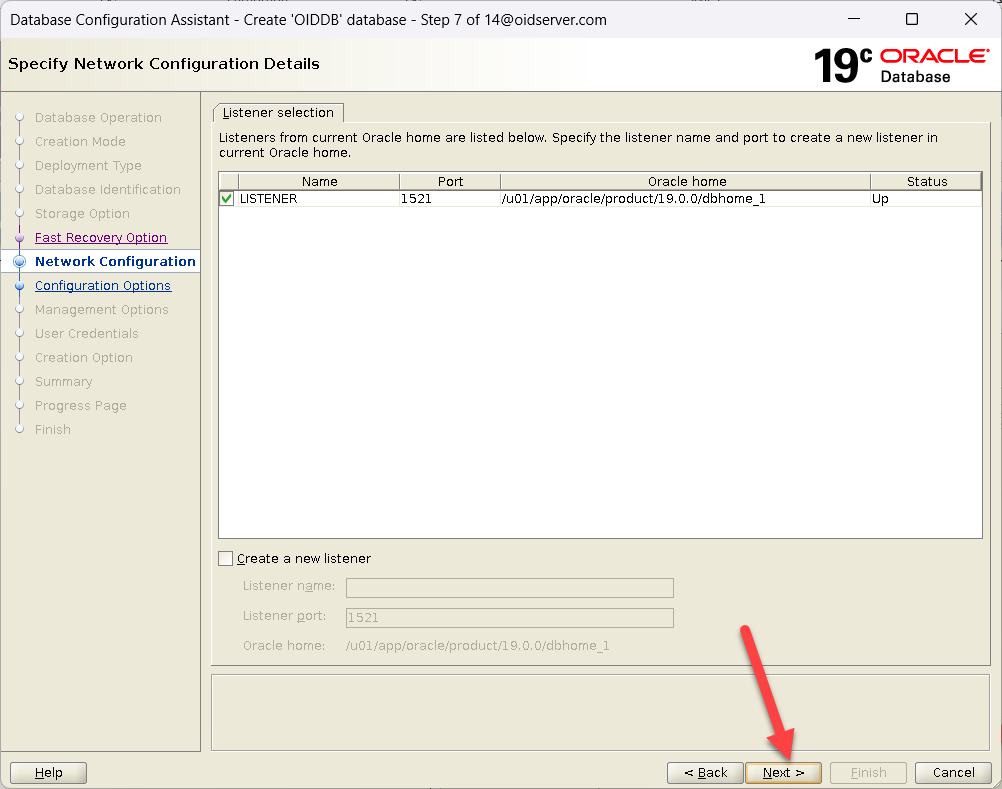 |
| Click Next | 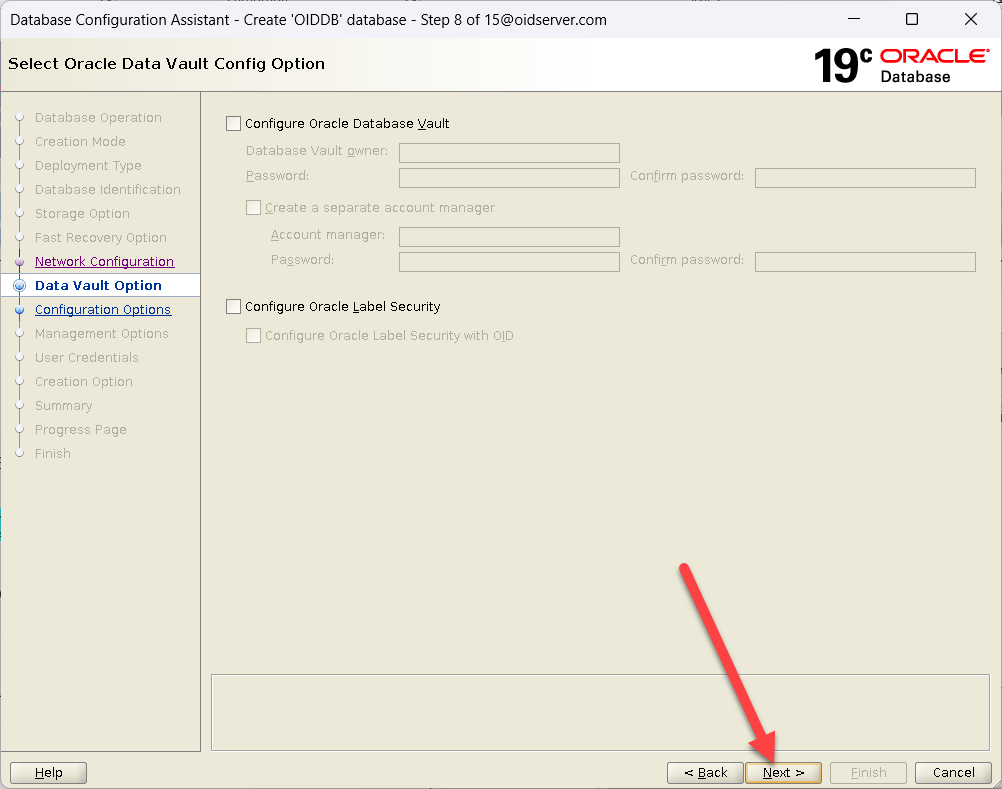 |
| Click Next | 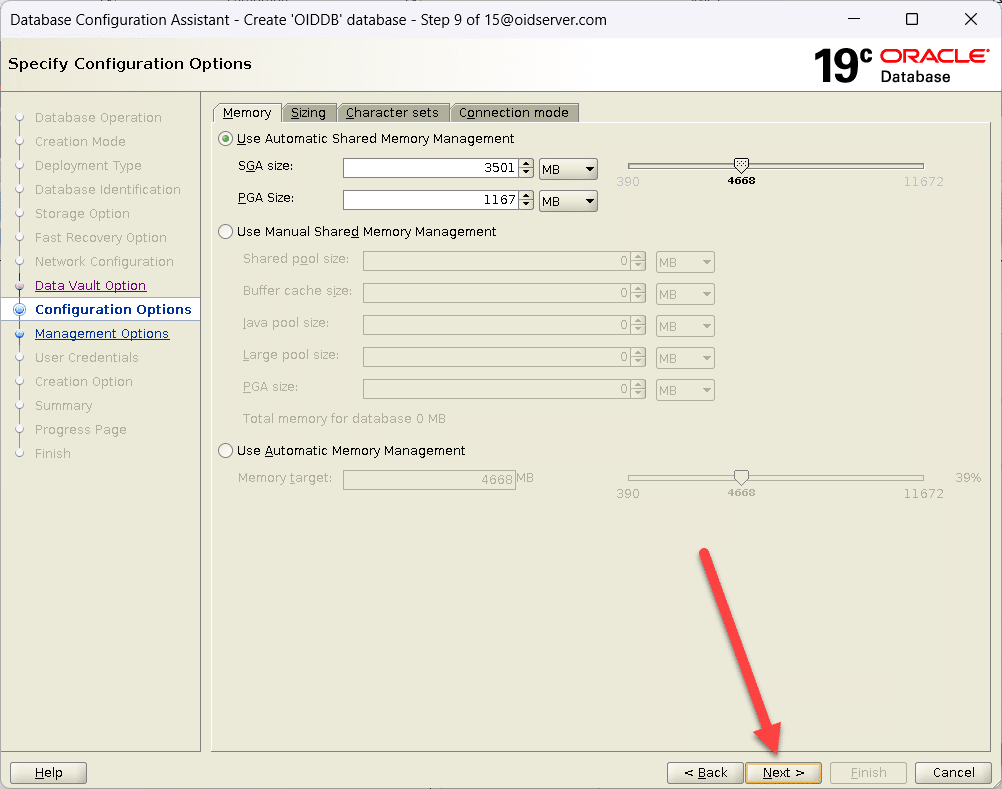 |
| Click Next | 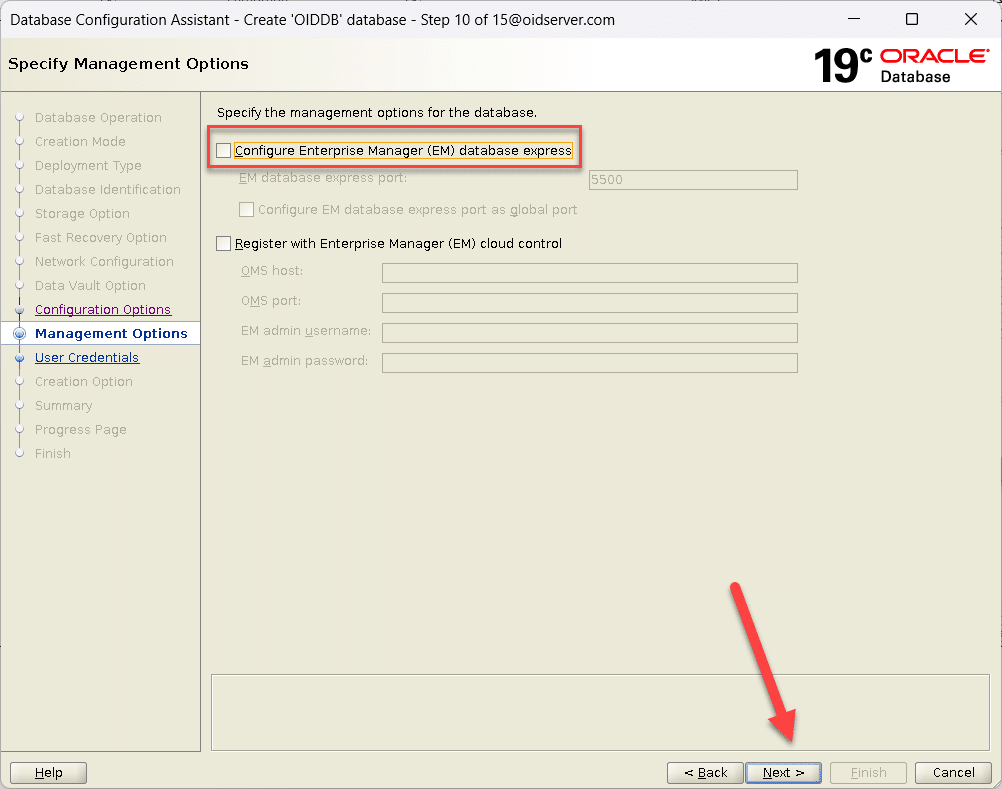 |
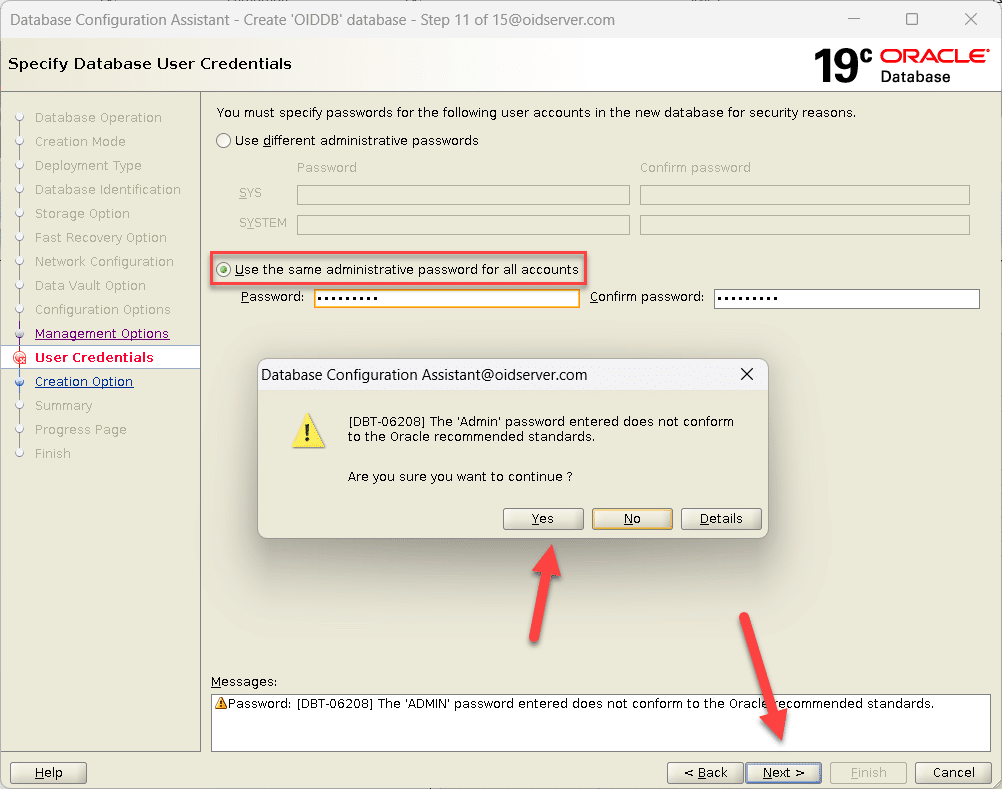
| We used the Same Password for all Administrative accounts.
Click Next |
 |
| Click Next | 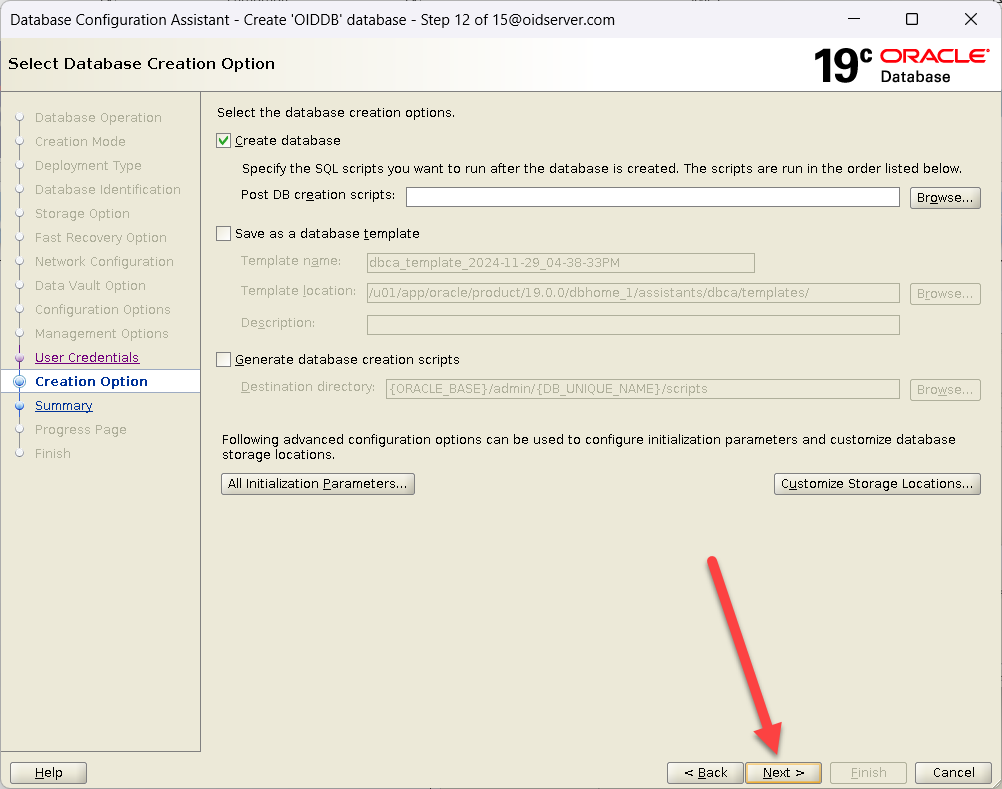 |
| Verify the settings on the Installation Summary screen.
To change entries, Click BACK to the pertinent screen. Once satisfied with the settings, click the Finish button to begin the installation. |
 |
| Database Creation Started | 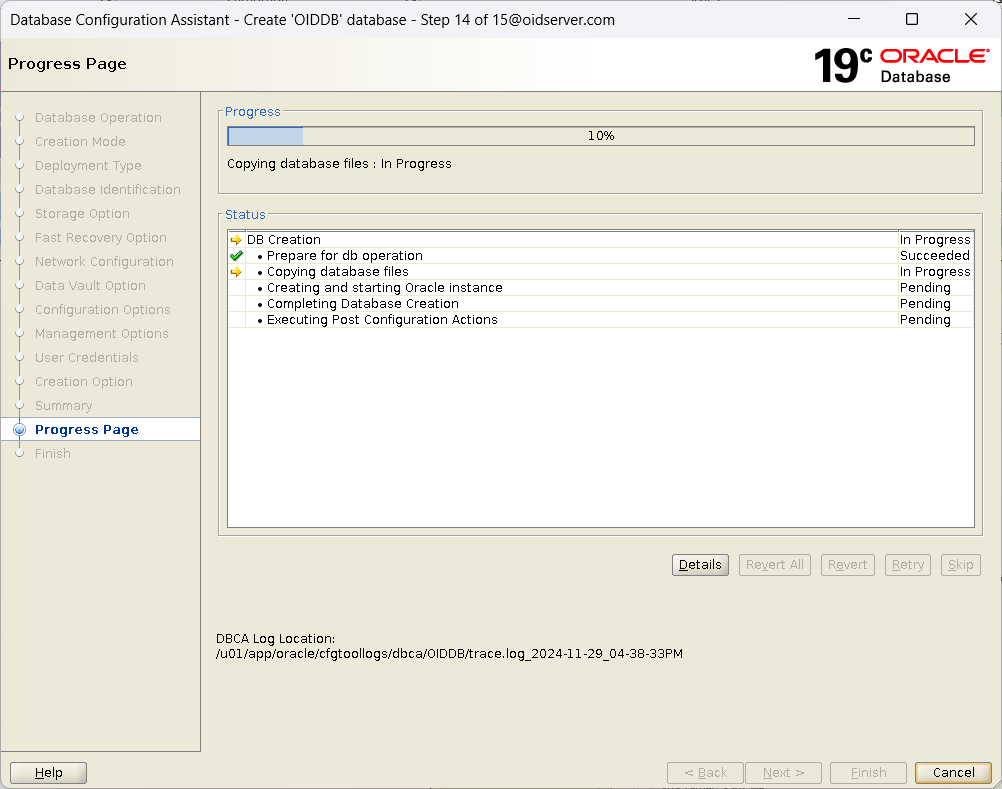 |
| Click Close | 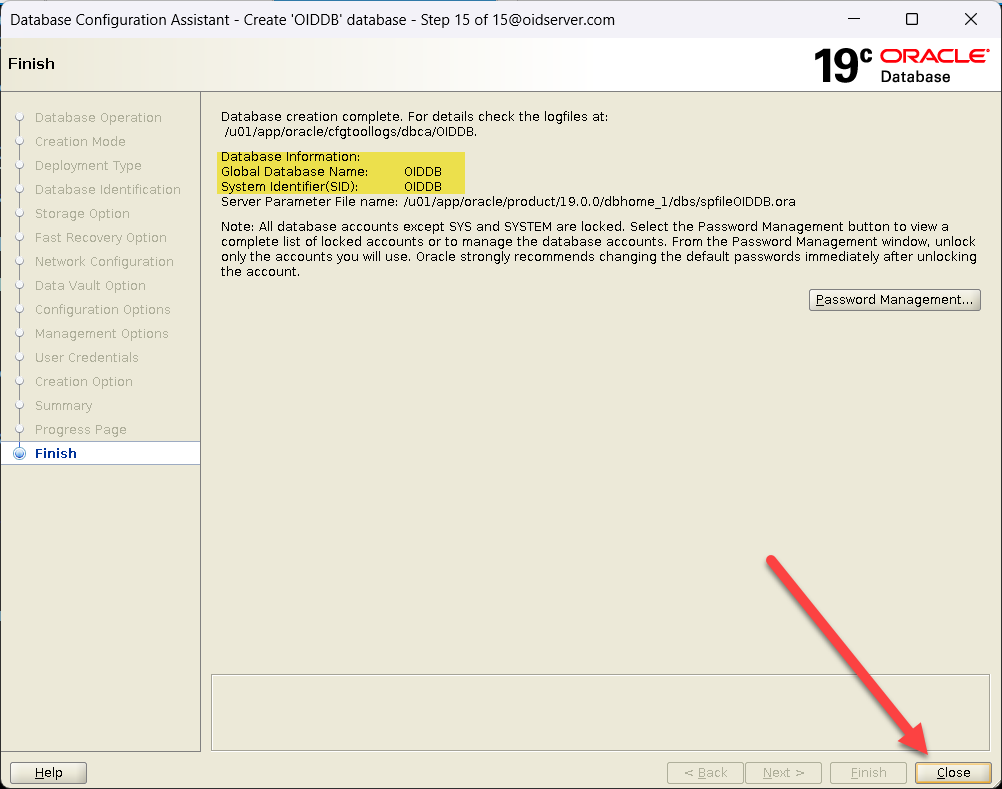 |
Alter Database Parameters |
|
| SQL> alter system set open_cursors=800 scope=both; SQL> alter system set processes=1000 scope=spfile; SQL> alter system set sessions=1000 scope=spfile; |
|
Hope you found this document informative and gained valuable insights.