
Oracle Database 19c Installation For OID

Oracle Database 19c Installation on OEL 8.10
Operating System Setup
1. For Automatic Setup of Operating System Packages and Parameter, Run the following command with Root user
[root@oidserver ~]# dnf install -y oracle-database-preinstall-19c
| If you are using RHEL8 or CentOS8, you can pick up the RPM from the OL8 repository and install it. It will pull the dependencies from your normal repositories.
curl -o oracle-database-preinstall-19c-1.0-2.el8.x86_64.rpm https://yum.oracle.com/repo/OracleLinux/OL8/appstream/x86_64/getPackage/oracle-database-preinstall-19c-1.0-2.el8.x86_64.rpm dnf -y localinstall oracle-database-preinstall-19c-1.0-2.el8.x86_64.rpm |
2. Set the password for the “oracle” user.
[root@oidserver ~]# passwd oracle
3. Set secure Linux to permissive by editing the “/etc/selinux/config” file, making sure the SELINUX flag is set as follows.
SELINUX=permissive
4. Once the change is complete, restart the server or run the following command.
[root@oidserver ~]# setenforce Permissive
5. Once the change is complete, restart the server or run the following command.
If you have the Linux firewall enabled, you will need to disable or configure it. To disable it, do the following.
# systemctl stop firewalld

# systemctl disable firewalld
6. Create the directories in which the Oracle software will be installed.
[root@oidserver ~]# mkdir -p /u01/app/oracle/product/19.0.0/dbhome_1
[root@oidserver ~]# chown -R oracle:oinstall /u01/app
[root@oidserver ~]# chmod -R 775 /u01
7. Create an Environment Variable file for the Oracle Database on the Oracle User Home Directory
| [oracle@oidserver ~]$ vi setEnv.sh
# Oracle Settings export ORACLE_HOSTNAME=oidserver.com export PATH=/usr/sbin:/usr/local/bin:$PATH export LD_LIBRARY_PATH=$ORACLE_HOME/lib:/lib:/usr/lib |
8. Unzip Software Binaries
Copy the Downloaded Database 19c Zip (V982063-01.zip) file on the /u01/app/oracle/product/19.0.0/dbhome_1 Directory
[oracle@oidserver ~]$ cd /u01/app/oracle/product/19.0.0/dbhome_1
[oracle@oidserver dbhome_1]$ unzip -oq V982063-01.zip
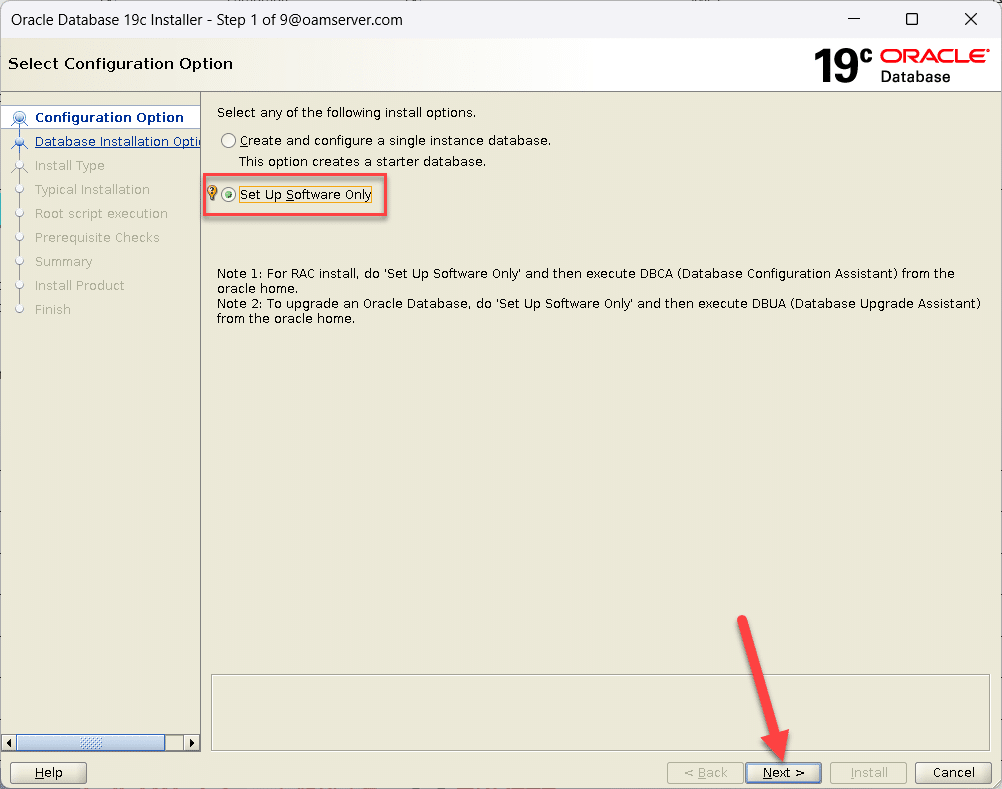
Running Database Installer
| [oracle@oidserver dbhome_1]$ export DISPLAY=192.168.1.124:0.0 [oracle@oidserver dbhome_1]$ export CV_ASSUME_DISTID=OEL7.8[oracle@oidserver dbhome_1]$ ./runInstaller Launching Oracle Database Setup Wizard…The response file for this session can be found at: /u01/app/oracle/product/19.0.0/dbhome_1/install/response/db_2024-11-30_10-01-36PM.rsp You can find the log of this install session at: |
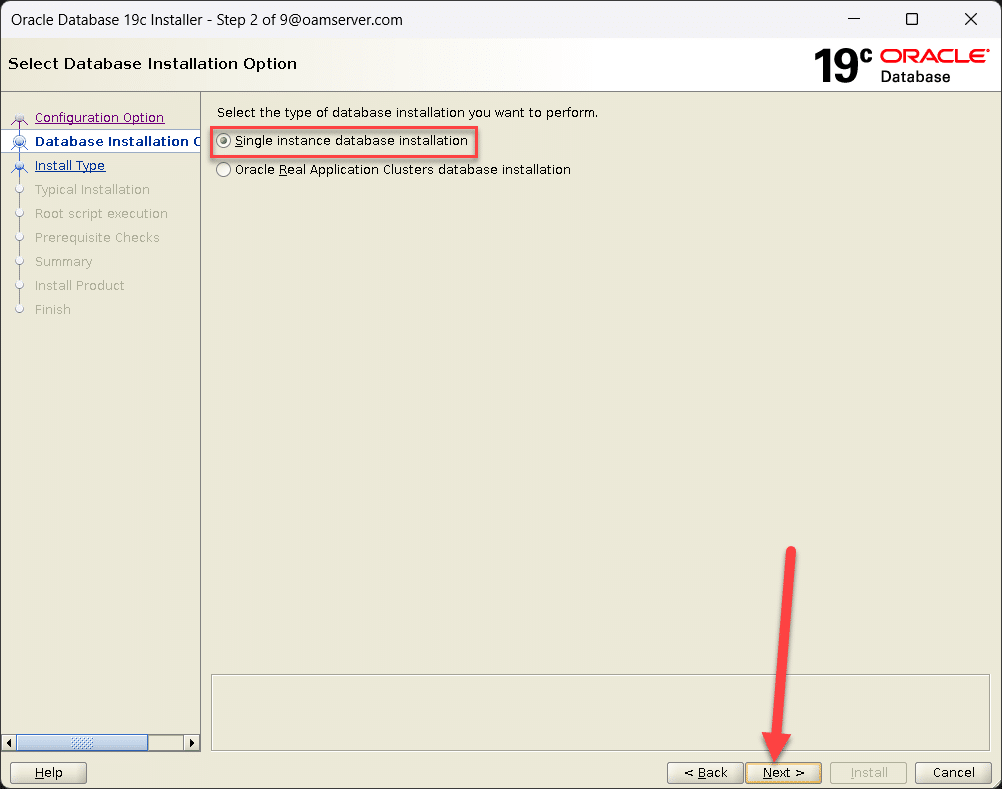
| Select Single Instance Database Installation
Click Next |
 |
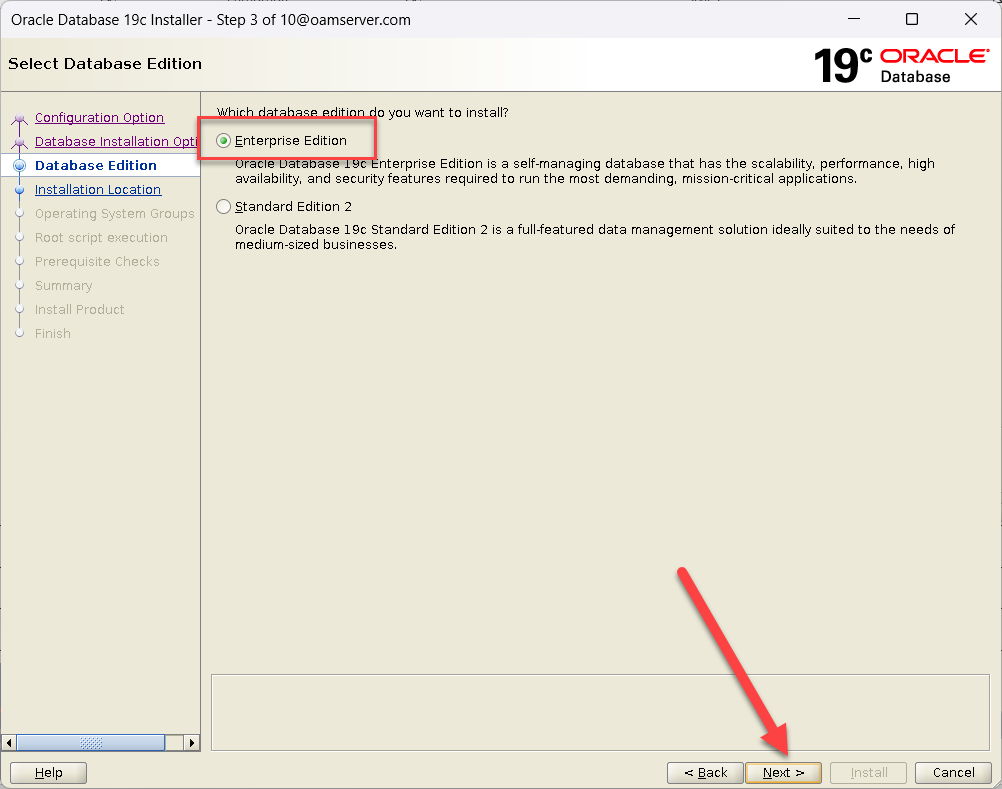
| Select Enterprise Edition
Click Next |
 |
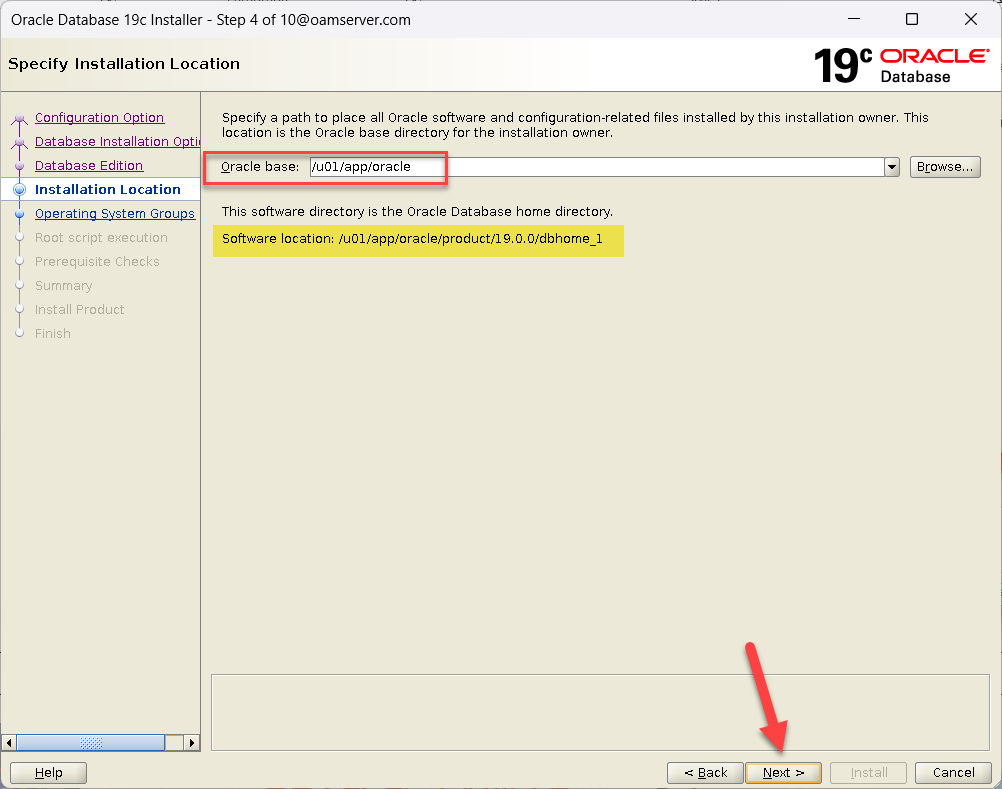
| Confirm Oracle Base Location
Click Next |
 |
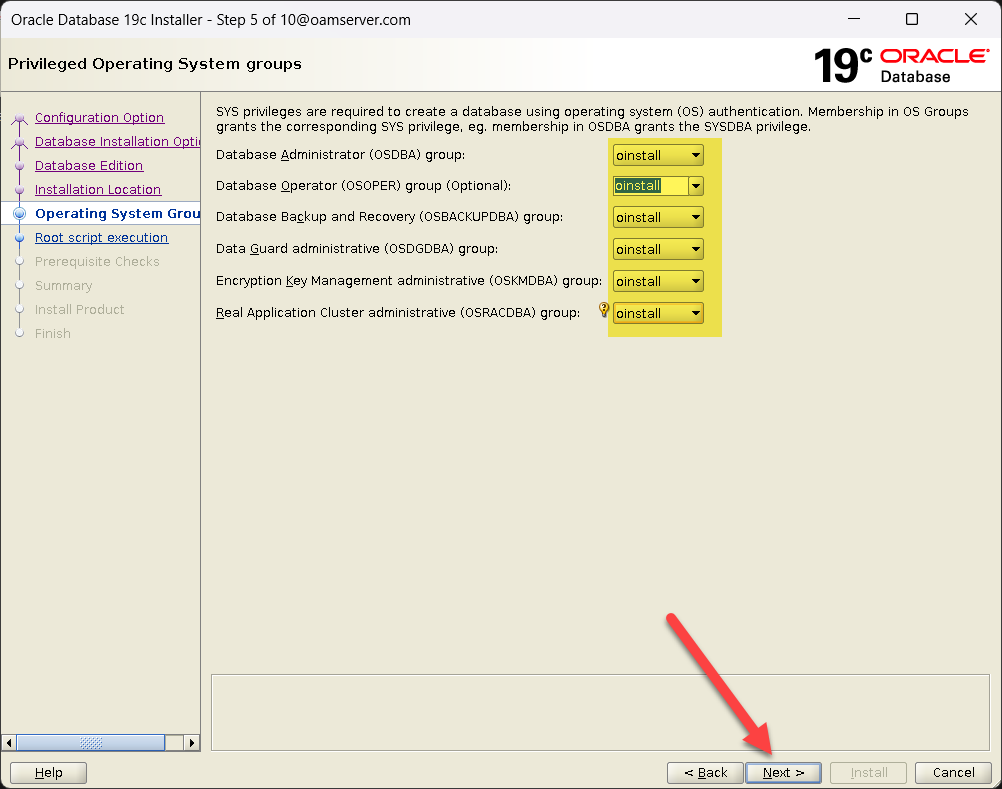
| Select Database Administration Groups
Click Next |
 |
| Click Next | 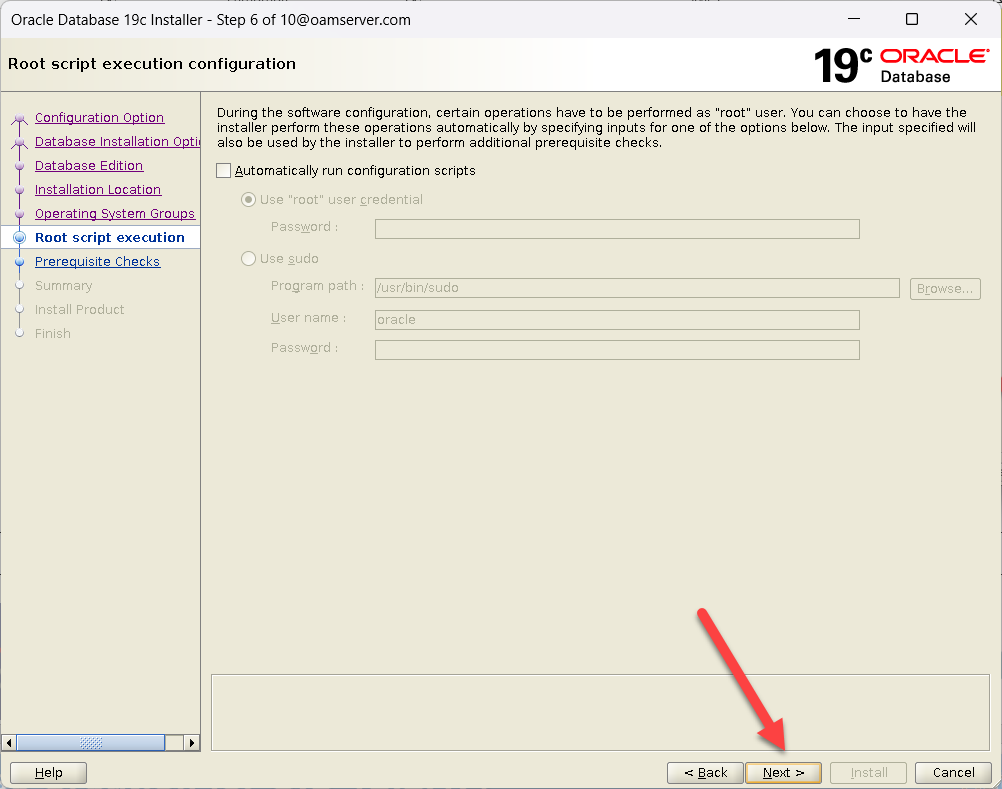 |
| Click Install | 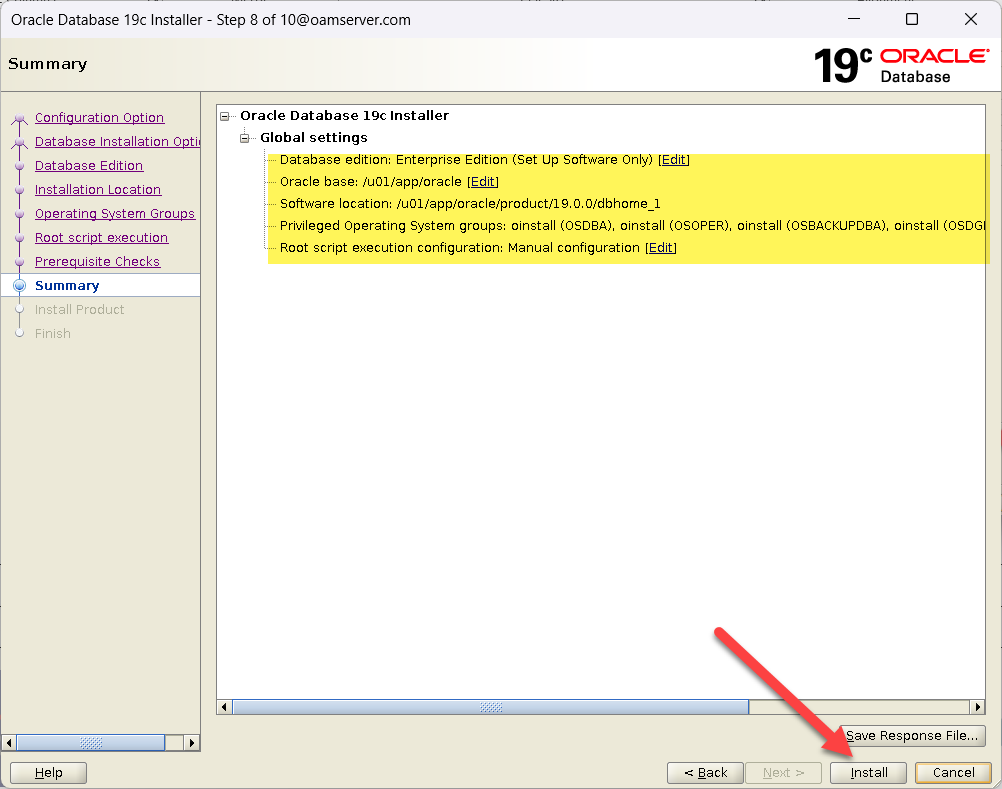 |
| Installation Started | 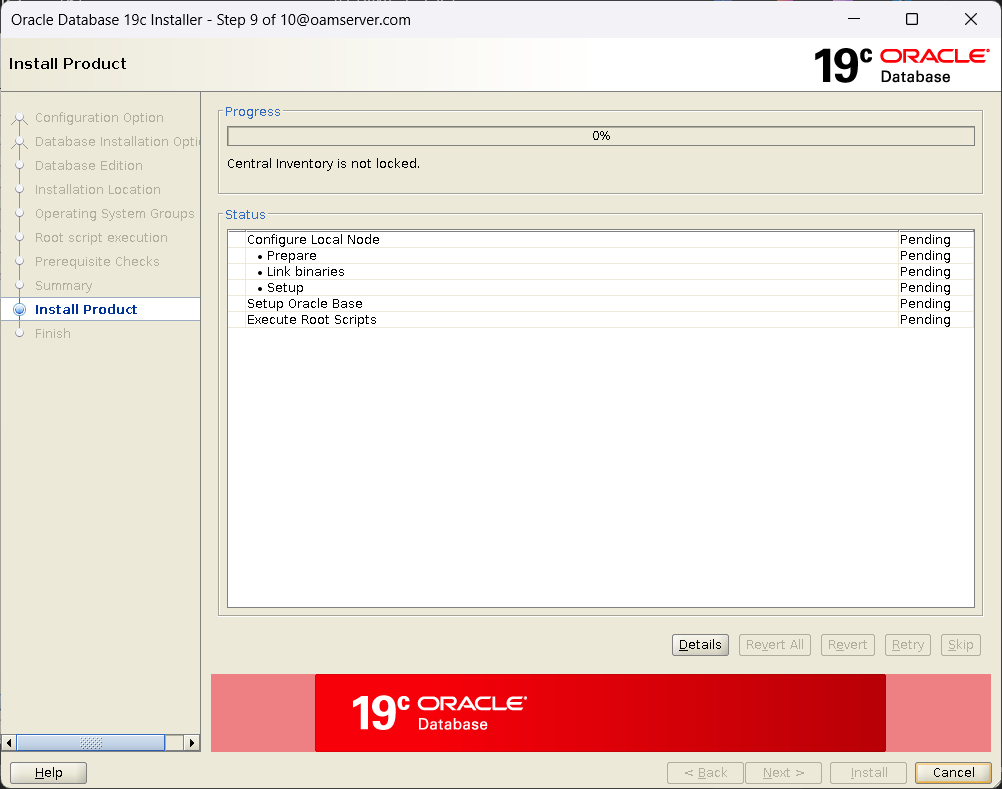 |
| Run the Script with Root User
[root@oidserver ~]# /u01/app/oracle/product/19.0.0/dbhome_1/root.sh Click OK |
 |
| Click Close | 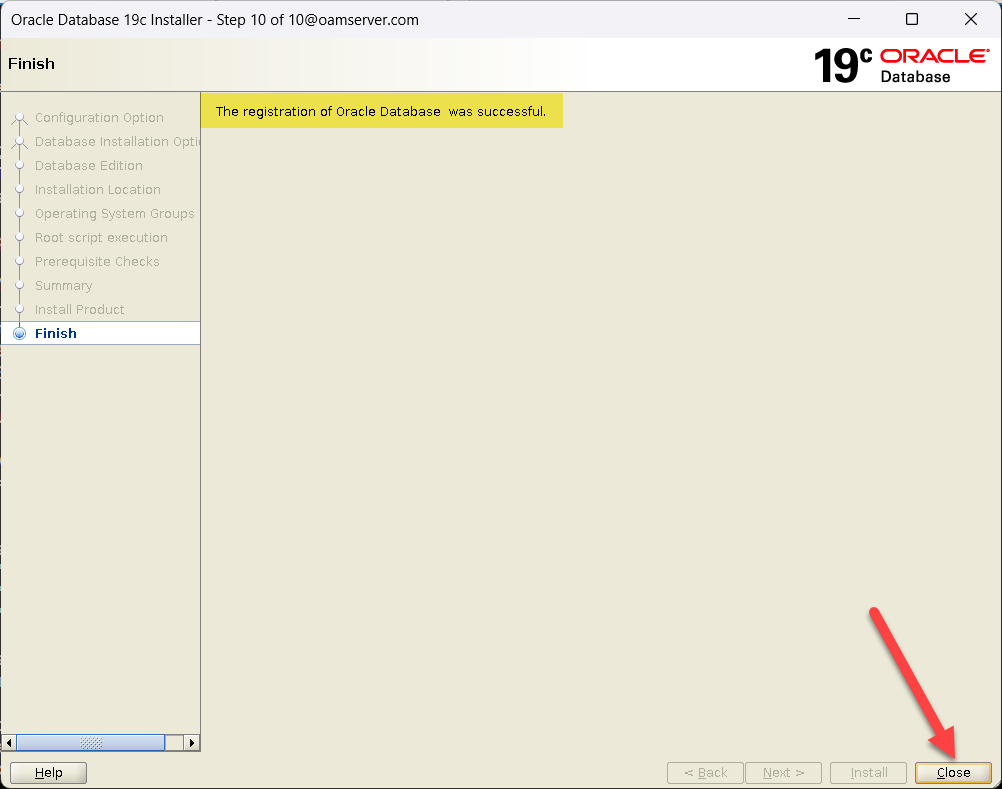 |
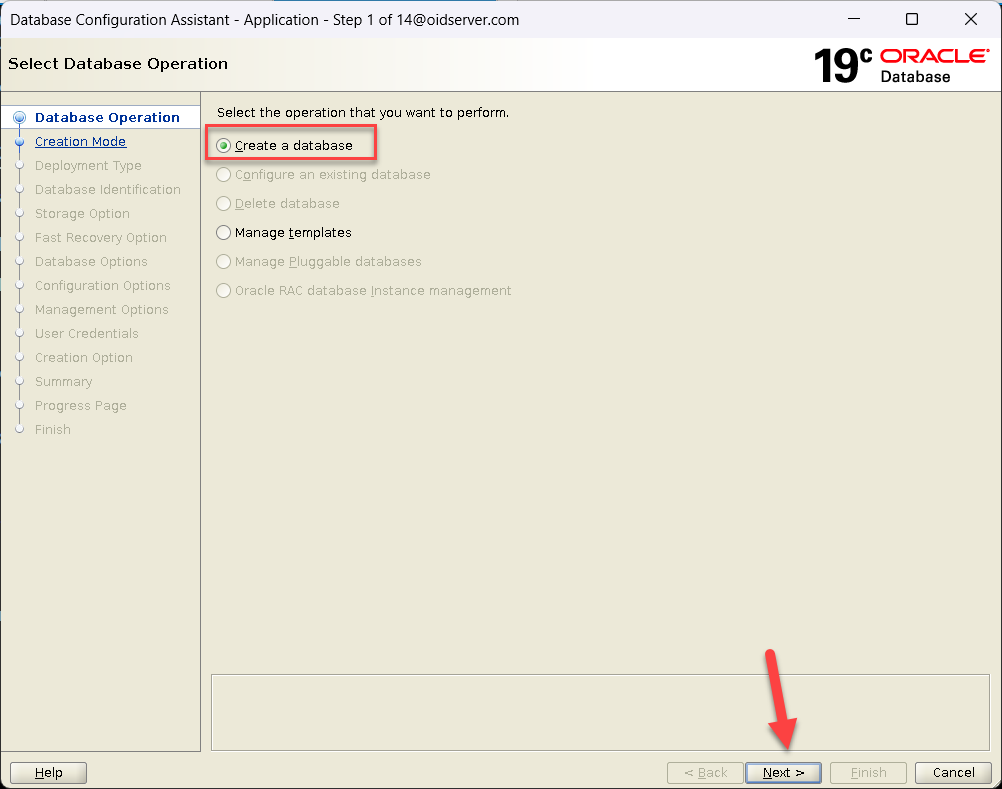
Database Creation through DBCA |
|
| [oracle@oidserver ~]$ . ./setEnv.sh
[oracle@oidserver ~]$ dbca |
 |
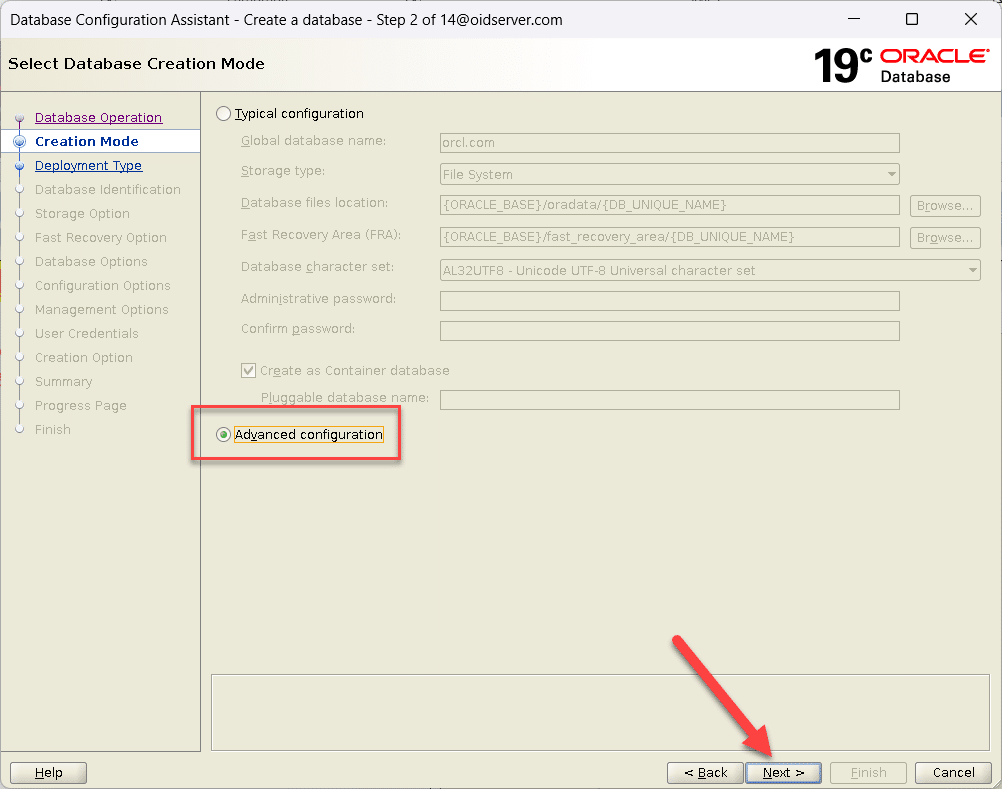
| Select Advanced Configuration
Click Next
|
 |
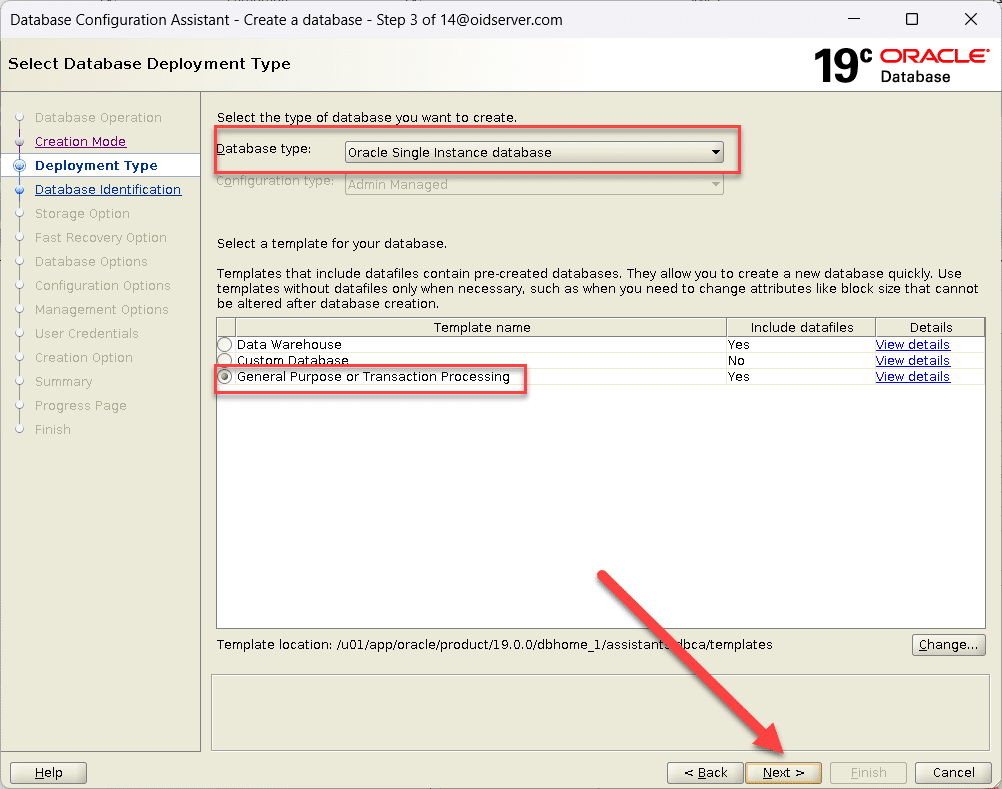
| Select Oracle Single Instance database
Select Template Name General Purpose or TransactionProcessing Click Next |
 |
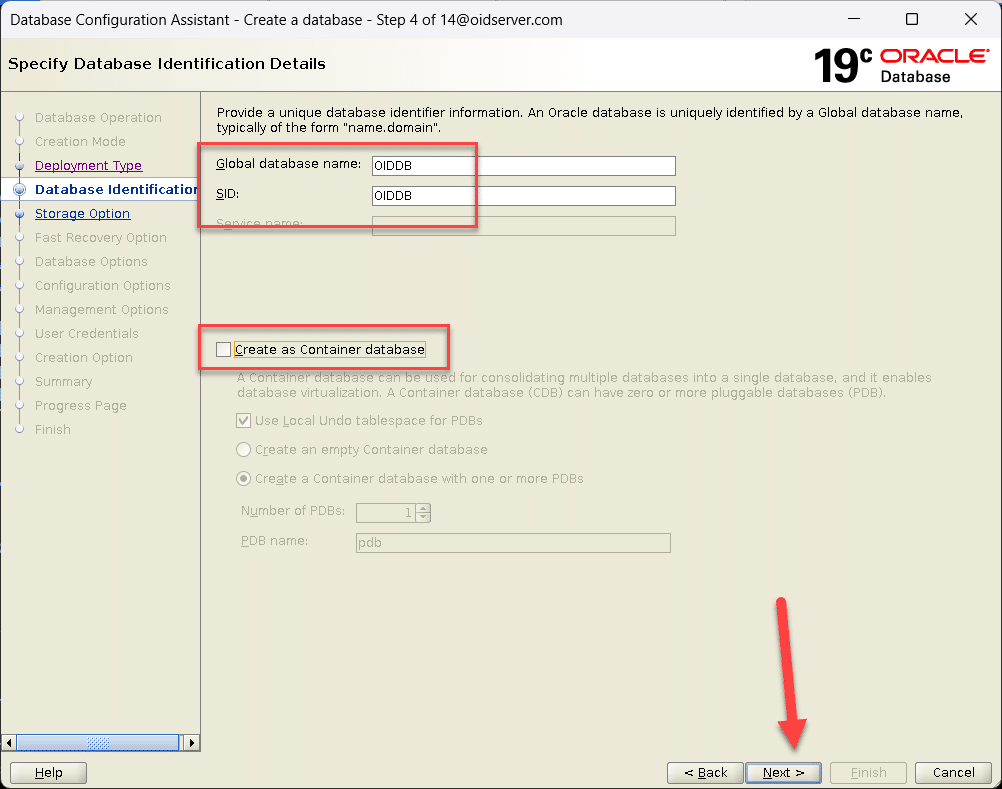
| Enter Global Database name and SID
Uncheck Option Create as Container database Click Next |
 |
| Click Next | 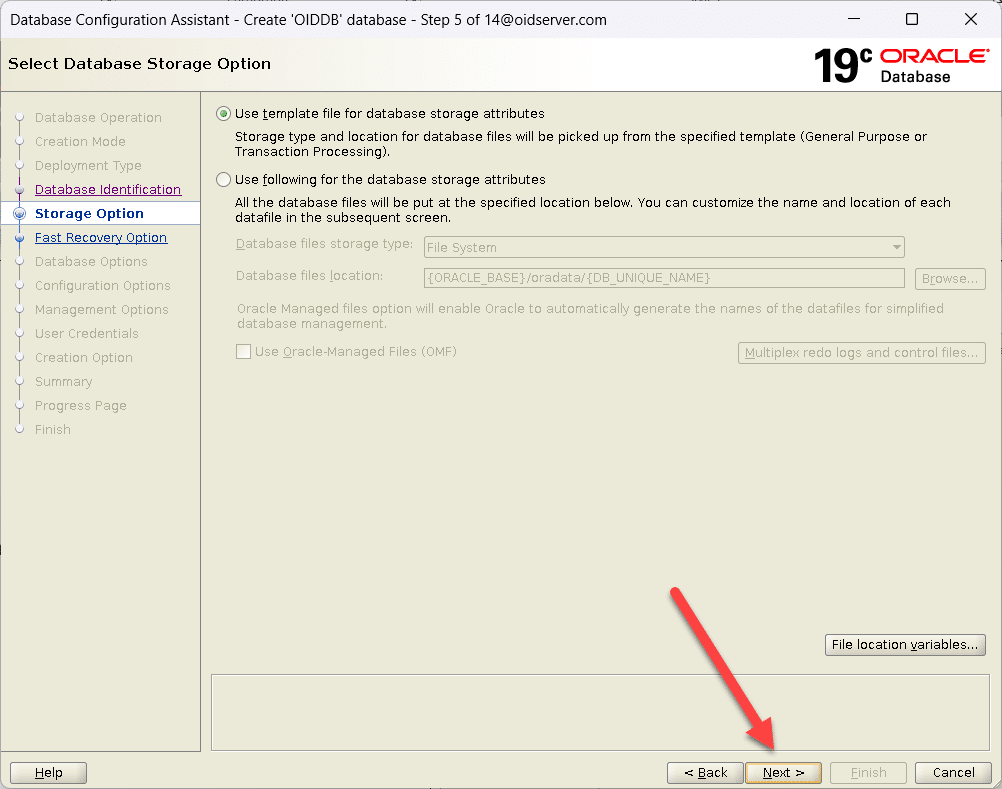 |
| Click Next |  |
| Click Next | 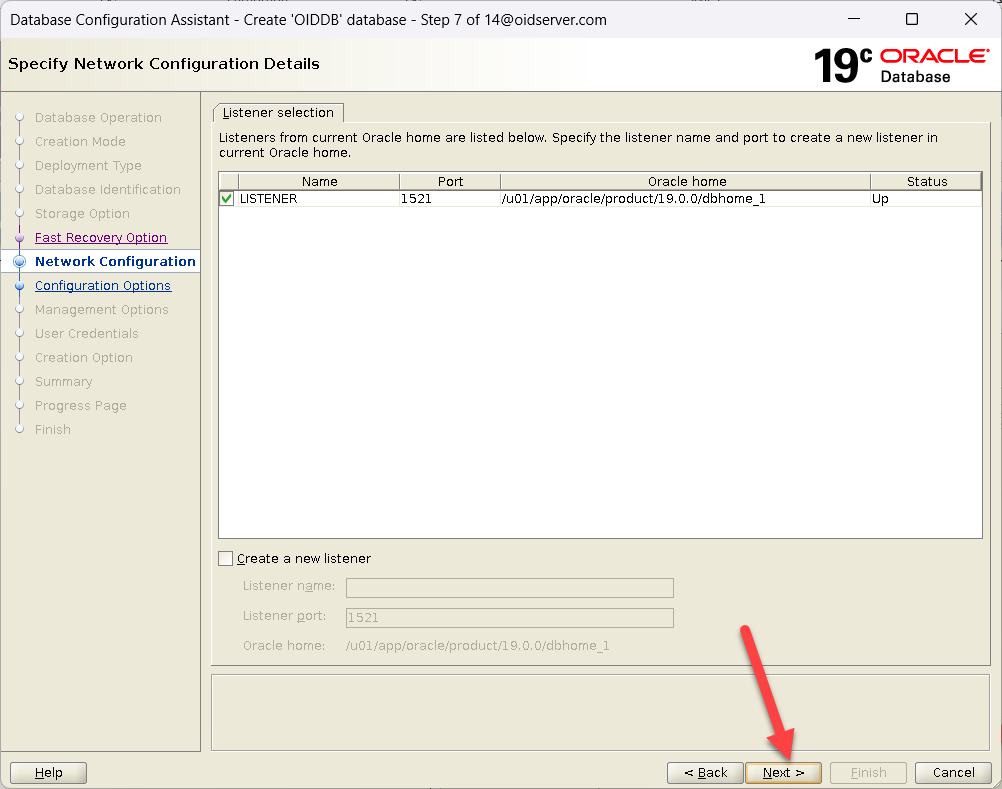 |
| Click Next | 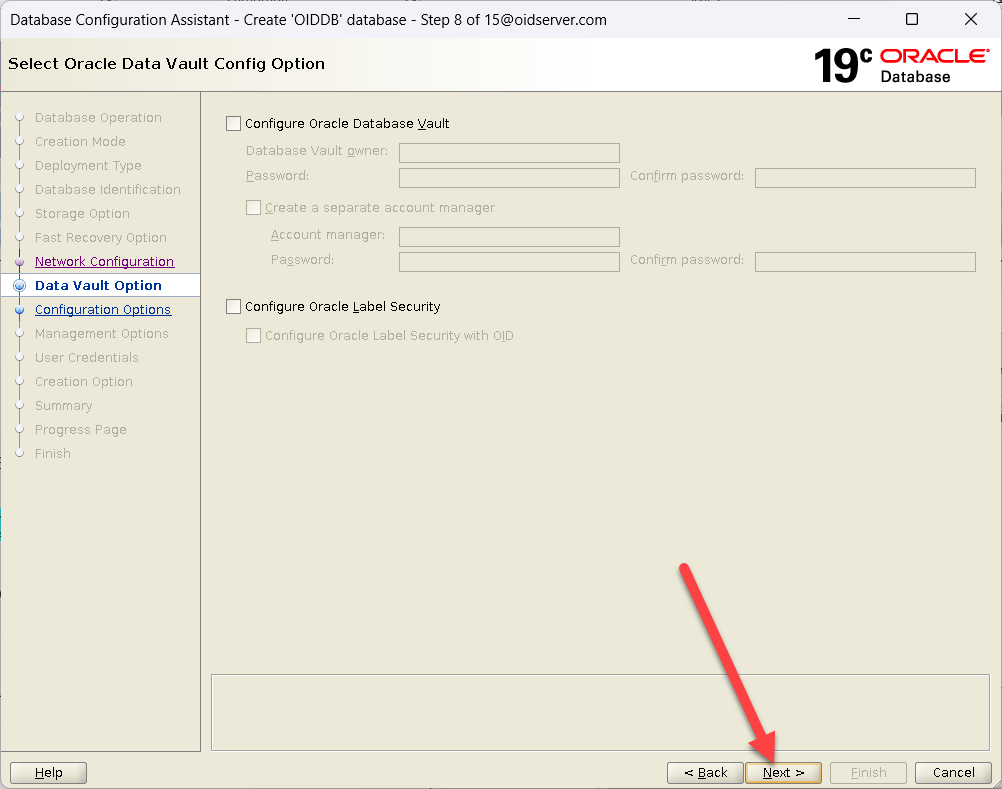 |
| Click Next | 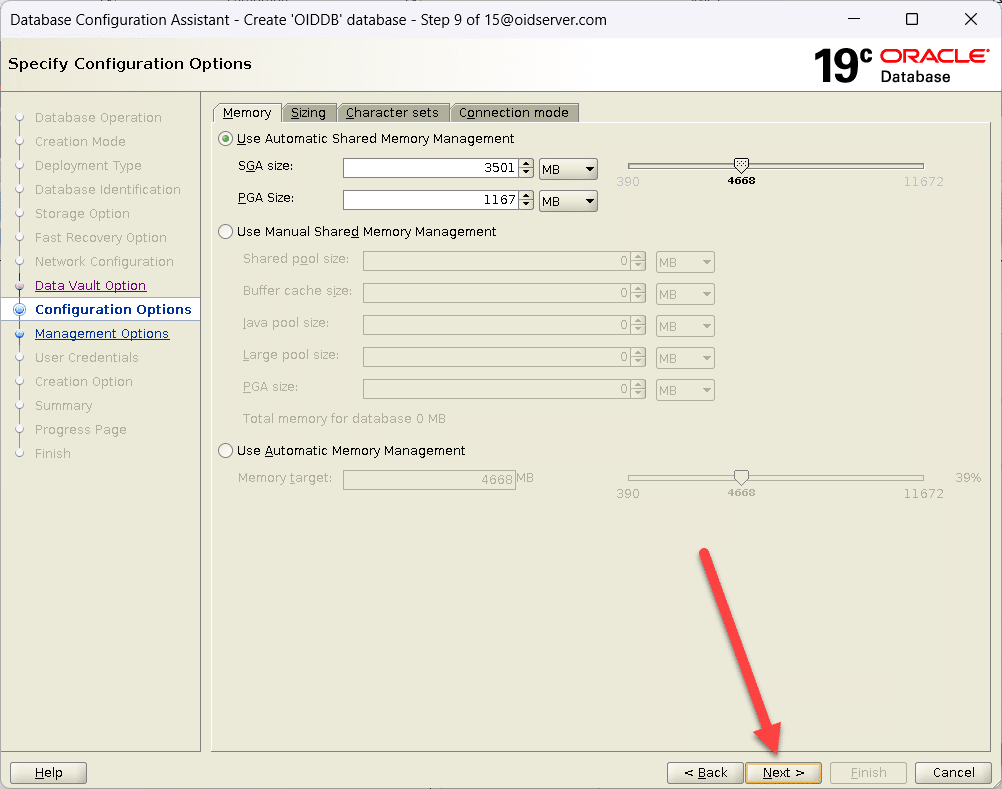 |
| Click Next | 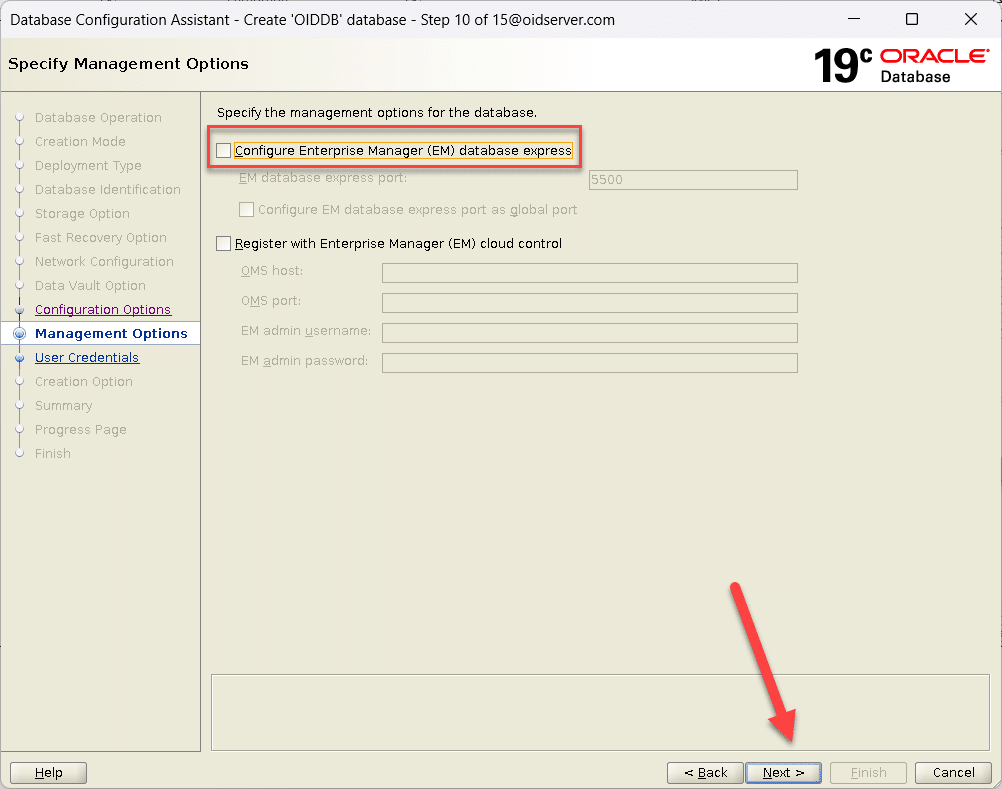 |
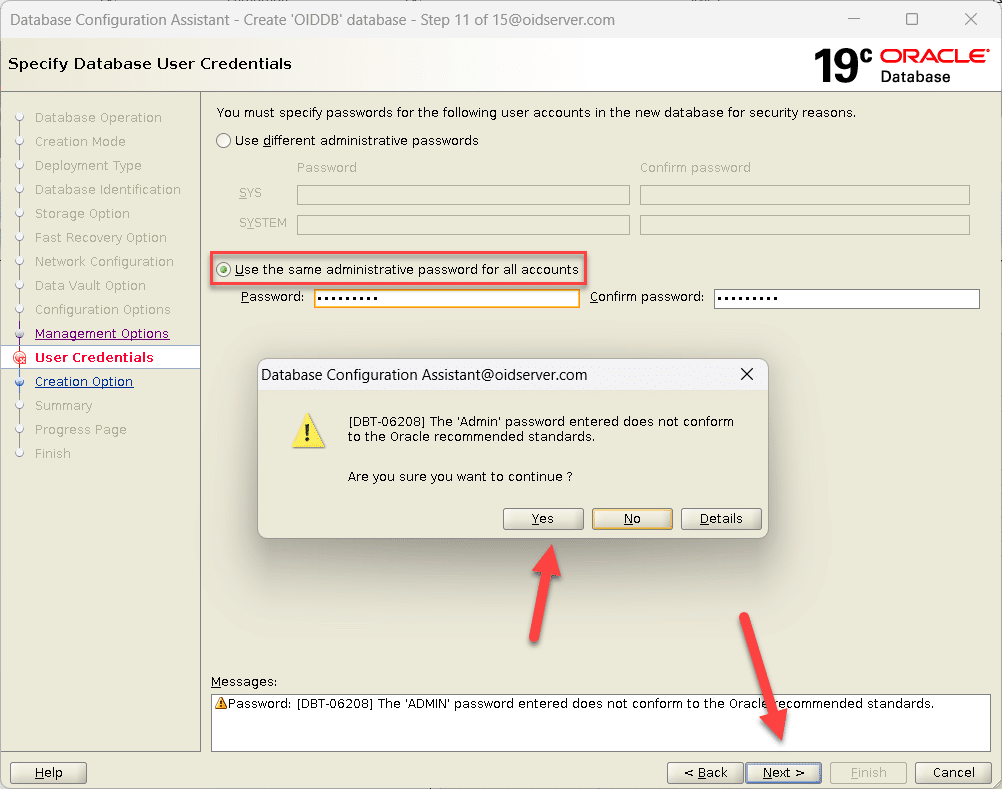
| We used the Same Password for all Administrative accounts.
Click Next |
 |
| Click Next | 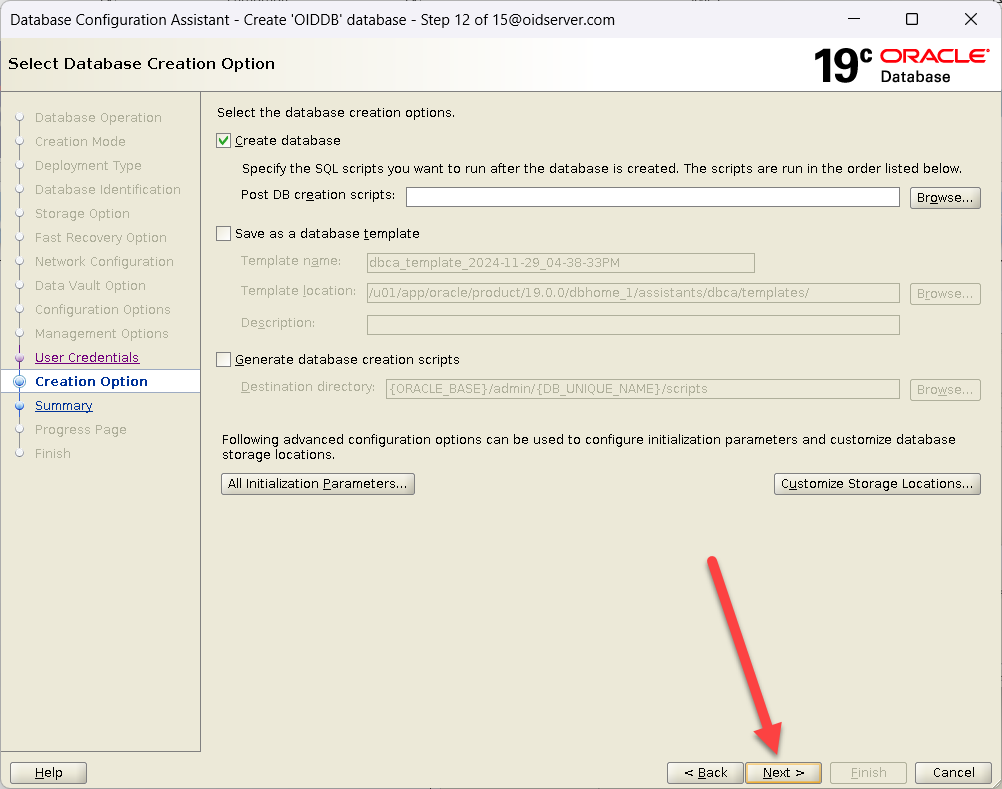 |
| Verify the settings on the Installation Summary screen.
To change entries, Click BACK to the pertinent screen. Once satisfied with the settings, click the Finish button to begin the installation. |
 |
| Database Creation Started | 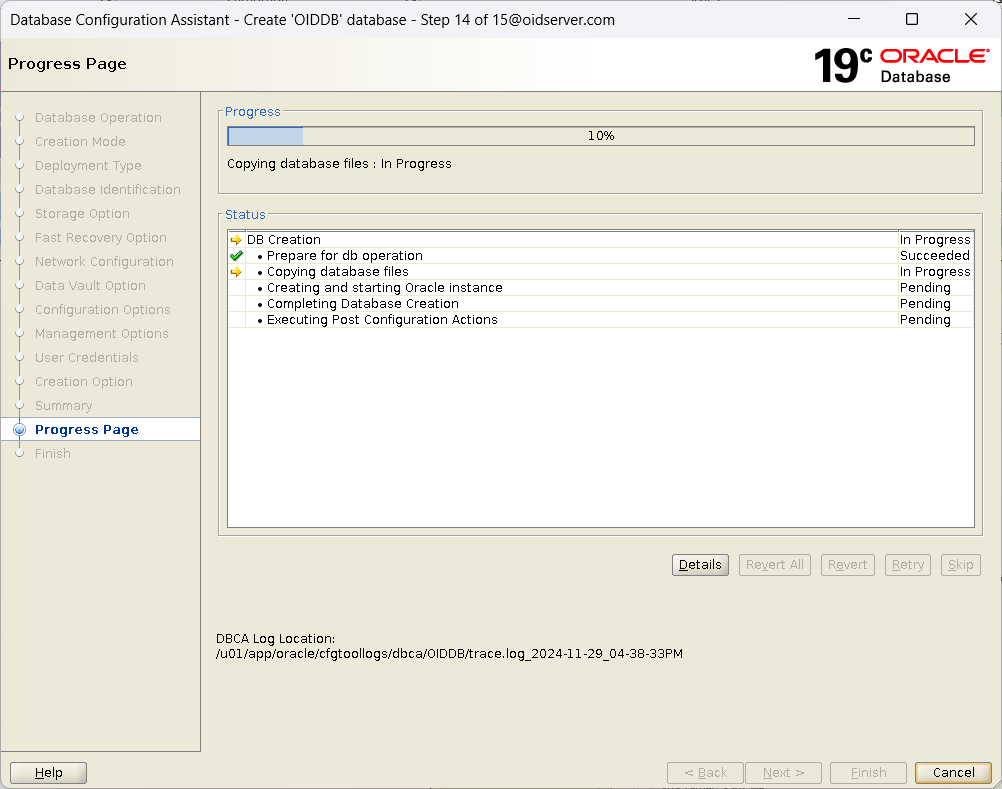 |
| Click Close | 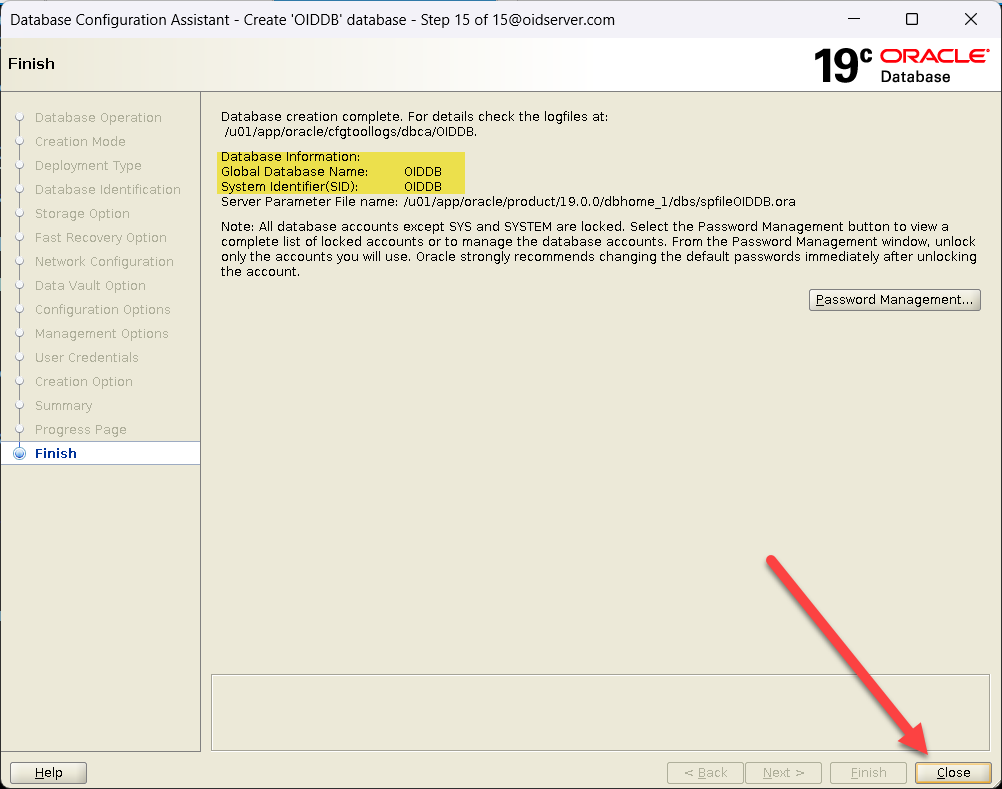 |
Alter Database Parameters |
|
| SQL> alter system set open_cursors=800 scope=both; SQL> alter system set processes=1000 scope=spfile; SQL> alter system set sessions=1000 scope=spfile; |
|
Hope you found this document informative and gained valuable insights.
[…] Oracle Database 19c Installation For OID […]
[…] Oracle Database 19c Installation For OID […]
[…] Oracle Database 19c Installation For OID […]