
Oracle Linux 7.9 Installation On Virtual Box

Oracle Linux 7.9 Installation On Virtual Box
In the previous section of this blog series, we explored the installation process of Oracle Virtual Box on a Windows operating system.
Now, we will shift our focus towards preparing a virtual machine for the installation of Oracle Linux.
To accomplish this, we will follow a set of steps to adequately configure the virtual machine. These steps can be utilized to create any virtual machine, with the exception of allocating the appropriate amount of RAM and hard disk space based on specific requirements.
In this case, as we are installing Oracle Apps R12.2.12, we have adjusted the resources such as RAM and hard disk space accordingly to ensure optimal performance during the installation process.
|
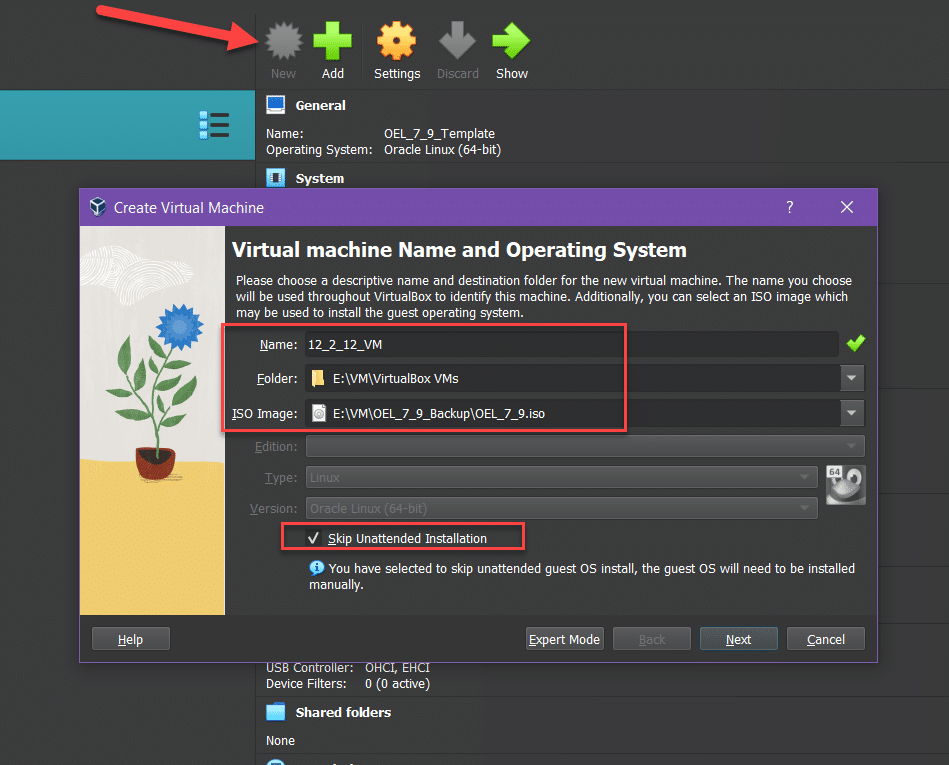
Open Virtual Box And Click New ICON. It will open a Pop Up Box on which Enter the Details of the Following
Now Click NEXT |
 |
|
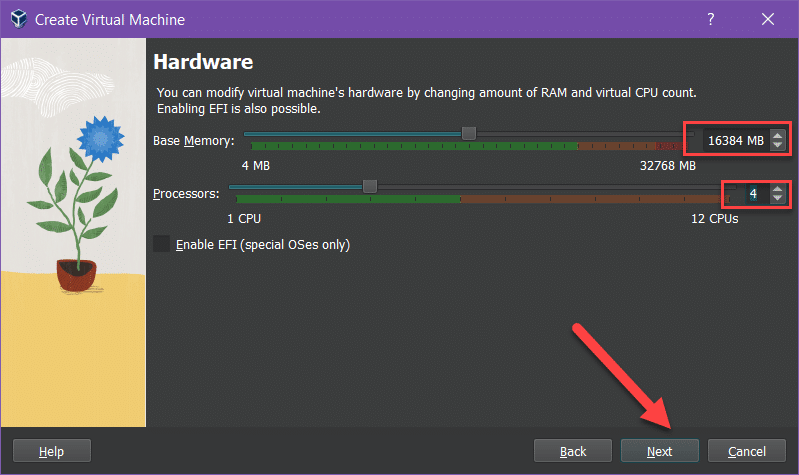
Now Enter the Following Details:
Now Click Next |
 |
|
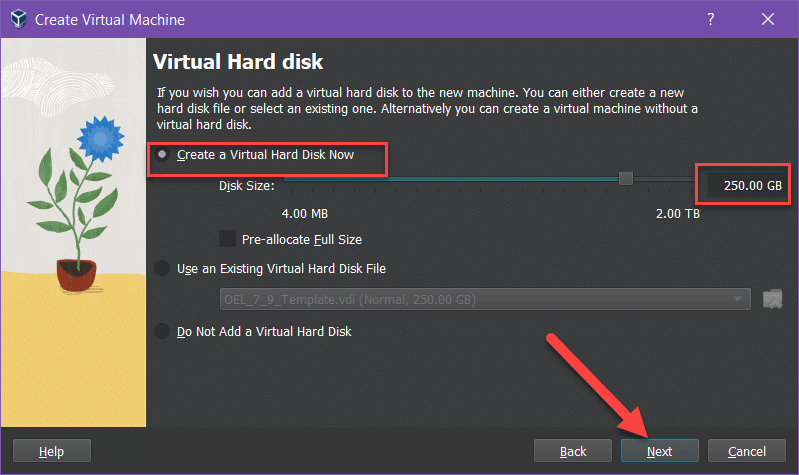
Now in this Step, we will Create a Virtual Hard Disk. As mentioned Before I will be allocating 250 GB size to this disk for Operating System and Staging Area. Note: If you have a Limitation of Space you can allocate 110 GB for this Hard Disk. After this Click Next and Then Click Finish to Create a Virtual Machine for Further Configuration
|
 |
|
As I have to Install Oracle Apps R12.2.12 in this Linux Virtual Machine, I will add an additional 300 GB Hard Disk for the Application File System and Database. So for adding one more Hard Disk, we will go in the Settings of the created Virtual Machine by Clicking Settings of this Virtual Machine. |
 |
|
Once The Settings Box opens, go to the Storage TAB and Click on + Hard Disk Button as shown in the Picture. |
 |
|
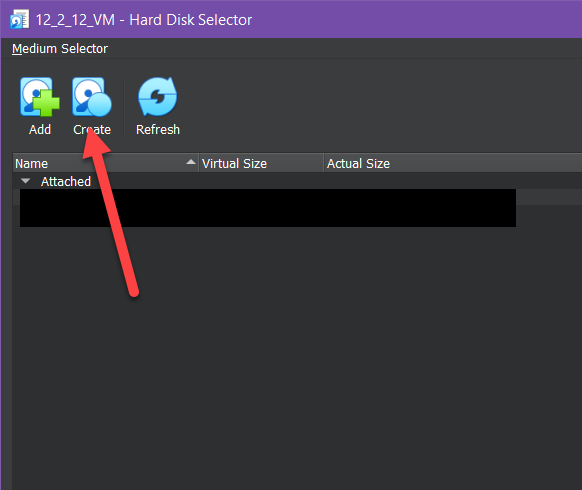
Now Click Create Button to Open a Virtual Hard Disk Creation Wizard |
 |
|
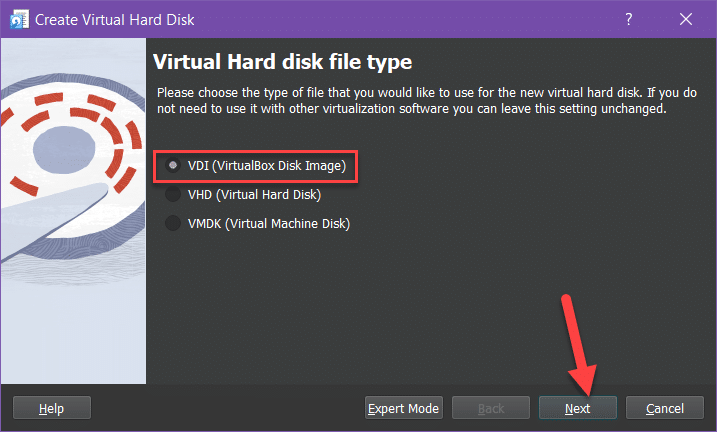
Click Next |
 |
|
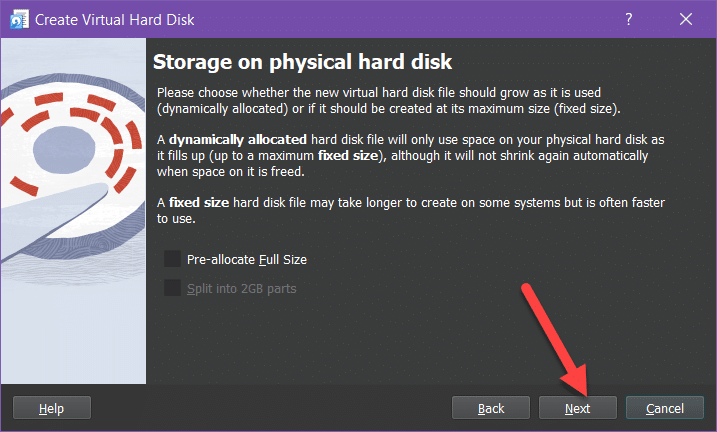
Click Next |
 |
|
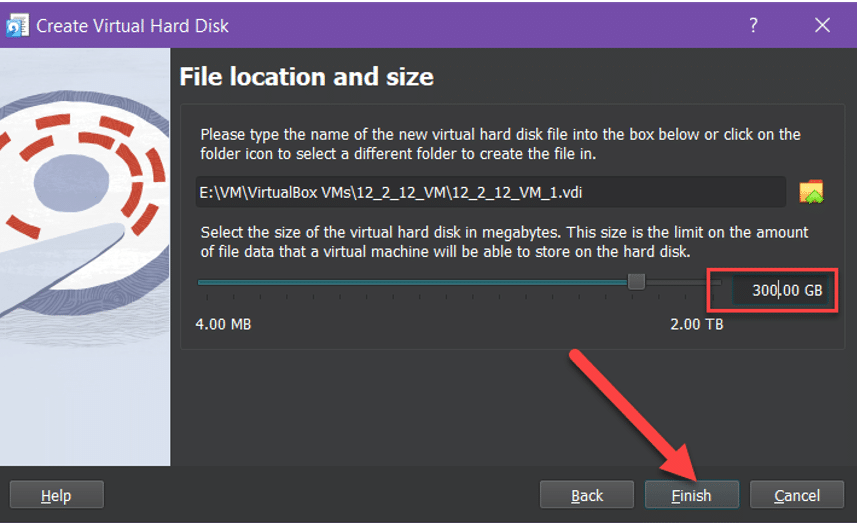
After Entering the Desired Value of the Hard Disk to Be Created, then Click Finish |
 |
|
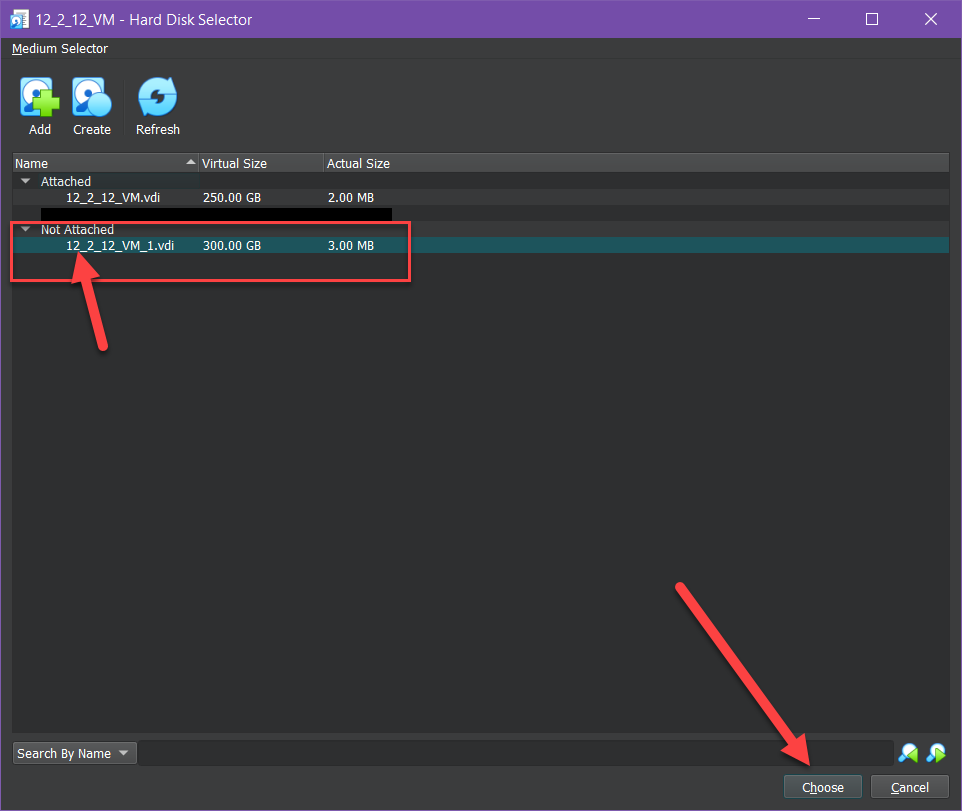
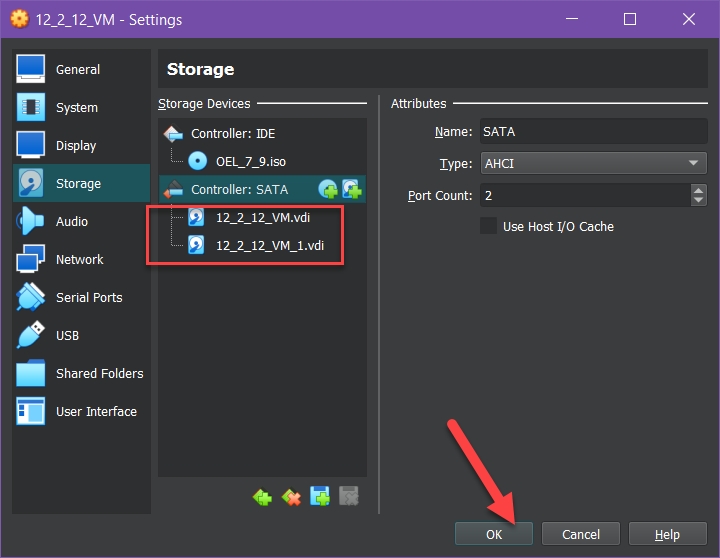
Now as You Can See the Drive that we created in Above Steps is in “Not Attached” Condition. Click This “Hard Disk” and Click “Choose” as Shown In the Picture Below |
 |
|
As you can see we are Having 2 Hard Disks in this Virtual Machine that we Created. Click OK to Continue Further |
 |
|
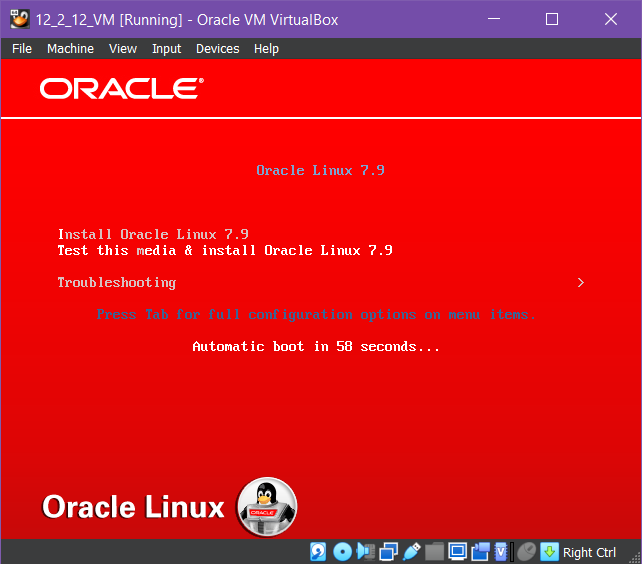
Now Start the Newly Configure VM to Install the OEL 7.9 |
 |
|
Now New Window Will Pop Up Running the Installer for OEL 7.9. Click in this Window and select “Install Oracle Linux 7.9” with arrow keys on the keyboard and Press ENTER. |
 |
Oracle Enterprise Linux 7.9 Installation Process |
|
|
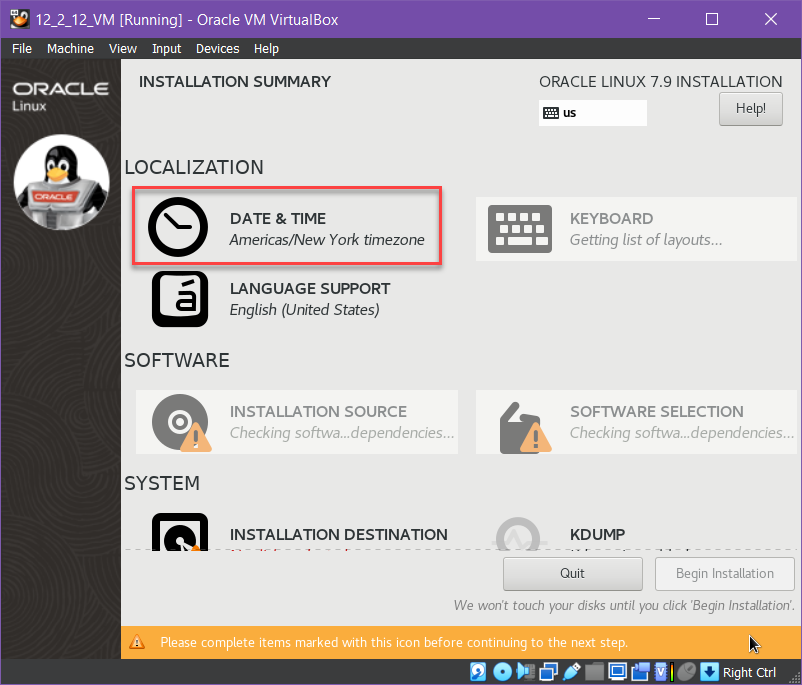
Click Continue |
 |
|
Click “DATE & TIME ” to configure Timezone |
 |
|
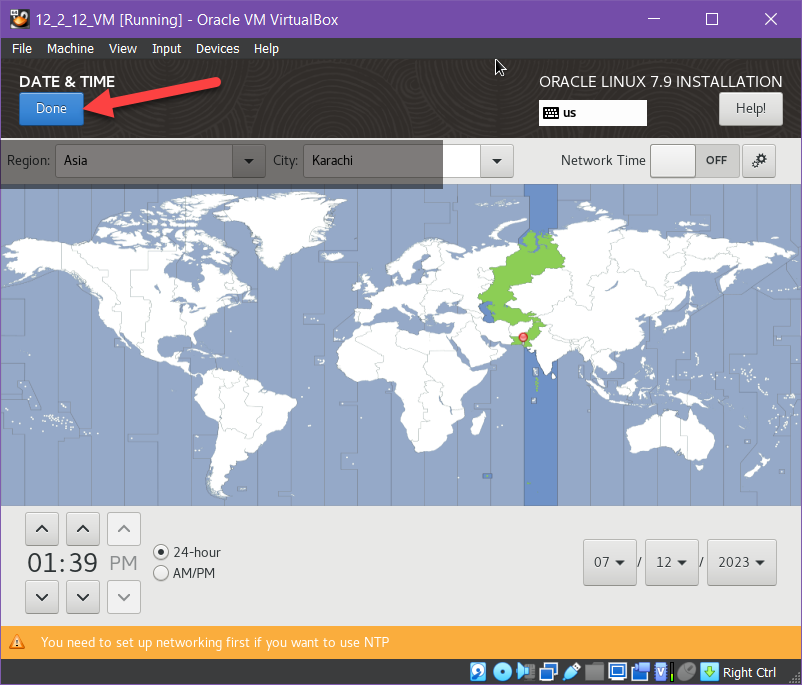
Click Done After Configuring Region Timezone |
 |
|
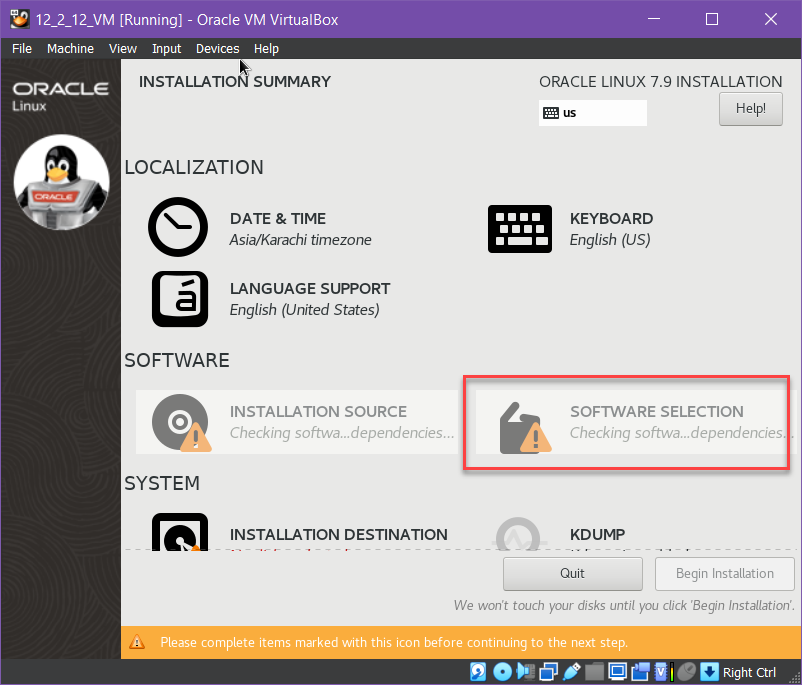
Now Click “SOFTWARE SELECTION” |
 |
|
Select the Following from the List Base Environment
Add-Ons For Selected Environment
|
 |
|
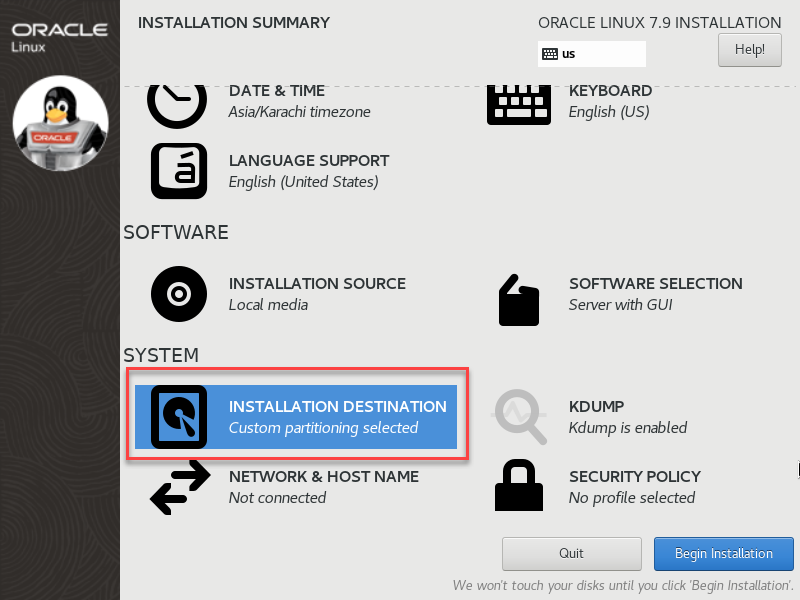
Now Click “INSTALLATION DESTINATION” |
 |
|
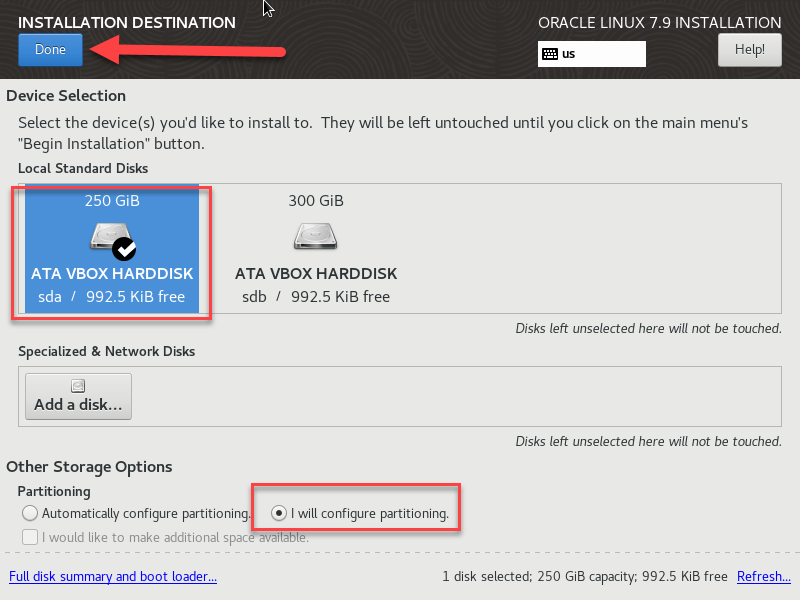
Select the following options in the picture and Click DONE to open Hard Disk Configuration |
 |
|
Click “Click here to create them automatically” |
 |
|
Alter the Size of the Partitions as per the picture given below or according to your desired values and Click Done |
 |
|
Click “Accept Changes” to Create the Partitions Note: We will Configure the Other added Virtual Hard Disk After OS Installation
|
 |
|
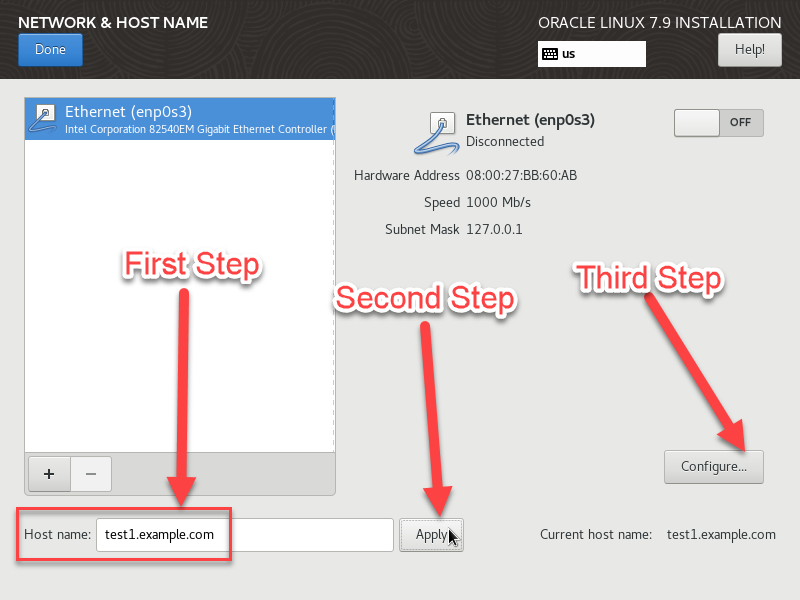
Click “NETWORK & HOST NAME” for the configuration of the Network |
 |
|
Enter the Required Info as given in the Picture and then Click Configure |
 |
|
Go to IPv4 Settings Tab and then 1: Select Manual 2: Click Add to add IP address Details 3: Add IP Address and DNS Details for Internet Connectivity. 4. Click Save |
 |
|
Click Ethernet to ON and Click Done |
 |
|
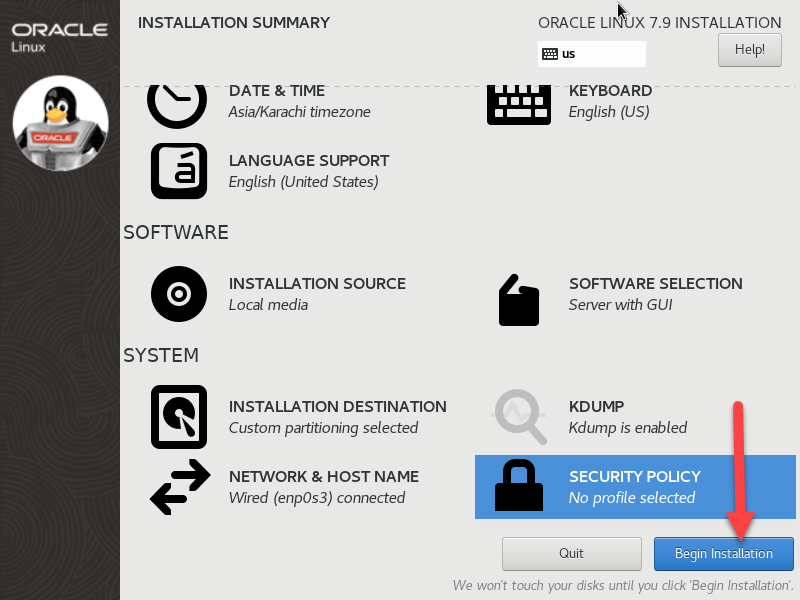
Now Click “Begin Installation” for starting the Installation Process |
 |
|
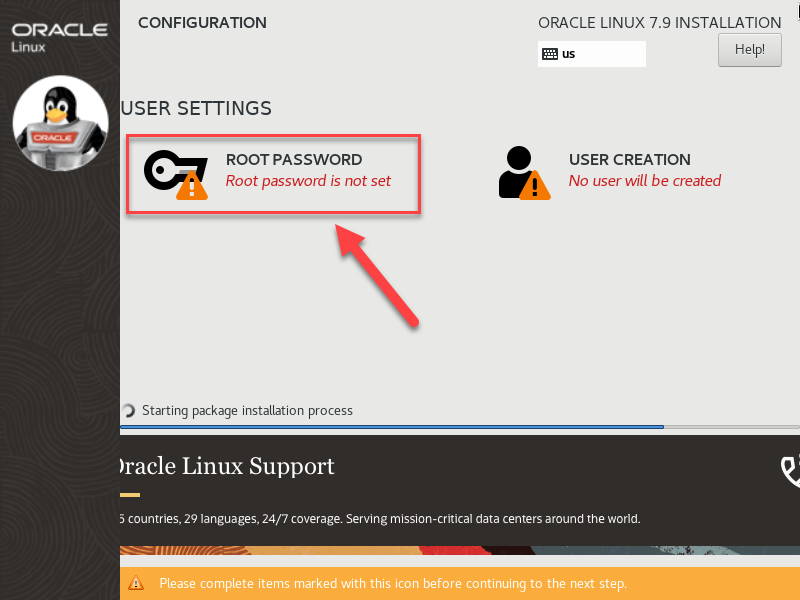
Installation Process Start, click Root Password to Set Password of ROOT User |
 |
|
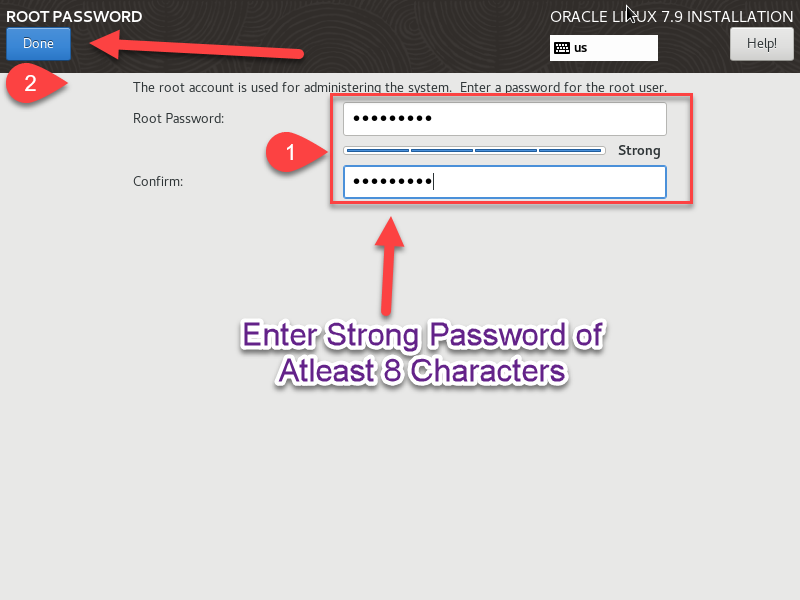
Enter the Password for ROOT User and Click Done |
 |
|
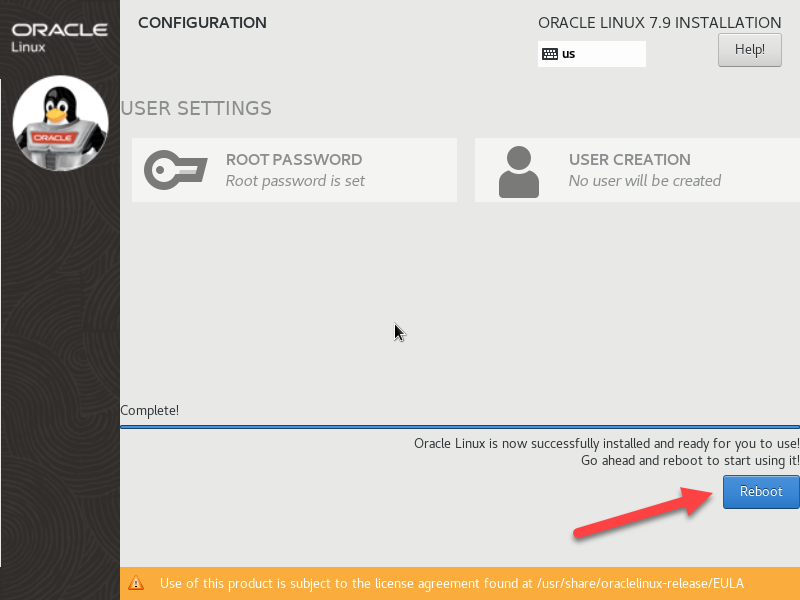
Click the Reboot Button Once the Installation Completes |
 |
|
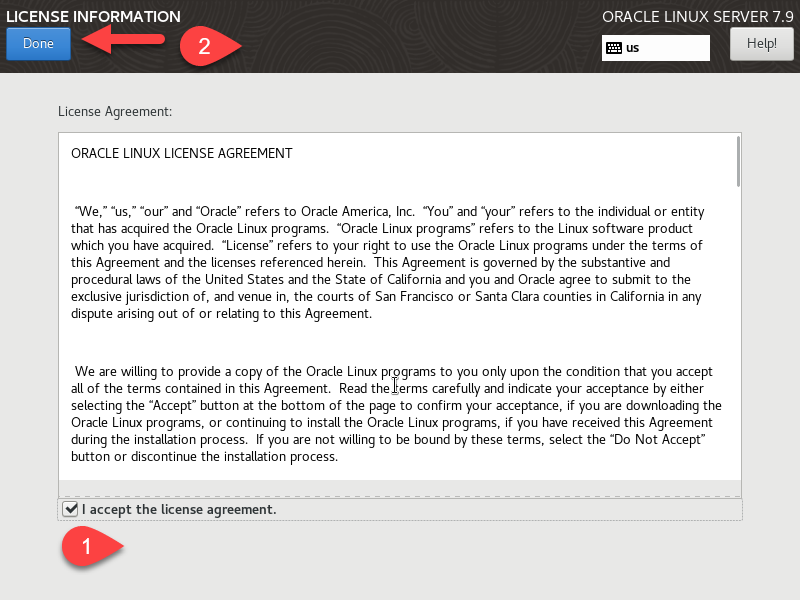
After Reboot, Click “LICENSE INFORMATION” |
 |
|
Accept the License and Click Done |
 |
|
Click “FINISH CONFIGURATION” |
 |
|
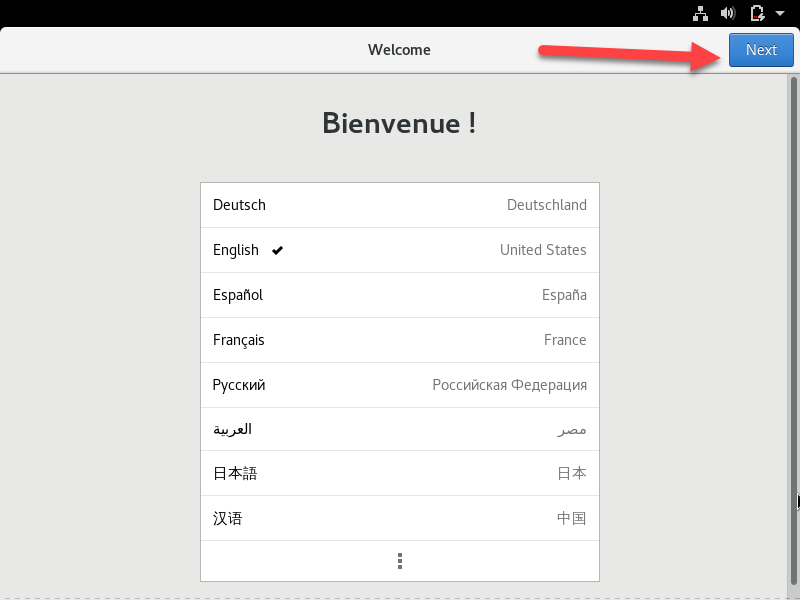
Click Next |
 |
|
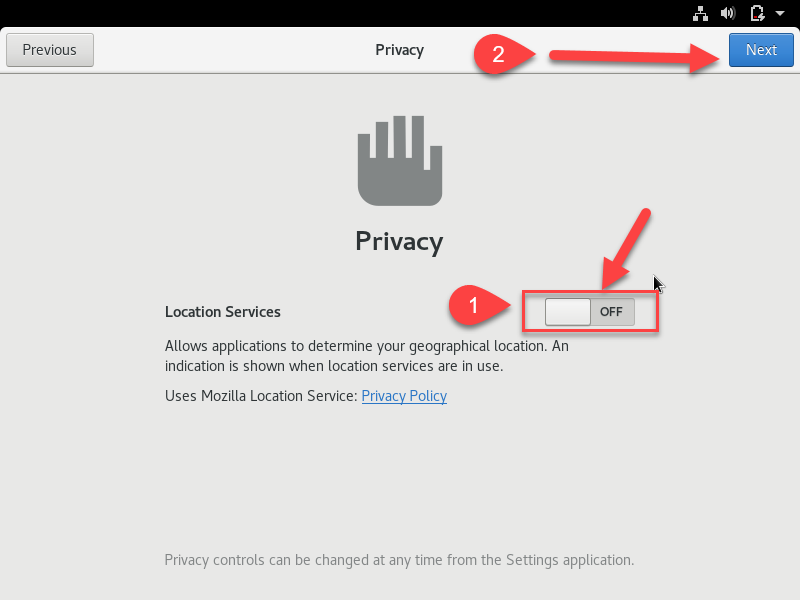
Click Next after Disabling the Location Services |
 |
|
Click Skip |
 |
|
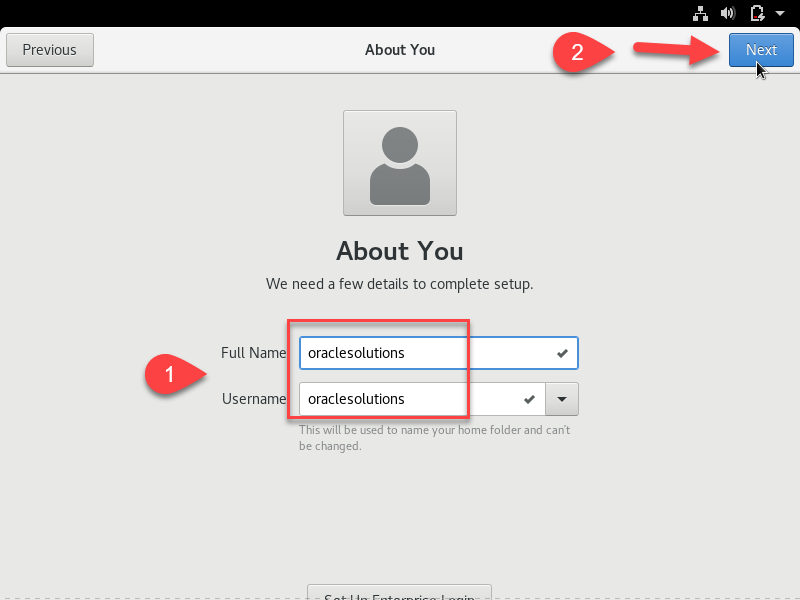
Click Next After Entering The Following Information in the Picture. This will Create an Account Other than ROOT User. |
 |
|
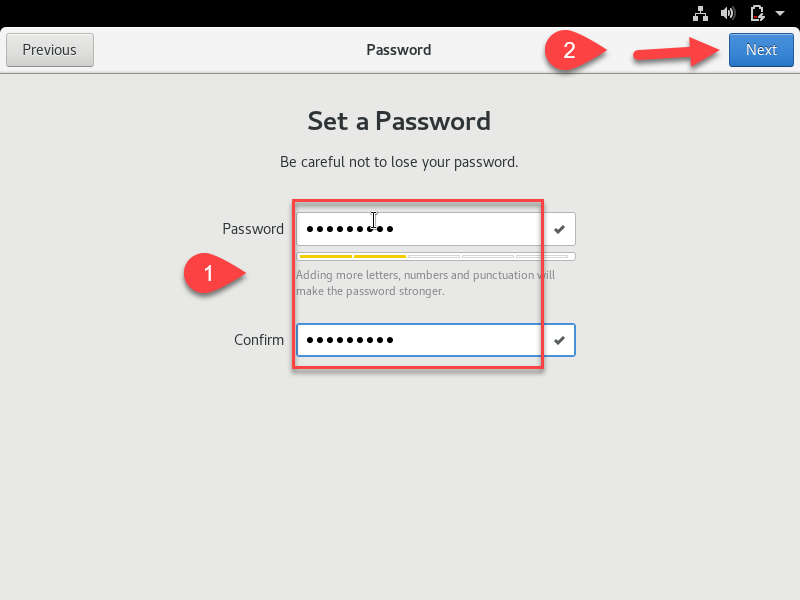
Set Password for the User and Click Next |
 |
|
Click “Start Using Oracle Linux Server” |
 |
Oracle Virtual Box Guest Addition RPM Installation Process |
|
|
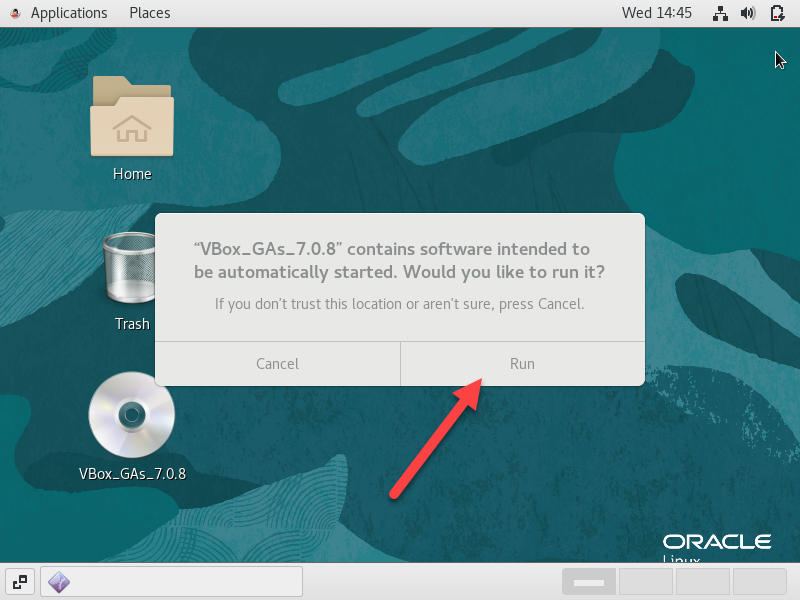
Now We will Install the Virtual Box Guest Addition RPM. For This Insert the Guest Additions CD Image as shown in the Picture |
 |
|
Click Run |
 |
|
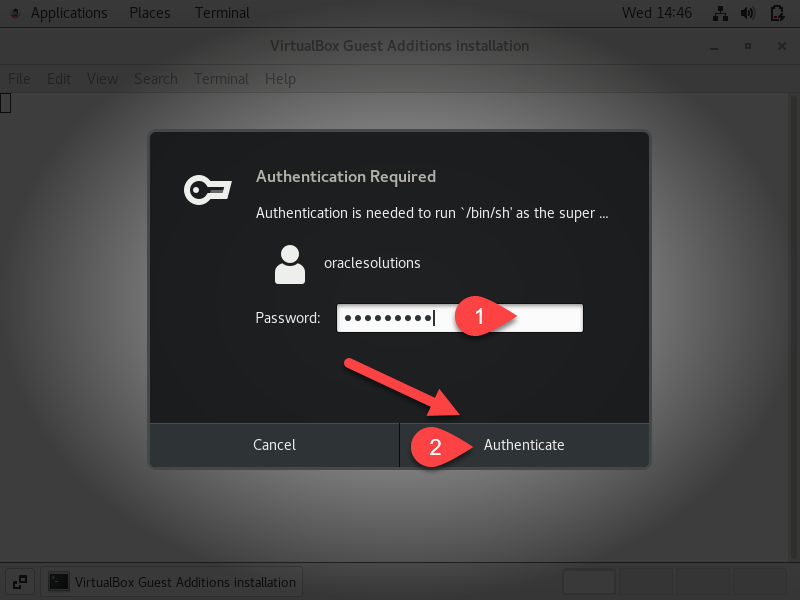
Enter The Password of the user to continue the Installation Process |
 |
|
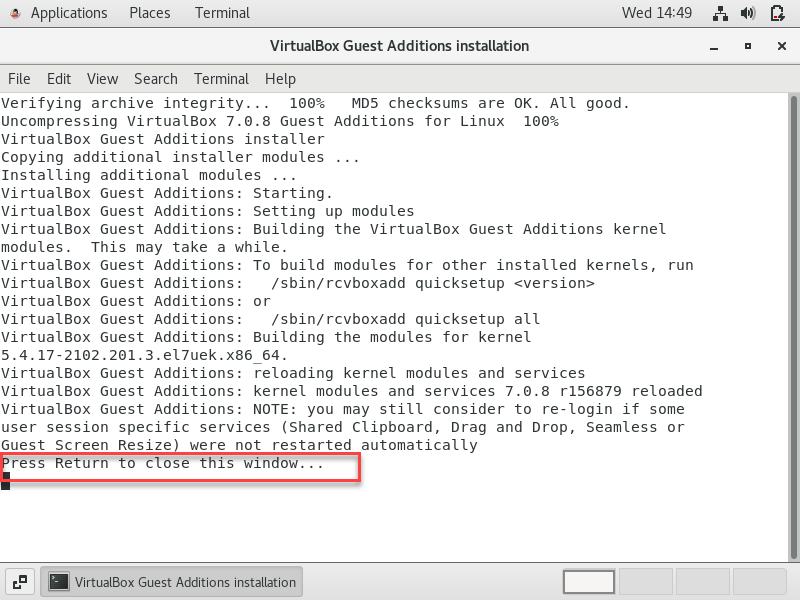
Click Enter to Close the Window. Reboot After the installation. |
 |
Configure Another Virtual Hard Disk Process |
|
|
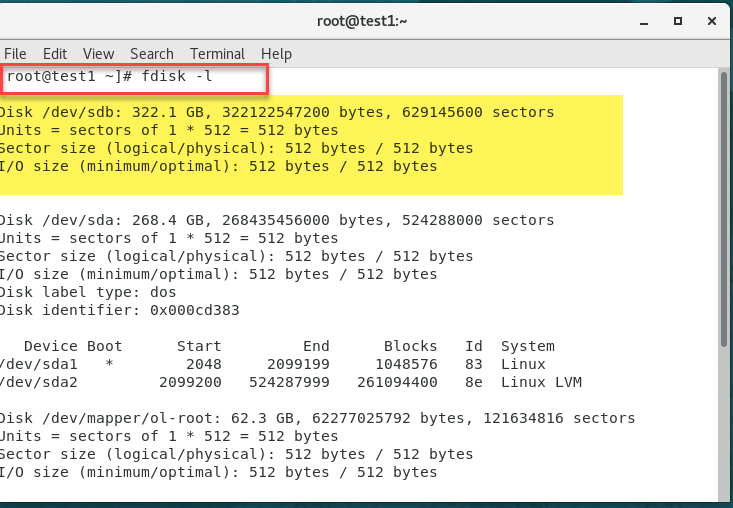
As a reminder, during the Linux configuration on Virtual Box, we included two virtual hard disks. However, during the Linux installation process, we only configured one of the virtual hard disks. Now, it is time to configure the remaining virtual hard disk. To display the available disks, open the terminal as the root user and enter the command “fdisk -l”. This will provide a list of the disks that are currently accessible. |
 |
Step 1: Format Disk To Create File System
|
[root@test1 ~]# fdisk /dev/sdb Welcome to fdisk (util-linux 2.23.2). Changes will remain in memory only, until you decide to write them. Be careful before using the write command. Device does not contain a recognized partition table Building a new DOS disklabel with disk identifier 0xdc621a1b. Command (m for help): c DOS Compatibility flag is set (DEPRECATED!) Command (m for help): u Changing display/entry units to cylinders (DEPRECATED!). Command (m for help): p Disk /dev/sdb: 322.1 GB, 322122547200 bytes, 629145600 sectors 255 heads, 63 sectors/track, 39162 cylinders Units = cylinders of 16065 * 512 = 8225280 bytes Sector size (logical/physical): 512 bytes / 512 bytes I/O size (minimum/optimal): 512 bytes / 512 bytes Disk label type: dos Disk identifier: 0xdc621a1b Device Boot Start End Blocks Id System Command (m for help): n Partition type: p primary (0 primary, 0 extended, 4 free) e extended Select (default p): p Partition number (1-4, default 1): First cylinder (1-39162, default 1): 1 Last cylinder, +cylinders or +size{K,M,G} (1-39162, default 39162): Using default value 39162 Partition 1 of type Linux and of size 300 GiB is set Command (m for help): w The partition table has been altered! Calling ioctl() to re-read partition table. Syncing disks. |
Step 2. Create and Mount File System
|
[root@test1 ~]# /sbin/mkfs.ext4 -L /u01 /dev/sdb1 mke2fs 1.42.9 (28-Dec-2013) Filesystem label=/u01 OS type: Linux Block size=4096 (log=2) Fragment size=4096 (log=2) Stride=0 blocks, Stripe width=0 blocks 19660800 inodes, 78642183 blocks 3932109 blocks (5.00%) reserved for the super user First data block=0 Maximum filesystem blocks=2227175424 2400 block groups 32768 blocks per group, 32768 fragments per group 8192 inodes per group Superblock backups stored on blocks: 32768, 98304, 163840, 229376, 294912, 819200, 884736, 1605632, 2654208, 4096000, 7962624, 11239424, 20480000, 23887872, 71663616
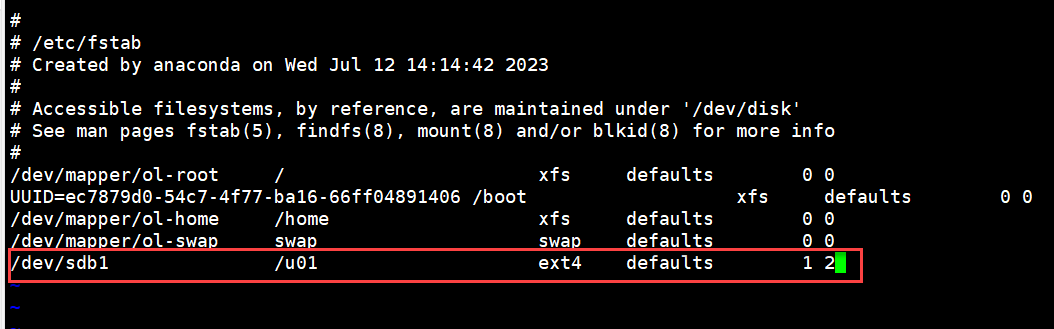
Allocating group tables: done Writing inode tables: done Creating journal (32768 blocks): done Writing superblocks and filesystem accounting information: done [root@test1 ~]# mkdir /u01 [root@test1 ~]# mount /dev/sdb1 /u01 Now, edit the fstab file to automatically mount this partition on REBOOT. [root@test1 ~]# vi /etc/fstab /dev/sdb1 /u01 ext4 defaults 1 2 |
Following a successful installation of Linux on Virtual Box, we can now proceed with configuring the RPM packages on the Linux system based on the specific software you intend to install.
For Configuration of Linux RPM on 7.9 for Oracle E-Business Suite 12.2, click the Below link
OEL Configuration for Oracle Apps R12.2.12
[…] Oracle Linux Installation Link […]
[…] Oracle Linux 7.9 Installation On Virtual Box […]
[…] Oracle Linux Installation Link […]