


Purge Concurrent Request and Manager Data – Part2
April 20, 2025
AppsDBA Scripts

Scheduling Purge Concurrent Request and Manager Data in Oracle E-Business Suite (EBS) : A Step-by-Step Guide
To schedule the purging of Concurrent Request and/or Manager Data in Oracle E-Business Suite (EBS), you can utilize the built-in concurrent program called Purge Concurrent Request and/or Manager Data. This program is designed to remove historical data related to concurrent requests, helping to improve system performance and free up file system space on the server.
The purge process clears data under the
$APPLCSFdirectory — specifically in thelogandoutsubdirectories — based on the purge parameters you define.
Steps to Configure Purge Concurrent Request and/or Manager Data Program
1. Log in to Oracle E-Business Suite
- Log in to your Oracle EBS instance using user(SYSADMIN) having an appropriate responsibility, such as “System Administrator“
2. Navigate to the Submit Request Form
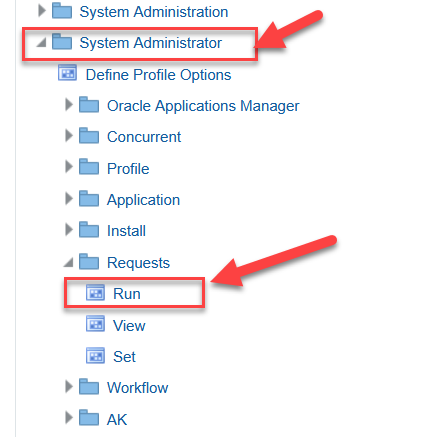
- Navigate to Concurrent – > Request -> Run
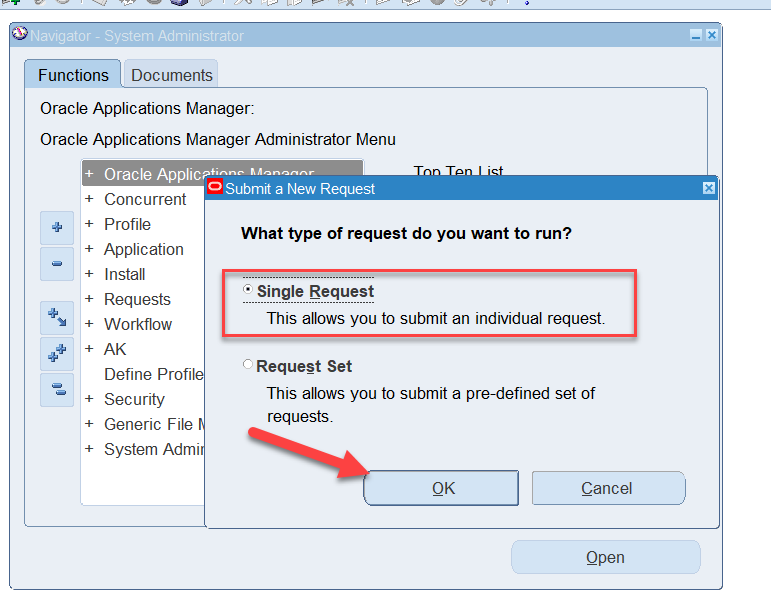
- Select “Single Request” and click “OK.
3. Select the Purge Program
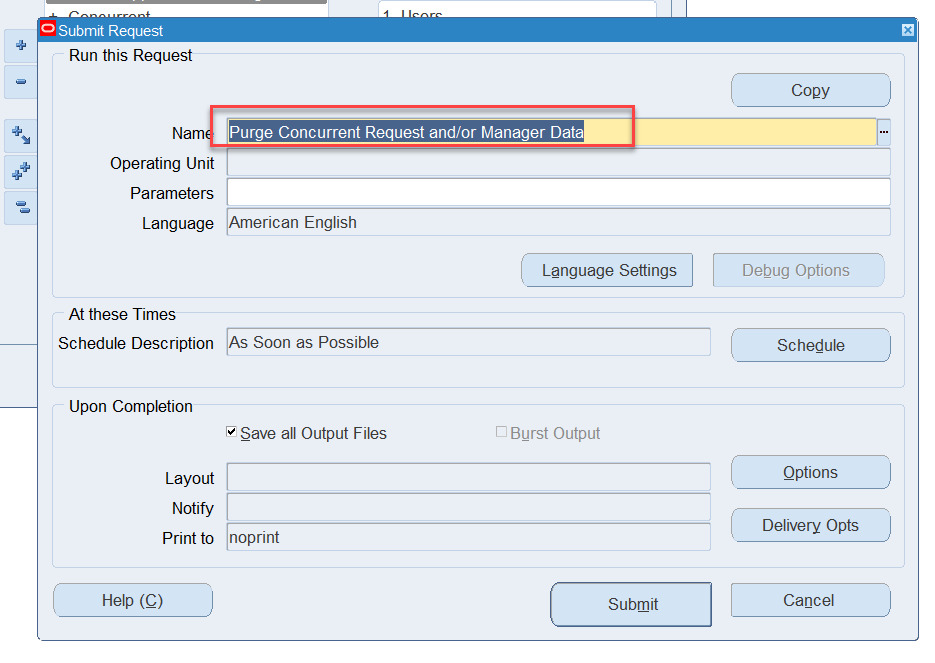
- In the “Submit Request” form, enter “Purge Concurrent Request and/or Manager Data” in the “Name” field and select it from the list of values or press TAB key.
4. Set the Parameters
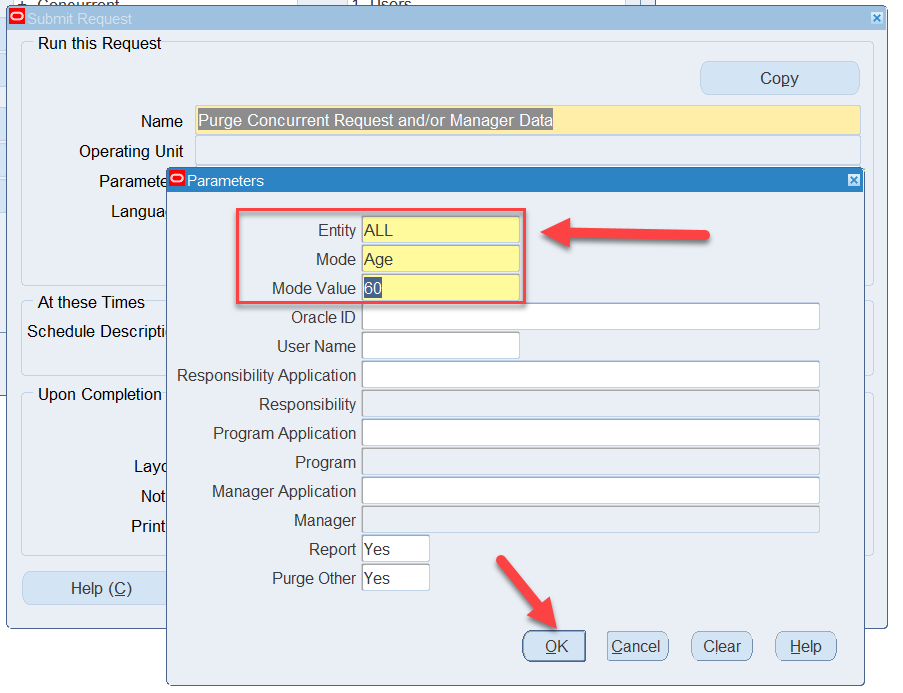
- After selecting the program, you will be prompted to enter parameters. The parameters include and Click OK. Yellow fields are mandatory.
Entity: Manager/Request or
Mode: Age (Days to Retain)or Count (Count of files to retain)
Mode values: How many days in case mode is age or number in case of Count.
5. Schedule the Purge (Optional)
- Click on the “Schedule” button to open the “Schedule” form.
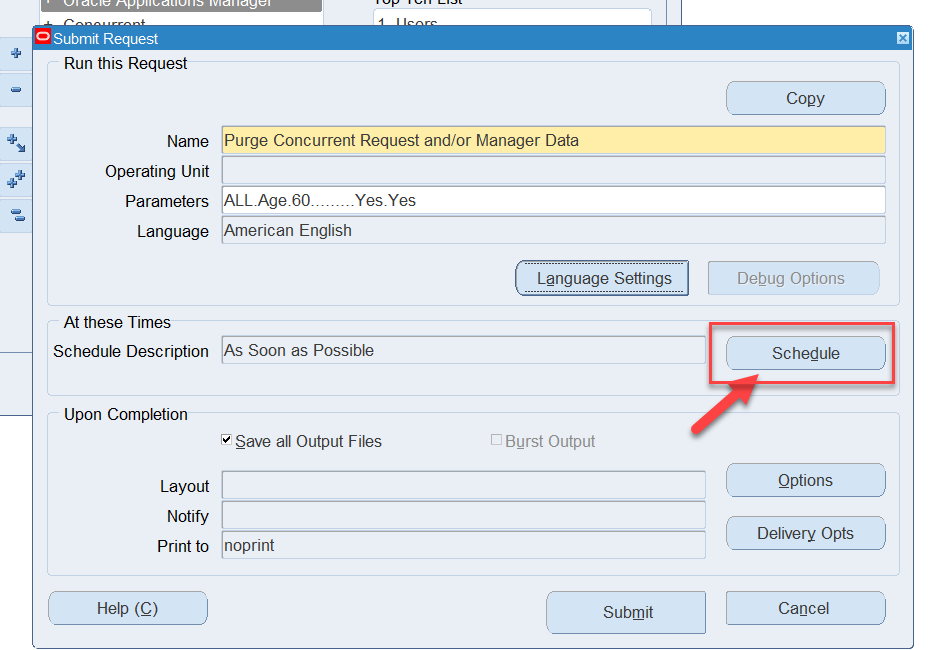
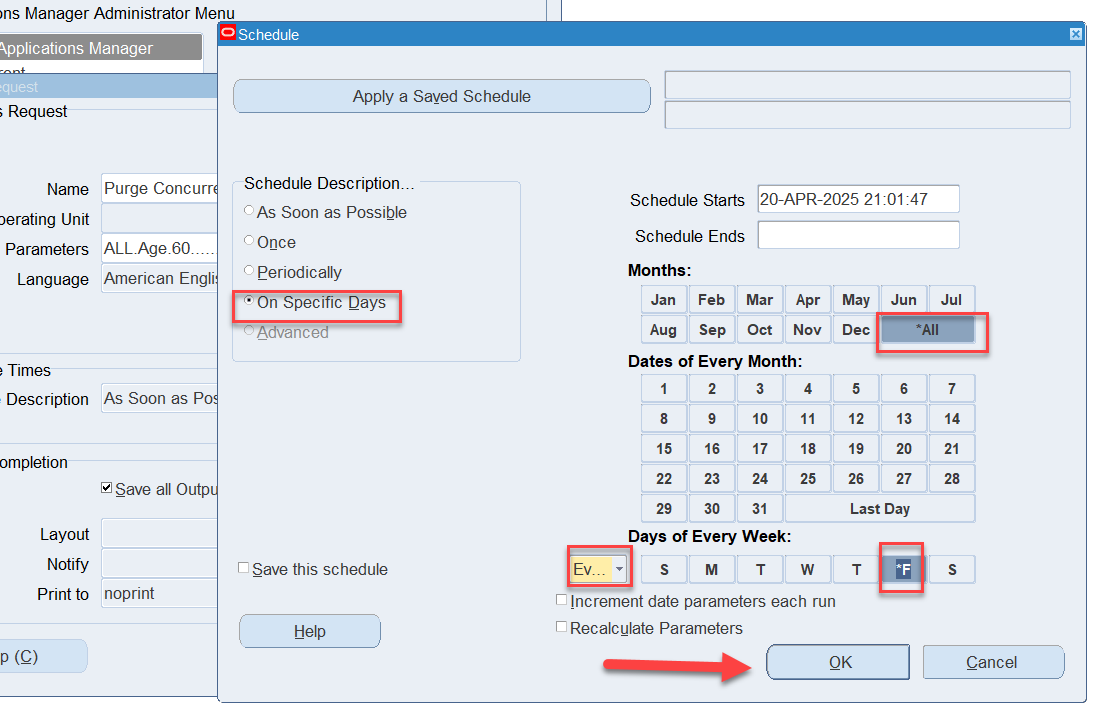
- Set the scheduling options as per your requirements. You can choose to run the purge program:
- Immediately
- Once at a later date and time
- Periodically (e.g., daily, weekly, monthly)
Below screenshot will run the job weekly on every Friday.
6. Submit
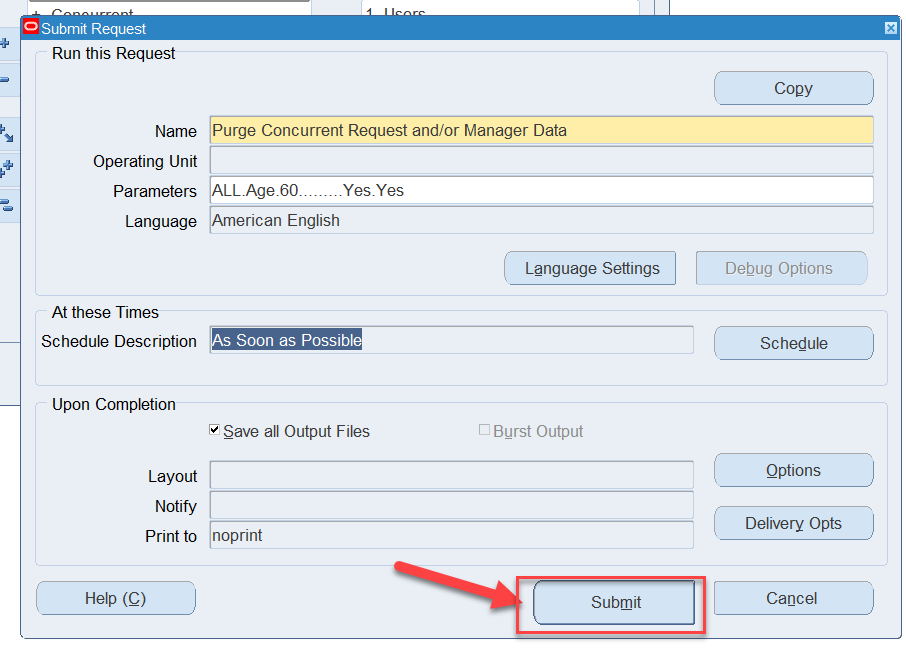
- Once you have set the schedule, save the schedule settings and return to the “Submit Request” form.
- Click on “Submit” to schedule the purge program.
7. Monitor the Request
- Navigate to
Concurrent -> Requests. - In the “Find Requests” form, query the scheduled request to monitor its status and ensure it runs as expected.
Related Posts